8-42 Structure and Assembly/Disassembly
8.3.7 Lifting Column
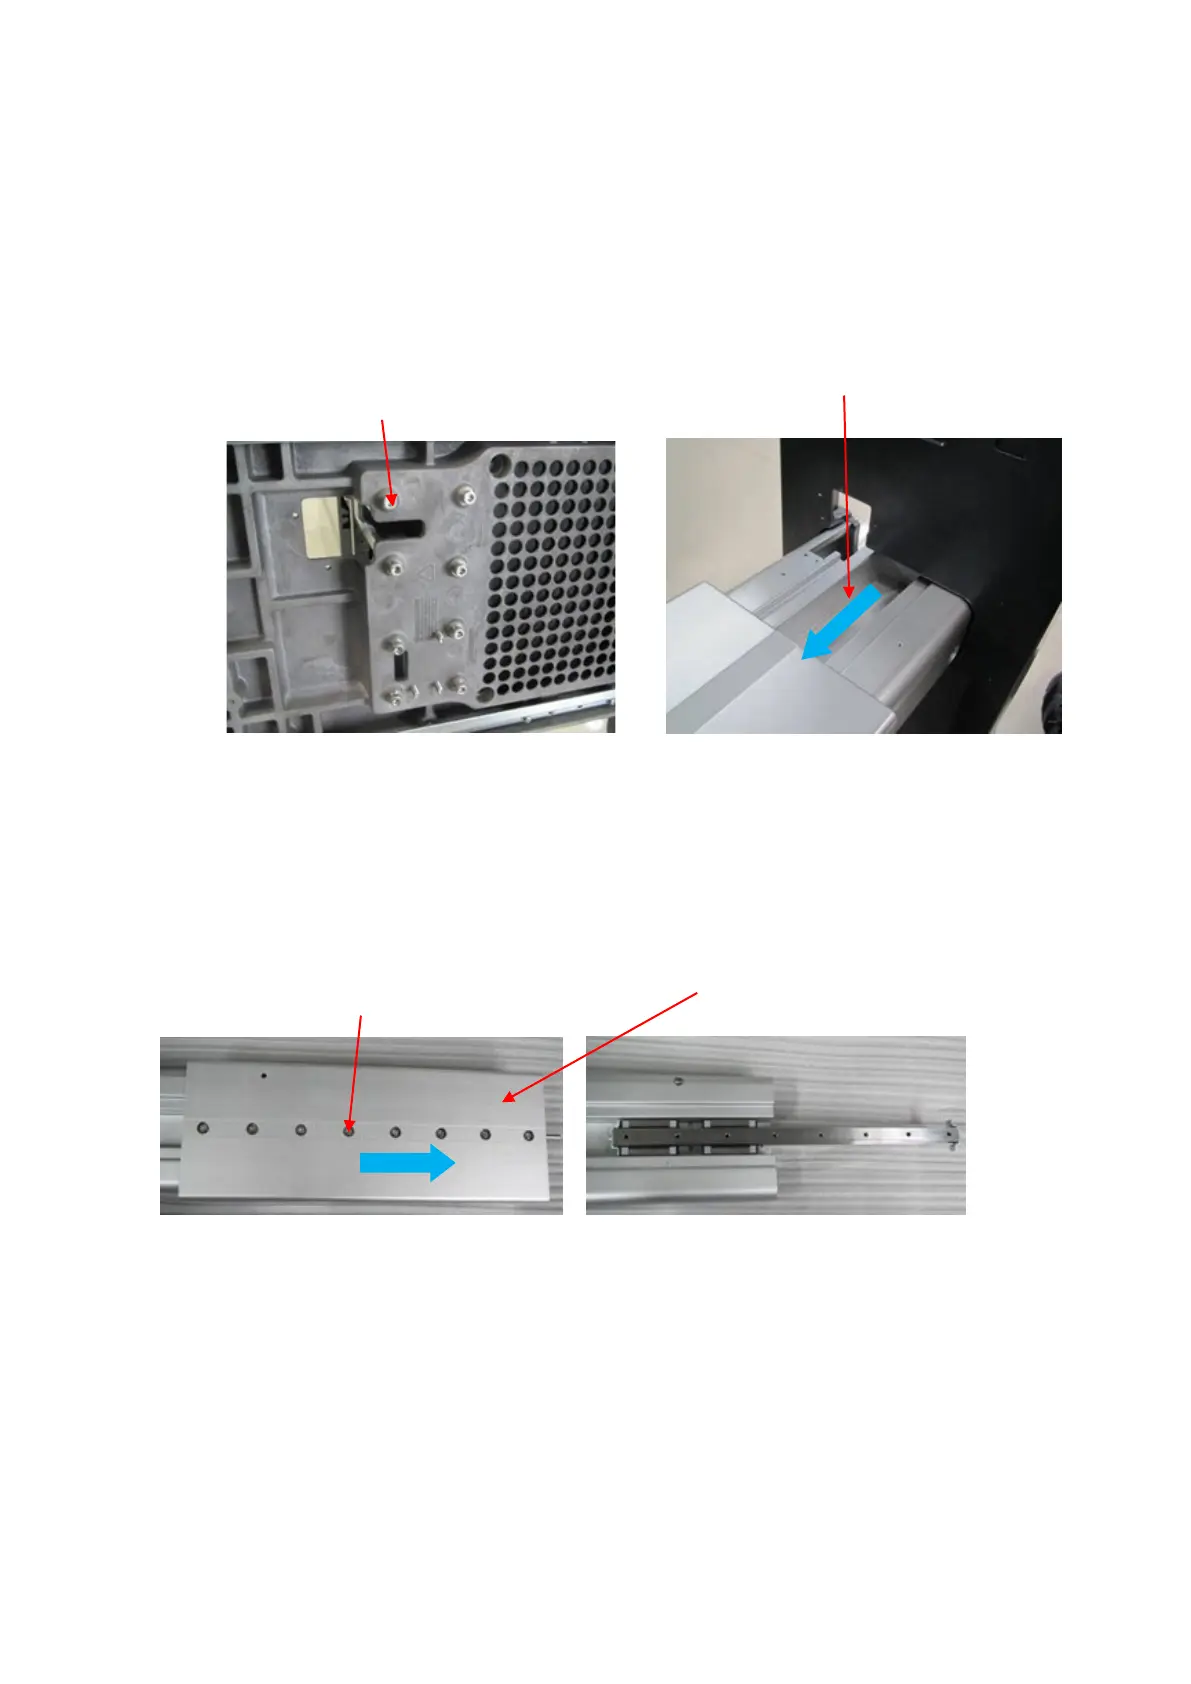
1. Remove cast-aluminum base of trolley panel. See Chapter 9.3.2.5 for details.
2. Lay the device flat. Remove 8 screws (M5 X 25 Allen screw with the pad and the clip) on the
base. Take out the lifting column towards arrow’s direction.
3. Remove external lifting column
Pull the lifting column to the maximum position towards arrow’s direction. Unscrew 8 screws
(M6 X 16 Allen screw with the pad and the clip) on the external lifting column. Take out the
external lifting column.
Note: there is a piece of strip on the screw. Remove the strip before unfastening the screws.
4. Remove the straight track.
Unscrew 8 screws (M5 X 12 Allen screw with the pad and the clip) on internal lifting column,
and take out the straight track.
M6X16 Allen screw with
the pad and the clip (8
M5X25 Allen screw
with the pad and the
clip (8 screws)
Take out the lifting column
towards arrow’s direction