miniClima Schönbauer GmbH
Brunner Str. 21b, 2700 WIENER NEUSTADT, AUSTRIA, EU
Tel. | Phone: +43 2622 24964, +43 6991 24964 01, Voicemail: +43 6993 24964 01, Fax: +43 2622 24964 15, E-Mail: office@miniclima.com
www.miniclima.com, twitter.com/miniClima, www.linkedin.com/company/miniclima-schönbauer-gmbh, www.google.com/+Miniclima, www.facebook.com/miniclima
UID | VAT-ID: ATU61994435, EORI: ATEOS1000001229, DVR: 4008782
Firmenbuchnummer | Trade Register Number: 267137z (Landesgericht | Regional Court of Wiener Neustadt)
3.2.1.2 Handling VE25_V2, VE32_V2 and VE40_V2
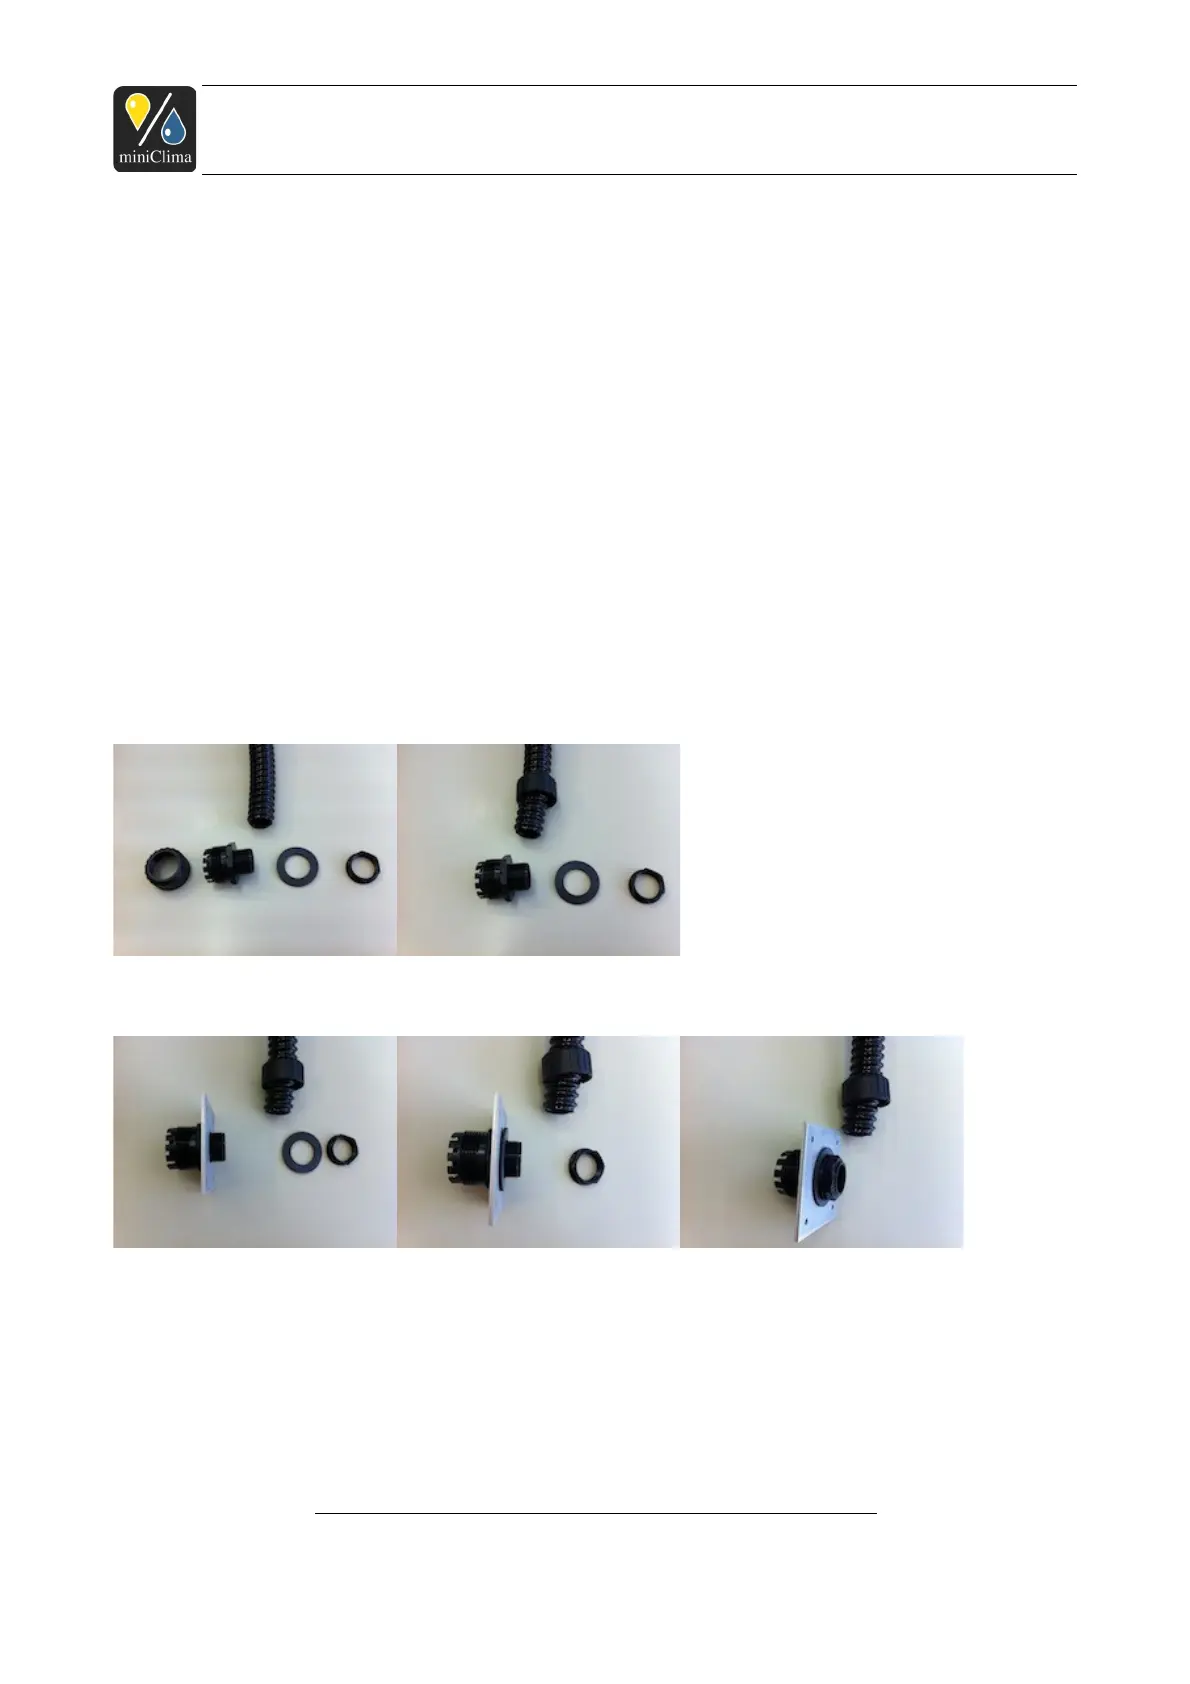
Handling the second model is almost identical: The slotted clamping ring is now built into the joint screw as
slats. Please do take good care to not fold over these slats as well as to position the hosepipe inside all of
the slats when inserting it into the joint screw. Always cut the hosepipe as even as possible, in order to make
it possible for the hosepipe to be seated solidly inside the screw joint (relevant for the tightness). We
recommend the use of appropriate hosepipe nippers.
Furthermore, please do always push the hosepipe up to the stop inside the joint screw. Fix the connection by
use of the union nut only when the pipe has been pushed fully inside. The union nut should be tied up well
but do not over-tighten it.
Proceed like this:
1) Slide the union nut (A) over the hosepipe (E):
2) The joint screw (B), the rubber gasket (C) and the counter nut (D) have to be brought into either the case
wall or (as seen here) into the intermediate piece/flange (F) (ensure this connection to be tight):
3) Finally, push the hosepipe up to the stop inside the joint screw and do fix the connection after that with
the union nut. The union nut should be tied up well but beware to not over-tighten it. IMPORTANT: All
slats of the joint screw have to remain outside the hosepipe, do not fold them over:
Applies analogously to the individual products of series EBC10/11/12 (Rev.3). As of 24.11.2014. Subject
to modification.
miniClima - Manual_EBC10-11-12(Rev.3)_en
16 / 54