miniClima Schönbauer GmbH
Brunner Str. 21b, 2700 WIENER NEUSTADT, AUSTRIA, EU
Tel. | Phone: +43 2622 24964, +43 6991 24964 01, Voicemail: +43 6993 24964 01, Fax: +43 2622 24964 15, E-Mail: office@miniclima.com
www.miniclima.com, twitter.com/miniClima, www.linkedin.com/company/miniclima-schönbauer-gmbh, www.google.com/+Miniclima, www.facebook.com/miniclima
UID | VAT-ID: ATU61994435, EORI: ATEOS1000001229, DVR: 4008782
Firmenbuchnummer | Trade Register Number: 267137z (Landesgericht | Regional Court of Wiener Neustadt)
3.2.1 Handling the hosepipe fittings
Currently three different types are in use: VE.._V1 (partly discontinued) and VE.._V2 are both for use along
to our robust PVC hosepipes UFX.._V1. The newest model is VE.._V3. It is now the standard fitting used on
new builds and fits to our PA wave tube UFX.._V2. The gaskets (GD..) used along to all these fittings are
always of the same type.
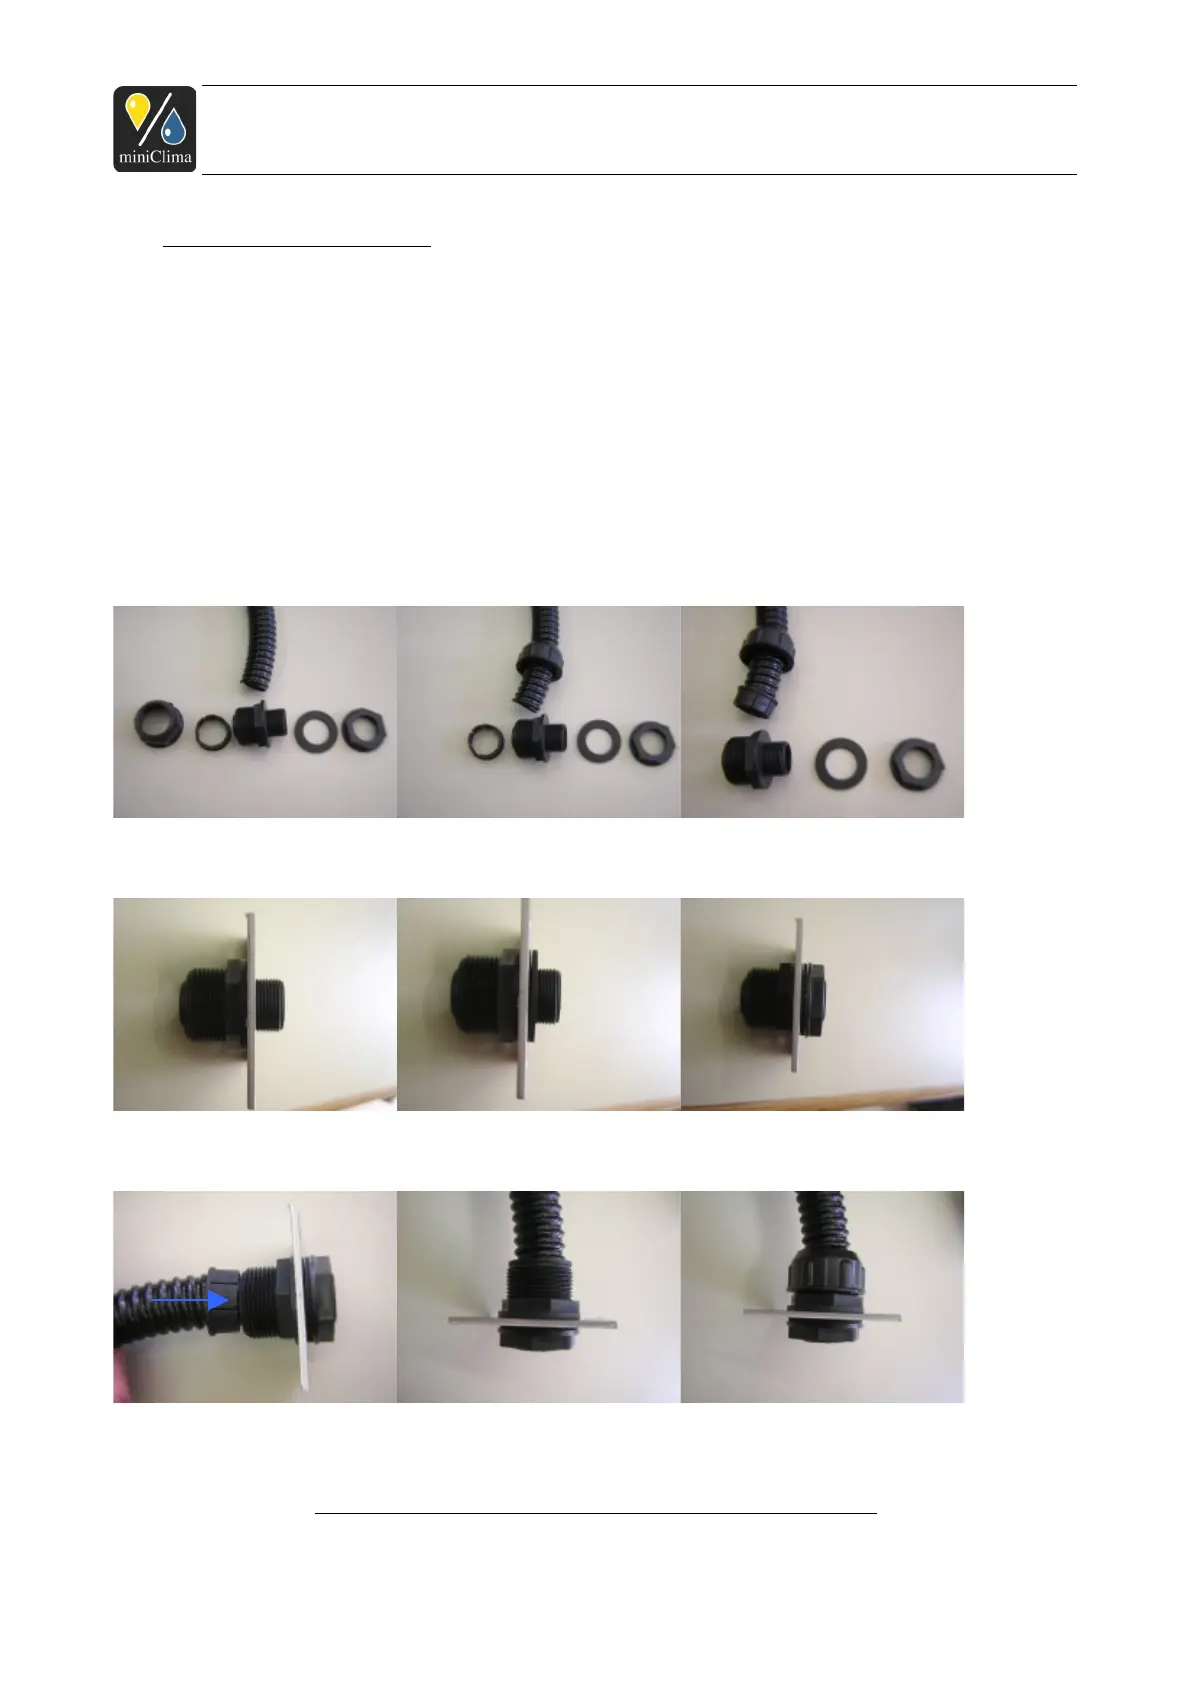
3.2.1.1 Handling VE25_V1, VE32_V1 and VE40_V1
1) Slide the union nut (A) over the hosepipe (F). Then, press or "screw" the clamping ring (B) over the end of
the hosepipe:
2) The screw joint (C), the rubber gasket (D) and the counter nut (E) have to be brought into either the case
wall or the intermediate piece/flange (G) (ensure this connection to be tight):
3) Finally, push the hosepipe with the clamping ring in the screw joint and fix the connection with the union
nut (again making sure that this connection is tight):
Applies analogously to the individual products of series EBC10/11/12 (Rev.3). As of 24.11.2014. Subject
to modification.
miniClima - Manual_EBC10-11-12(Rev.3)_en
15 / 54