Do you have a question about the MIR 250 and is the answer not in the manual?
Explains where to find additional resources and documentation for MiR robots on the MiR website.
Details the document's revision history, including release dates and descriptions of changes made in each version.
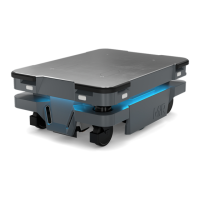
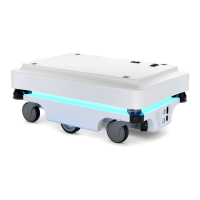
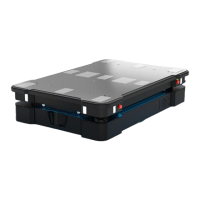
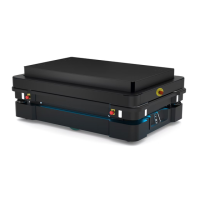
Highlights the key capabilities and advantages of the MiR250 autonomous mobile robot.
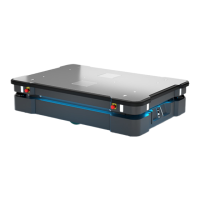
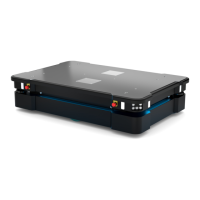
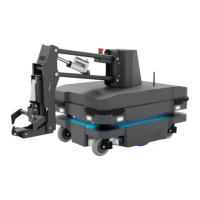
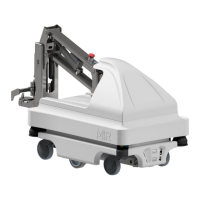
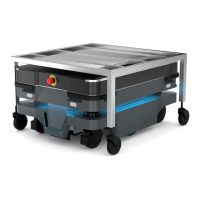
Lists and describes the available top modules that can be mounted on the MiR250 robot.
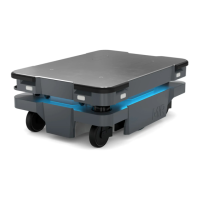
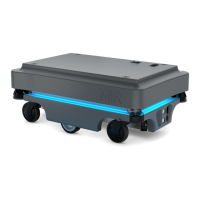
Details the visible external components and their identification numbers on the MiR250 robot.
Describes the location and components within the robot's front, rear, side, and top compartments.
Explains the different types of safety messages (WARNING, CAUTION, NOTICE) used in the document.
Provides essential safety instructions and precautions to follow when operating the MiR250 robot.
Defines the intended applications and environments for the MiR250 robot.
Specifies the types of intended users (commissioners, operators, direct users) and their roles.
Lists uses of the MiR250 that are considered misuse and deviate from intended operation.
Describes the mandatory warning label that prohibits riding on the robot.
Identifies potential hazards and residual risks that commissioners must inform personnel about.
Provides step-by-step instructions on how to open and access the front compartment of the robot.
Details the procedure for opening and accessing the rear compartment of the MiR250 robot.
Explains how to open and access the side compartments of the robot.
Describes the process for opening and accessing the top compartments of the MiR250 robot.
Lists the contents included in the MiR250 robot packaging.
Provides step-by-step instructions on how to safely unpack the MiR250 robot from its packaging.
Guides users through the process of connecting the battery to the MiR250 robot.
Explains how to turn on and initialize the MiR250 robot.
Details how to connect a PC, tablet, or phone to the robot's WiFi access point for interface access.
Provides instructions on how to operate the MiR250 robot manually using the joystick.
Explains how to manually move the robot by hand, including brake release procedures.
Guides users on how to check the operational status of the robot's hardware components via the interface.
Details the procedure for correctly mounting the robot's unique nameplate.
Provides instructions on how to properly power down and shut off the MiR250 robot.
Explains how to charge the MiR250 robot using a MiR cable charger.
Guides users on how to safely disconnect the robot's battery for transport or maintenance.
Provides recommendations for storing the robot's battery to preserve its service life.
Outlines procedures and regulations for the proper disposal of the robot's battery.
Details how to manage user accounts and passwords to control access to the MiR250.
Explains how to improve robot security by installing software updates and security patches.
Provides an overview of the navigation and control system, including key processes and components.
Explains the necessary inputs from the user for the robot to navigate autonomously.
Describes the global planner's role in determining the robot's path to the goal position.
Explains the local planner's function in guiding the robot around obstacles while following the global path.
Details the sensor types and methods used by the robot for detecting obstacles.
Explains the process by which the robot determines its current position on the map.
Describes how the motor controller adjusts power to motors for speed and direction control.
Explains the dynamic brake function used to stop the robot at its goal position.
Provides an overview of the robot's safety system, controlled by the safety PLC.
Details the personnel detection safety function that stops the robot upon detecting people or obstacles.
Explains the overspeed avoidance function that prevents the robot from exceeding safety speed limits.
Describes the stability function that monitors wheel turns for traction and prevents driving if unstable.
Explains the emergency stop circuit and its integration with external buttons for immediate stoppage.
Details the safeguarded stop interface for bringing the robot into Protective stop.
Describes the locomotion interface used to signal driving status to top modules.
Explains the shared emergency stop interface for coordinating stops between the robot and top modules.
Details the reduced speed interface that signals the robot to drive at a lower speed.
Explains the safety stop mechanisms (STO and SS1 contactors) for safely stopping the robot.
Describes the robot's status lights and signal lights used for communication and planning.
Covers requirements for the robot's work environment, including surfaces, light, and temperature.
Outlines the necessity of performing a risk assessment for safe robot installation and operation.
Explains how to create and edit maps for the robot's navigation and operation.
Defines markers as X-Y coordinates for accurate robot positioning and docking.
Explains positions as X-Y coordinates for defining robot destinations or waypoints in missions.
Guides users on creating missions composed of various actions for robot tasks.
Details how to define the robot's footprint, including loads and top modules, for accurate path planning.
Explains how to mark and use operating hazard zones for safety compliance and risk mitigation.
Describes how to perform a brake test to ensure the robot's braking capability.
Guides on setting up user profiles, groups, and permissions for robot access control.
Explains how to build custom dashboards for users to easily control robot functions.
Provides instructions on how to update the robot's software to the latest version.
Explains the importance and process of creating backups for robot settings and data.
Introduces common system settings that commissioners should be aware of for robot configuration.
Details how to create and place markers on a map for robot docking and positioning.
Guides users on creating robot positions on a map for destinations or waypoints in missions.
Explains how to create a mission that prompts the user for input to guide robot actions.
Describes how to create missions that handle errors by defining alternative actions.
Explains how to create missions with variables for flexible marker docking and protective field management.
Details how to create a mission for the robot to navigate narrow doorways safely.
Provides instructions on how to test created missions to ensure proper execution.
Details the process and specifications for mounting top modules onto the MiR250 robot.
Outlines weekly tasks for cleaning and checking robot components for optimal performance.
Covers regular checks and replacement procedures for various robot parts.
Provides guidelines for cleaning and maintaining the robot's battery.
Instructs on using original packaging materials for transporting the robot.
Details the reverse steps of unpacking for packing the robot for shipment.
Highlights transport regulations specific to lithium-ion batteries.
Illustrates the center of mass for different payloads viewed from the side.
Shows the center of mass for various payloads viewed from the front.
Depicts the center of mass for payloads viewed from the top.
Details the Power, Emergency stop, and Ethernet interfaces located on the robot's left side.
Describes the GPIO A/B and Auxiliary Safety Functions A/B interfaces on the robot's right side.
Provides a list of connectors used for various robot interfaces, including manufacturer and part numbers.
Discusses common software errors like localization failures and how to prevent or handle them.
Covers hardware faults, troubleshooting steps, and checks for physical damage.