42
ԛ Setting the trim length
The trim length setting is valid when a cutting format having a trim length was selected.
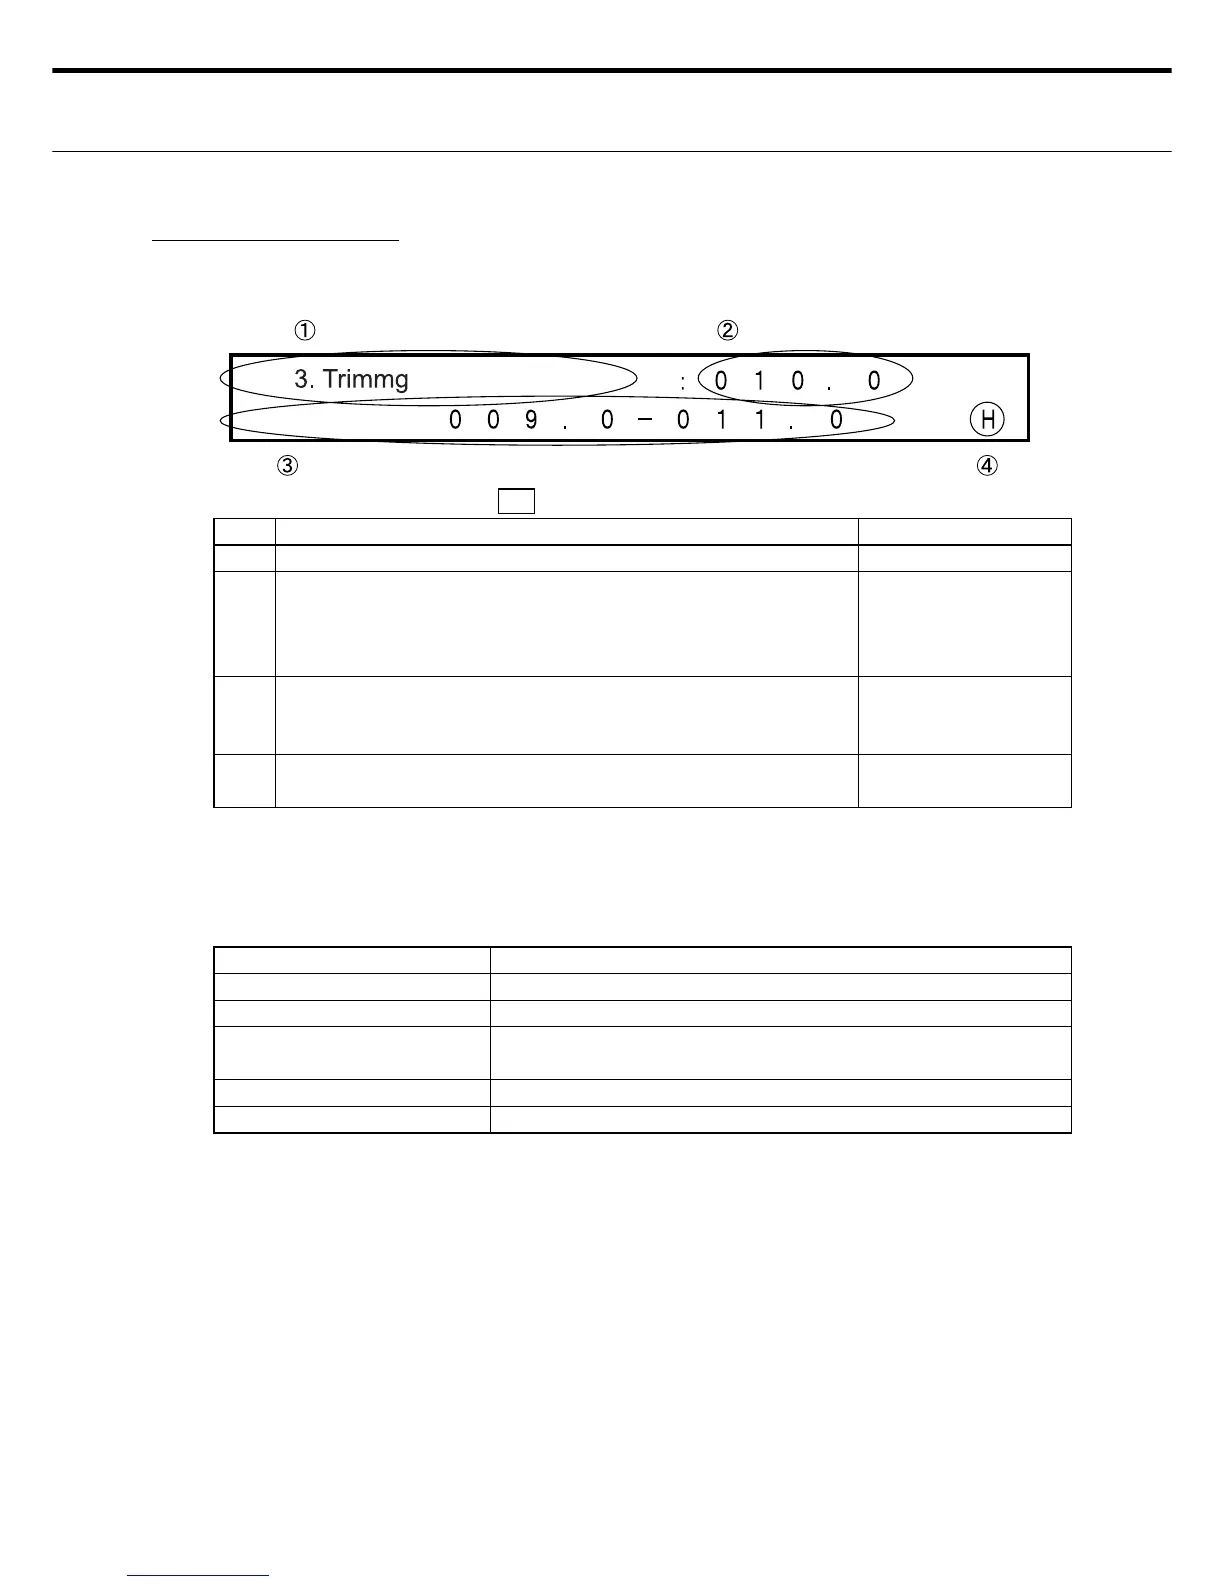
٤ LCD display for setting the trim length
LED display Power LED: ON, READY : OFF, ERROR: OFF
No. Display information Display Changes
Ԙ Shows that this is the setting for the trim length. INOP (Fixed screen)
ԙ Cursor is movable in the ԙ range. Enter a value in "Trim
Length" by moving the cursor with the right or left switches to
move up and down to the digits to fi nd the number you want. (0.1
mm steps)
OK
Ԛ Shows the effective trim length range for the currently selected
cutting format. Check the values shown here and set the value
of ԙ .
INOP
ԛ An "H" is shown when the displayed setting has been saved. A
blank space is shown in the setting change state.
OK. Shows "H" or
blank display.
Note 1: The only location settable by the user is ԙ .
Note 2: Numbers can be entered only in the range shown in Ԛ . Numbers outside this range
are invalid and cannot be entered because the Enter switch is disabled.
٤ Trim length setting switches
Switches Description
RIGHT/LEFT Moves the cursor. Valid in the range in ԙ .
UP - DOWN Use for setting the trim length. Enabled by ԙ .
ENTER Use to enter the display information. (After entering, an "H" ap-
pears in ԛ ).
CLEAR Shows the default (reset value).
MENU Setting Entry mode; Shifts to Menu screen 1.
Note 1: The data changes are not entered (stored) if the Menu switch is pressed before the
Enter switch was pressed.
Note 2: If an error such as Cover-Open was detected before pressing the Enter switch then
after eliminating the error, operation shifts to Standby mode without storing any
changes.