44
ԝ Setting the lead edge margin
This setting is valid when "lead edge" was selected for the cutting reference position.
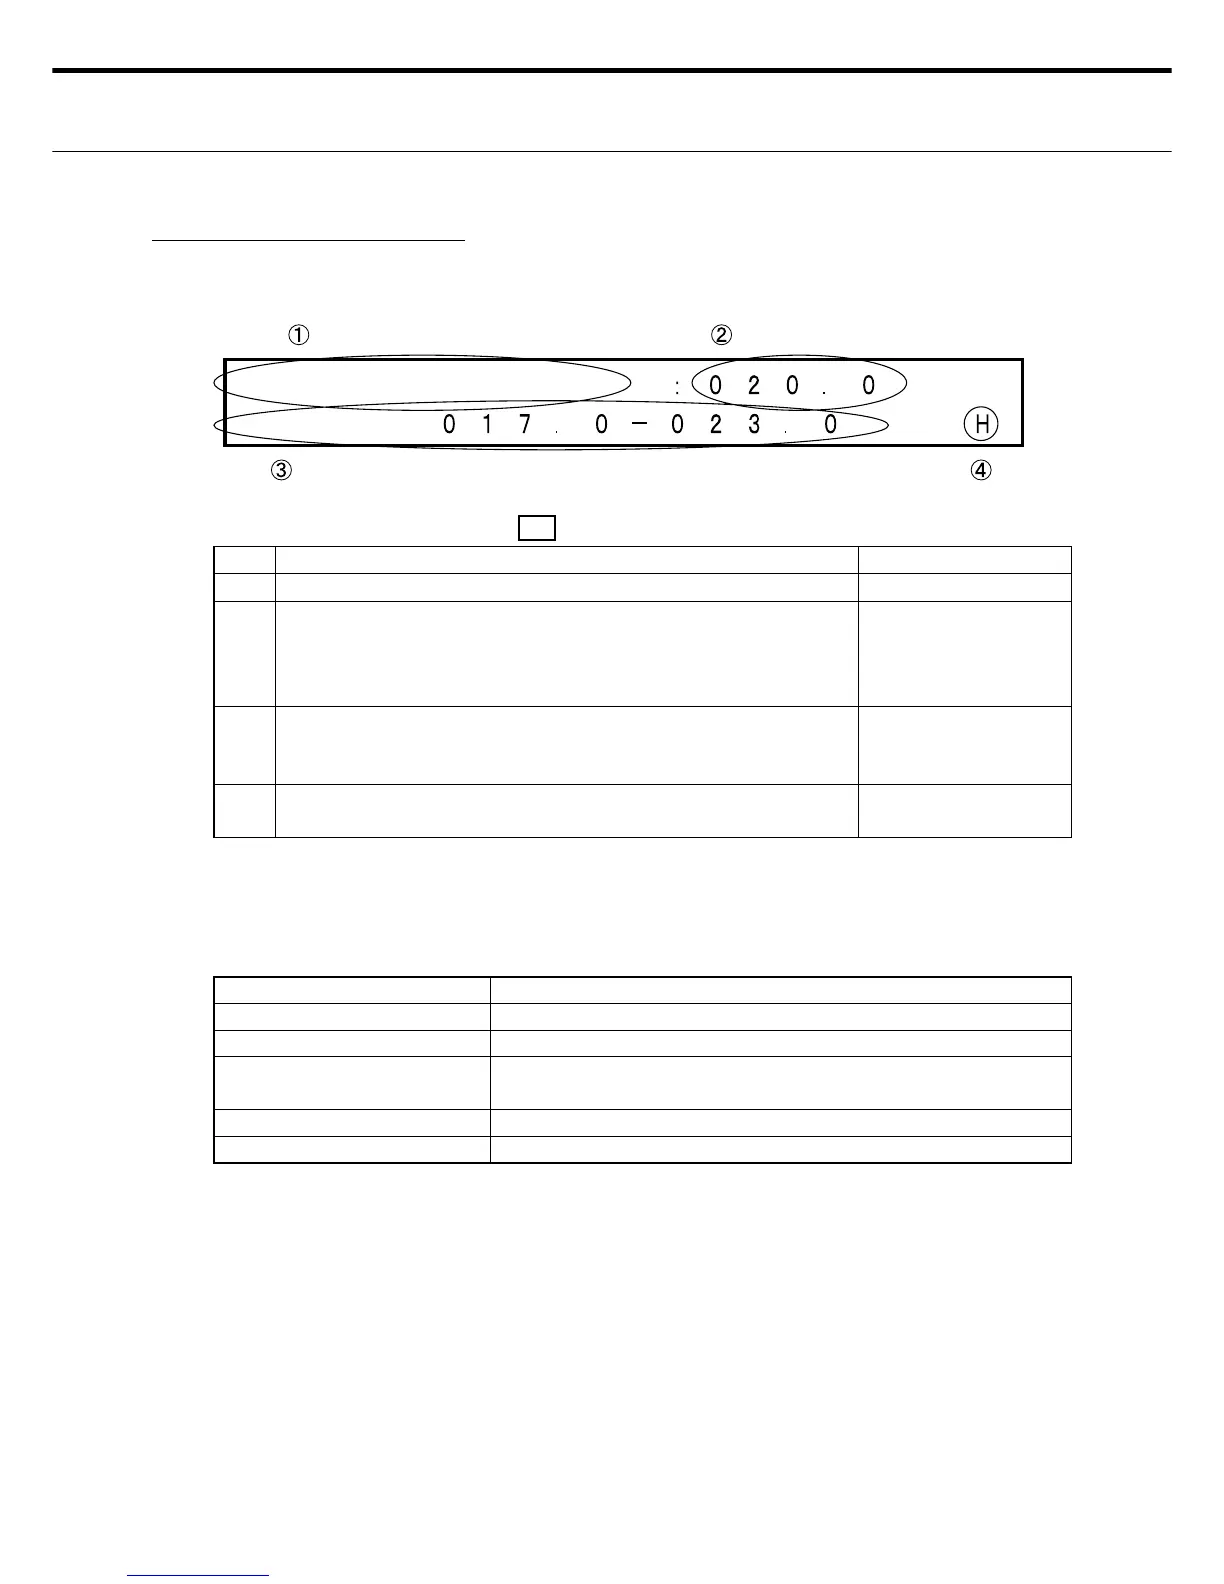
٤ LCD display for setting the margin
LED display Power LED: ޓONޓ, READY : OFF, ERROR: OFF
No. Display information Display Changes
Ԙ
Shows that this is the setting for the paper edge margins. INOP (Fixed screen)
ԙ
Cursor is movable in the ԙ range.
Enter a value in "Margins" by moving the cursor with the right
or left switches to move up and down the digits to fi nd the num-
ber you want. (0.2 mm steps)
OK
Ԛ
Indicates the lead edge margin effective range for the currently
selected cutting format. Check the values shown here and set
the value of ԙ .
INOP
ԛ
An "H" is shown when the displayed setting has been saved. A
blank space is shown in the setting change state.
OK. Shows "H" or
blank display.
Note 1: The only location settable by the user is ԙ .
Note 2: Numbers can be entered only in the range shown in Ԛ . Numbers outside this range
are invalid and cannot be entered because the Enter switch is disabled.
٤ Lead edge margin setting switches
Switches Description
RIGHT/LEFT Moves the cursor. Valid in the range in ԙ .
UP - DOWN Use for setting the lead edge margin Enabled by ԙ .
ENTER Use to enter the display information. (After entering, an "H" ap-
pears in ԛ ).
CLEAR Shows the default (reset value).
MENU Setting Entry mode; Shifts to Menu screen 1.
Note 1: The data changes are not entered (stored) if the Menu switch is pressed before the
Enter switch was pressed.
Note 2: If an error such as Cover-Open was detected before pressing the Enter switch then
after eliminating the error, operation shifts to Standby mode without storing any
changes.
5. Top Space