Bolt X Quick Start Guide
27
Shutting down the Bolt X system
1. Move Bolt X to its Home position, for both the arm and the track (if
using Bolt X On Track).
or...
If you are going to transport Bolt X to a new location, put the Bolt X
arm into its transport position. You can do this either by using Flair
(although you might have to reset the soft limits to reach the
transport position).
2. In the Flair software, click on the Disengage Robot button.
3. In the Flair software, disengage the track by toggling off the Track
button.
4. Press down all E-stop buttons:
On the computer stack
On the YRC1000 controller unit (if using Bolt X On Pedestal)
or on the Bolt X base (if using Bolt X On Track)
5. Close the Flair software.
6. Shut down Windows on the Flair PC.
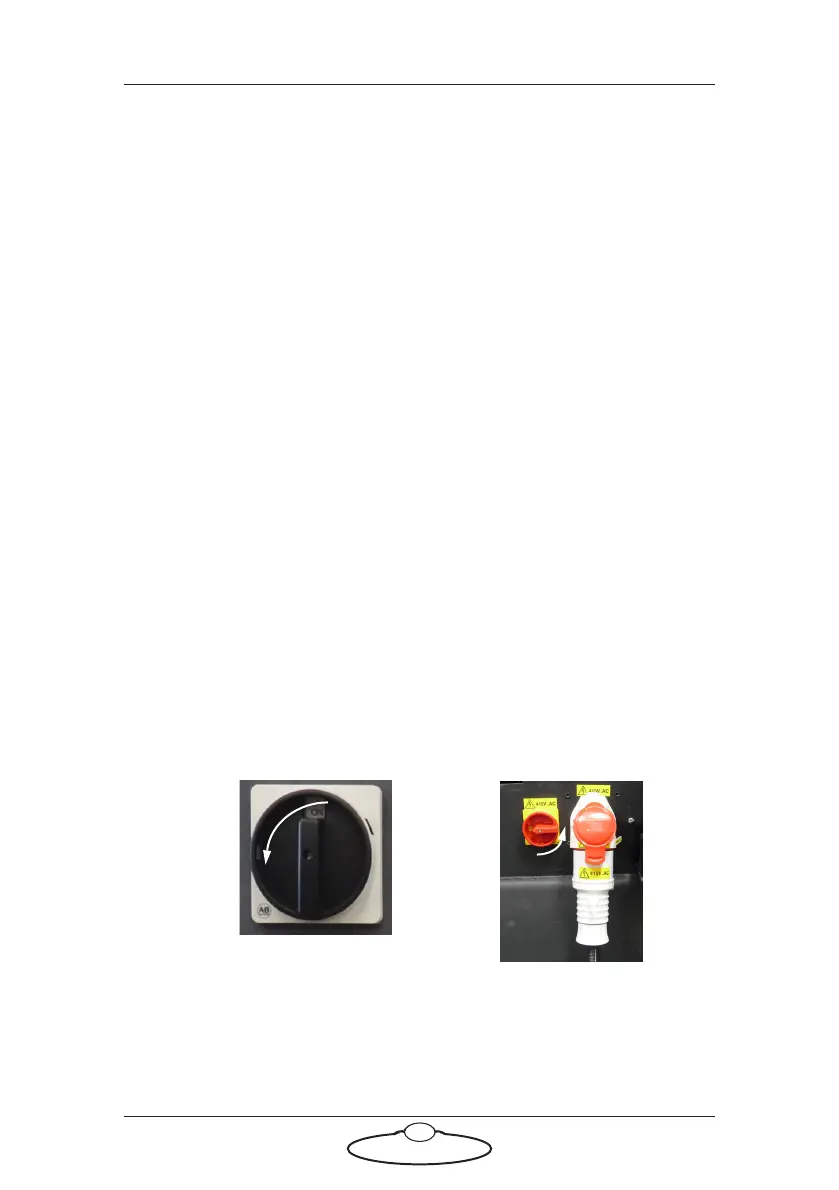
7. Turn off any peripherals. Turn off Bolt X as follows:
To remove Bolt X On Track from the track see Mounting Bolt (family of
robots) on the track in the separate Precision Track Quick Start Guide and
follow the instructions there in reverse order, to attach the trolley wheels,
detach the pinch motor wheels and remove the rig from the track
bearings.
For Bolt X On Track, turn
off the power switch on the
side of the Bolt X Base.
Turn off the power switch
on YRC1000.