ROYAL evo
Page 72
9.3. Security queries when switching ON
9.3.1. Throttle check
If in the menu L Transmitter the parameter Check
thr. is ON (è 13.1.6.), the following can appear:
The transmitter starts immediately and RF radiation
begins.
!!
For safety reasons throttle is kept in idle until the
throttle control (Heli: throttle limiter) is in idle posi-
tion (Heli: at throttle minimum).
The symbol below the text reminds you of the
control, used for throttle. The figure above shows
the stick symbol.
If Throttle-Cut is active the transmitter immediately
starts operation and a message appears for 4 sec.:
ThrottleThrottle--Cut activeCut active
H>
Also in this case the corresponding switch is indicated.
The “Throttle Check” safety query can be switched ON
or OFF as required (è 13.1.6.).
' TIP ! If the safety query does not disappear
When missing or defective operating elements are as-
signed for Throttle and Throttle Cut the safety query can
be by-passed by pressing any of the menu buttons or
ENTER.
9.3.2. RF Check with the synthesizer module
If a synthesizer RF module is fitted in your ROYALevo, an
additional safety query can be activated (Check RF).
When you switch ON with an HFM-S synthesizer RF
module fitted, the following screen may appear after
the power-on info screen:
For safety reasons RF transmission remains OFF until
you confirm the displayed channel or transmission fre-
quency by pressing any direct menu access button or
the ENTER button. Only then will you see the last active
status screen; RF transmission is then activated.
The “RF Check” safety query can be switched ON or OFF
as required (è 13.1.7.).
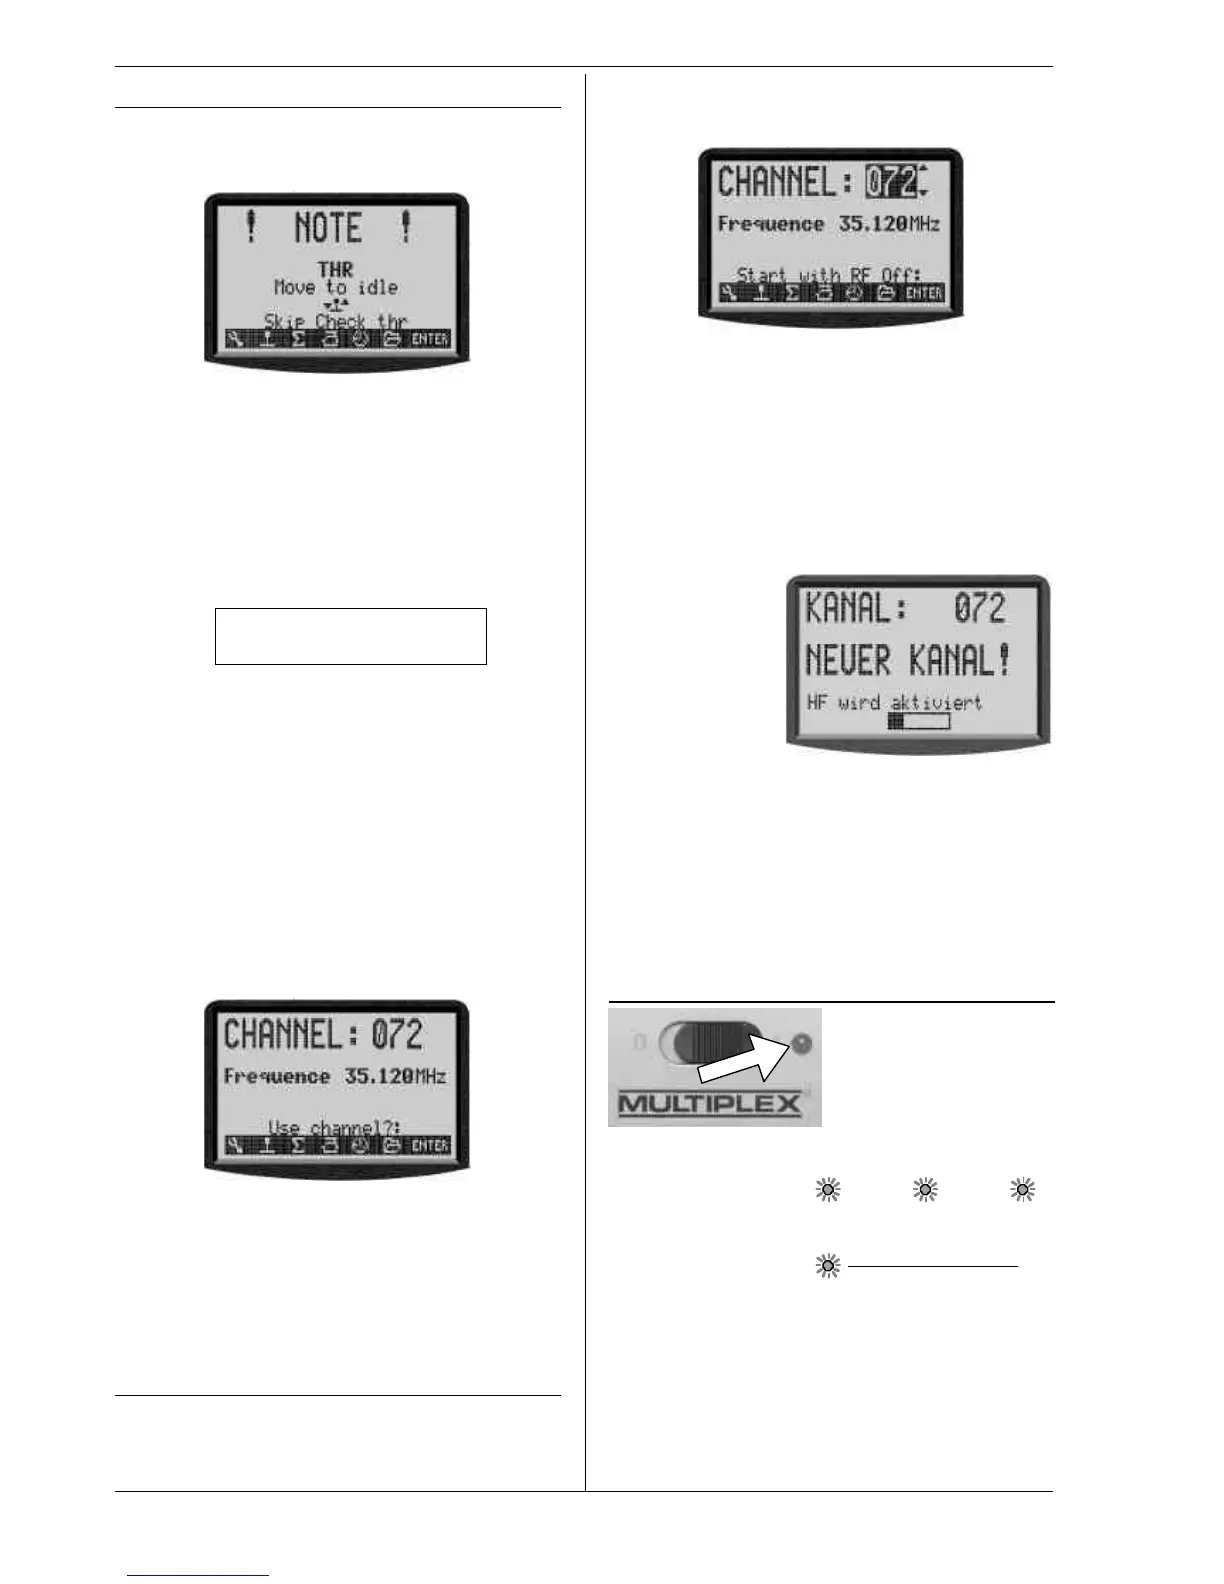
9.4. Selecting the channel with an HFM-S
synthesizer RF module
Channel selection with an HFM-S synthesizer RF module
is very simple, convenient and safe:
1. Switch on the transmitter with the tool button L
pressed in
⇒ You are now at the channel setting menu,
RF is OFF (LED glows constantly).
The following display appears:
Set the channel you wish to use by pressing the „s“(UP)
/ „t“(DOWN) buttons, or one of the two 3-D digi-
adjustors. The channel is displayed as a channel number
and also the associated transmission frequency. To
activate the transmitter on the channel you have just
selected, the transmitter must now be switched OFF,
and then switched on again -.
2. Switch the transmitter OFF and then ON again
(this time WITHOUT the tool button pressed in)
You will see the following display::
English text:
Channel 72
NEW CHANNEL!
Enable RF
For your information the screen displays the previously
set channel. RF transmission remains OFF (=> LED glows
constantly) until the waiting period (horizontal bar on
screen) to activate the new channel has elapsed. During
this waiting period you have the chance to switch off
the transmitter before the RF module is activated, if, for
example, you have inadvertently set the wrong channel.
When the waiting period has elapsed, the last used
status display appears
The LED starts flashing, the transmitter is ready for use.
9.5. The RF status display (red LED)
The red LED (light emit-
ting diode) constantly
indicates the current
status of the RF module
when the transmitter is
switched on, i.e. whether
an RF (Radio Frequency) signal is being transmitted or
not.
RF transmission ON: 2 sec 2 sec ...
The LED flashes at intervals of about 2 seconds and the
transmitter is ready for use.
RF transmission OFF:
The LED glows constantly.
The system monitors the current drain of the RF module
to check whether an RF signal is being transmitted or
not, rather than by checking the status of the RF mod-
ule. If the current drain is below a typical value, either
no RF signal is being transmitted, or the RF signal is
being transmitted at less than full power (in which case
safe operation cannot be guaranteed!) This method of