Instructions
Page 75
10.2. The 3-D digi-adjustors
The transmitter is fitted with two 3-D digi-adjustors as
standard, and these are used for programming and
setting up the system
10.2.1. Programming using the 3-D digi-adjustors
At the programming stage, both 3-D digi-adjustors
operate in parallel with the “ENTER” button when
pressed, and in parallel with the „s“ (UP) and „t“
(DOWN) buttons when rotated. You will soon find that
you naturally use one or other by default.
10.2.2. Making adjustments using the 3-D digi-
adjustors
It is possible to assign many different parameters to the
3-D digi-adjustors; you can then use them to adjust the
setting quickly and easily, e.g. when the model is flying.
One typical setting which can be adjusted and opti-
mised in flight is aileron differential:
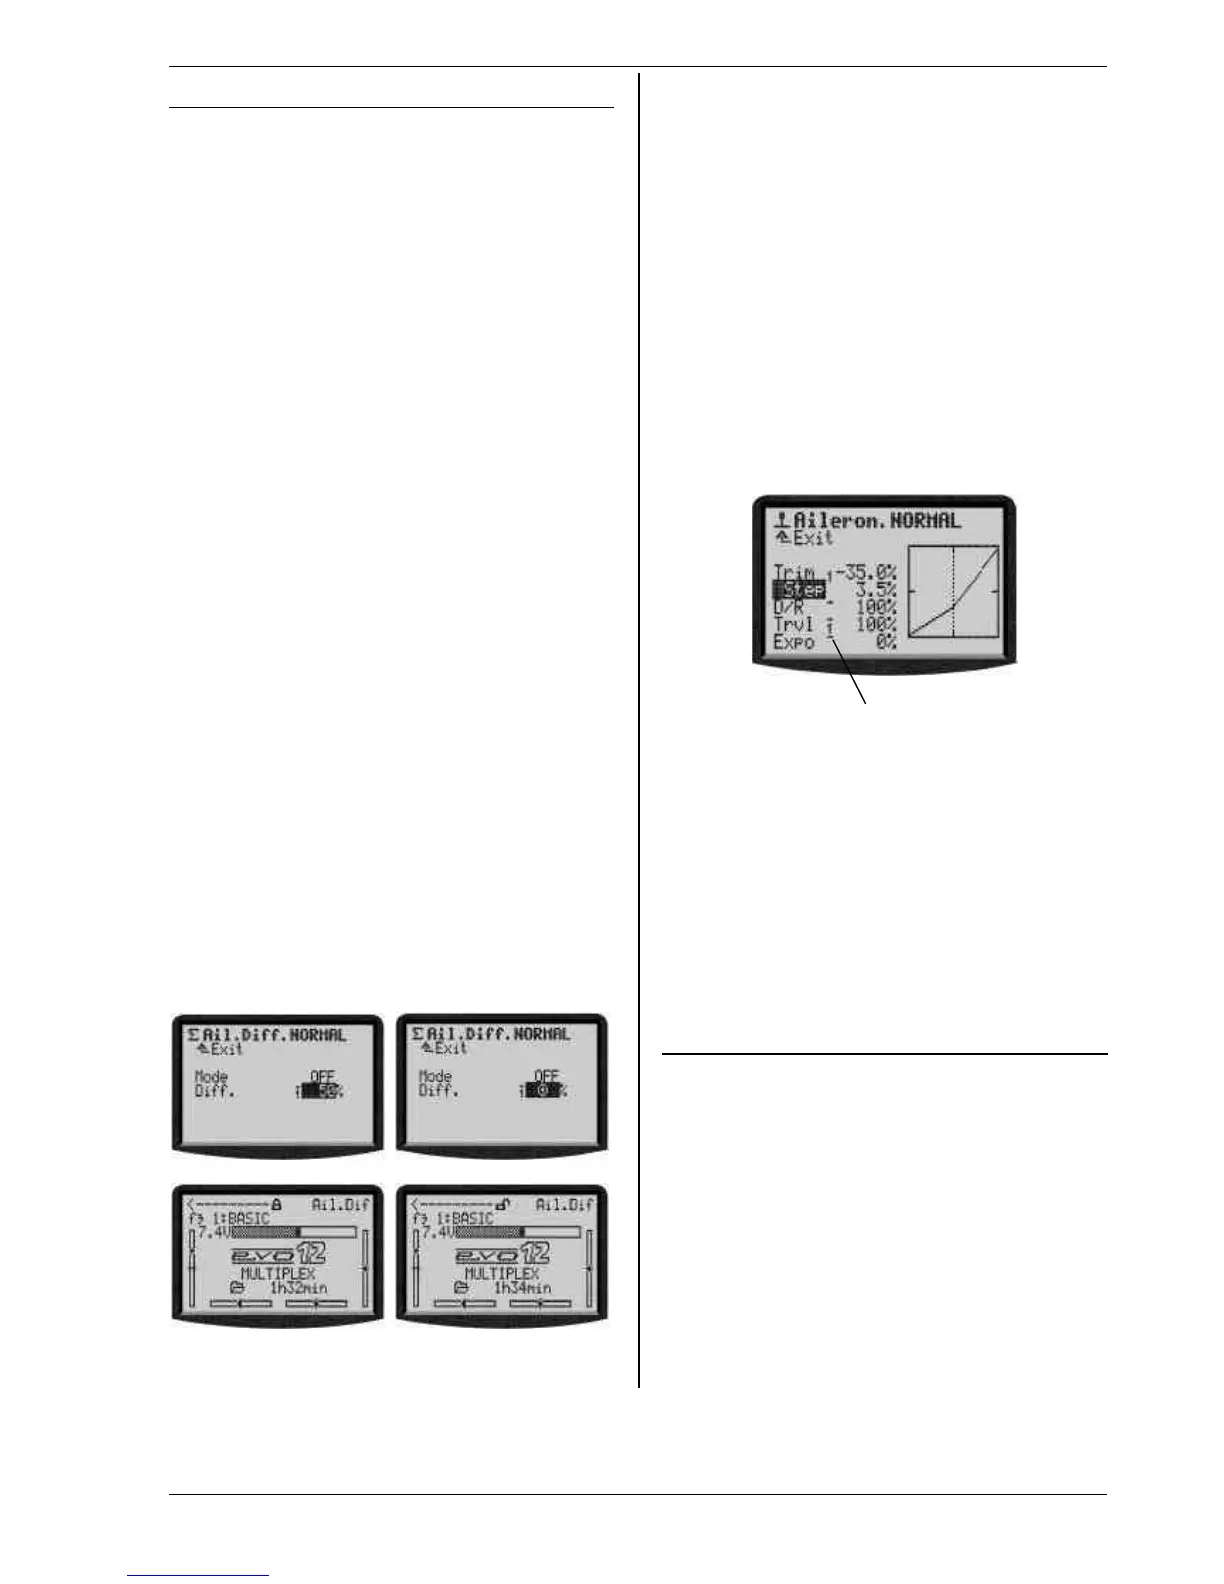
1. Select the aileron differential parameter (Fig. 1)
2. Press the < F > button
Instead of the parameter value the 3-D digi-adjustor
symbol (Fig. 2) appears. Now press one of the two
3-D digi-adjustors (in our example the right one) to
select it.
If you make a mistake, and the selected parameter
is not to be assigned, simply press the “ENTER” but-
ton.
Now you can quit the menu and go back to the status
display.
In the top line of status displays 1-3 you can now see
that aileron differential “Ail-Diff” is variable using the
right-hand 3-D digi-adjustor (Fig. 3). If you press or ro-
tate the corresponding 3-D digi-adjustor for a moment,
the screen displays the current value of that parameter
(Fig. 4). A closed padlock indicates that the value cannot
be changed at the moment (as a guard against acciden-
tal operation).
If you want to be able to change the value, press the 3-D
digi-adjustor assignment switch <F>. The value can now
be changed. Every change you make is immediately
stored. Pressing the 3-D digi-adjustor assignment
switch once more blocks access to the value again
(symbol: closed padlock).
Bild 1 Bild 2
Bild 3 Bild 4
Note: If you use flight phases
Setup parameters which have different values for each
flight phase are displayed correctly, i.e. the displayed
values vary according to the currently active flight
phase, and can be adjusted separately in each flight
phase using the appropriate 3-D digi-adjustor.
This is the procedure for erasing the assignment:
1. Hold the appropriate 3-D digi-adjustor pressed in
2. Press the REV/CLR button
⇒ the screen shows „- - -“ and the assignment is
erased
Alternatively you can “overwrite” an assignment at any
time by assigning a new parameter.
Which parameters can be assigned to a digi-adjustor?
The general rule is that only those parameters with
numeric values can be assigned in this way. However,
there are a few exceptions. In the following Display the
parameter Step (Step width for trim) can not be as-
signed.
Assignable parameters with numeric values are indi-
cated by a high-set hyphen following the parameter
name. If you attempt to assign a parameter which can-
not be assigned, a crossed-out 3-D digi-adjustor symbol
appears when you press the 3-D digi-adjustor assign-
ment button.
ƒ
If you press a 3-D digi-adjustor in this situation you will
hear an audible error warning.
NOTE:
Assigned parameters can not be reversed unintention-
ally, i.e. modified “across 0” or OFF to values with the
inverted sign.
10.3. Working with the keypad and
3-D digi-adjustor -the fundamental
operating philosophy
These instructions have already described how to
switch the transmitter on, the type of status display, and
the information and method of operating the status
displays (è 9.1. / è 9.6.).
The following section explains the operating philoso-
phy of the ROYALevo and the methods of working with
the keypad and 3-D digi-adjustors, using the example of
changing the screen language. The starting point is one
of the status displays 1-4 (è 9.6.).
10.3.1. Calling up main menus
To move to the transmitter’s menu level, the direct
menu access buttons are required (è 10.1.1.), and they
are also used for programming. Six main menus are
present in total, all of which contain appropriate sub-
menus: