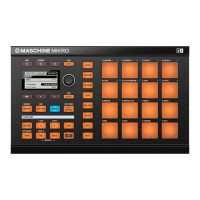
▪ The ENTER button allows you to enter Control mode.
▪ The F1, F2, and F3 buttons above the display allow you to select the tab or button under
them (at the top of the display). For example, in the picture above the SOUND tab is se-
lected.
▪ The NAV + F2 and NAV + F3 allow you to switch between Channel and Plug-in.
▪ The NAV + Left and Right Arrow buttons under the display allow you to switch between the
Plug-in and Control Mode pages. You can also use them in combination with the pads.
▪ Press Left/Right Arrow button to quickly navigate Plug-in parameters — in Control mode
this field represents the selected parameter (1/8: OSC 1 SOL. in the picture above).
▪ The Control encoder allows you to change the value of the highlighted field. For continuous
parameters, by pressing and turning the Control encoder you can change the value in finer
increments. The Control encoder can also aid navigation (e.g., in the Browser).
10.1.2 Controlling the Software Views from Your Controller
Your controller provides you with numerous shortcuts to modify the display in the MASCHINE
software window without having to touch your mouse.
10.1.2.1 Controlling the Software Views using the MASCHINE MIKRO MK1 Controller
Your controller provides you with numerous shortcuts to modify the display in the MASCHINE
software window without having to touch your mouse.
Scene View
Use Scene view to navigate the Arranger in the MASCHINE software:
1. Press and hold the VIEW button to enter View mode. You can also press VIEW + MAIN to
pin the View mode so that you can release VIEW and stay in View mode (see ↑10.1.1,
Controller Modes and Mode Pinning).
2. Press F1 to select SCENE and use the pads in the table below to navigate the Scene view.
Quick Reference
Using Your MASCHINE Controller
MASCHINE MIKRO - Getting Started - 151

 Loading...