8. Enter the saved answers to your security questions.
9. Click the Continue button.
A window displays your recovered password.
10. Click the Login again button.
A login window displays.
11. With your recovered password, log in to the AP.
Return the AP to its factory default settings
Under some circumstances (for example, if you lost track of the changes that you made
to the AP settings or you move the AP to a different network), you might want to erase
the configuration and reset the AP to factory default settings.
If you do not know the current IP address of the AP, first try to use an IP scanner
application to detect the IP address before you reset the AP to factory default settings.
To reset the AP to factory default settings, you can use either the Reset button on the
back of the AP or the Erase function. However, if you cannot find the IP address or lost
the password to access the AP, you must use the Reset button.
After you reset the AP to factory default settings, the user name is admin, the password
is password, and the AP’s DHCP client is enabled. If the AP is not connected to a network,
its default LAN IP address is 192.168.0.100. For a list of factory default settings, see
Factory default settings on page 92.
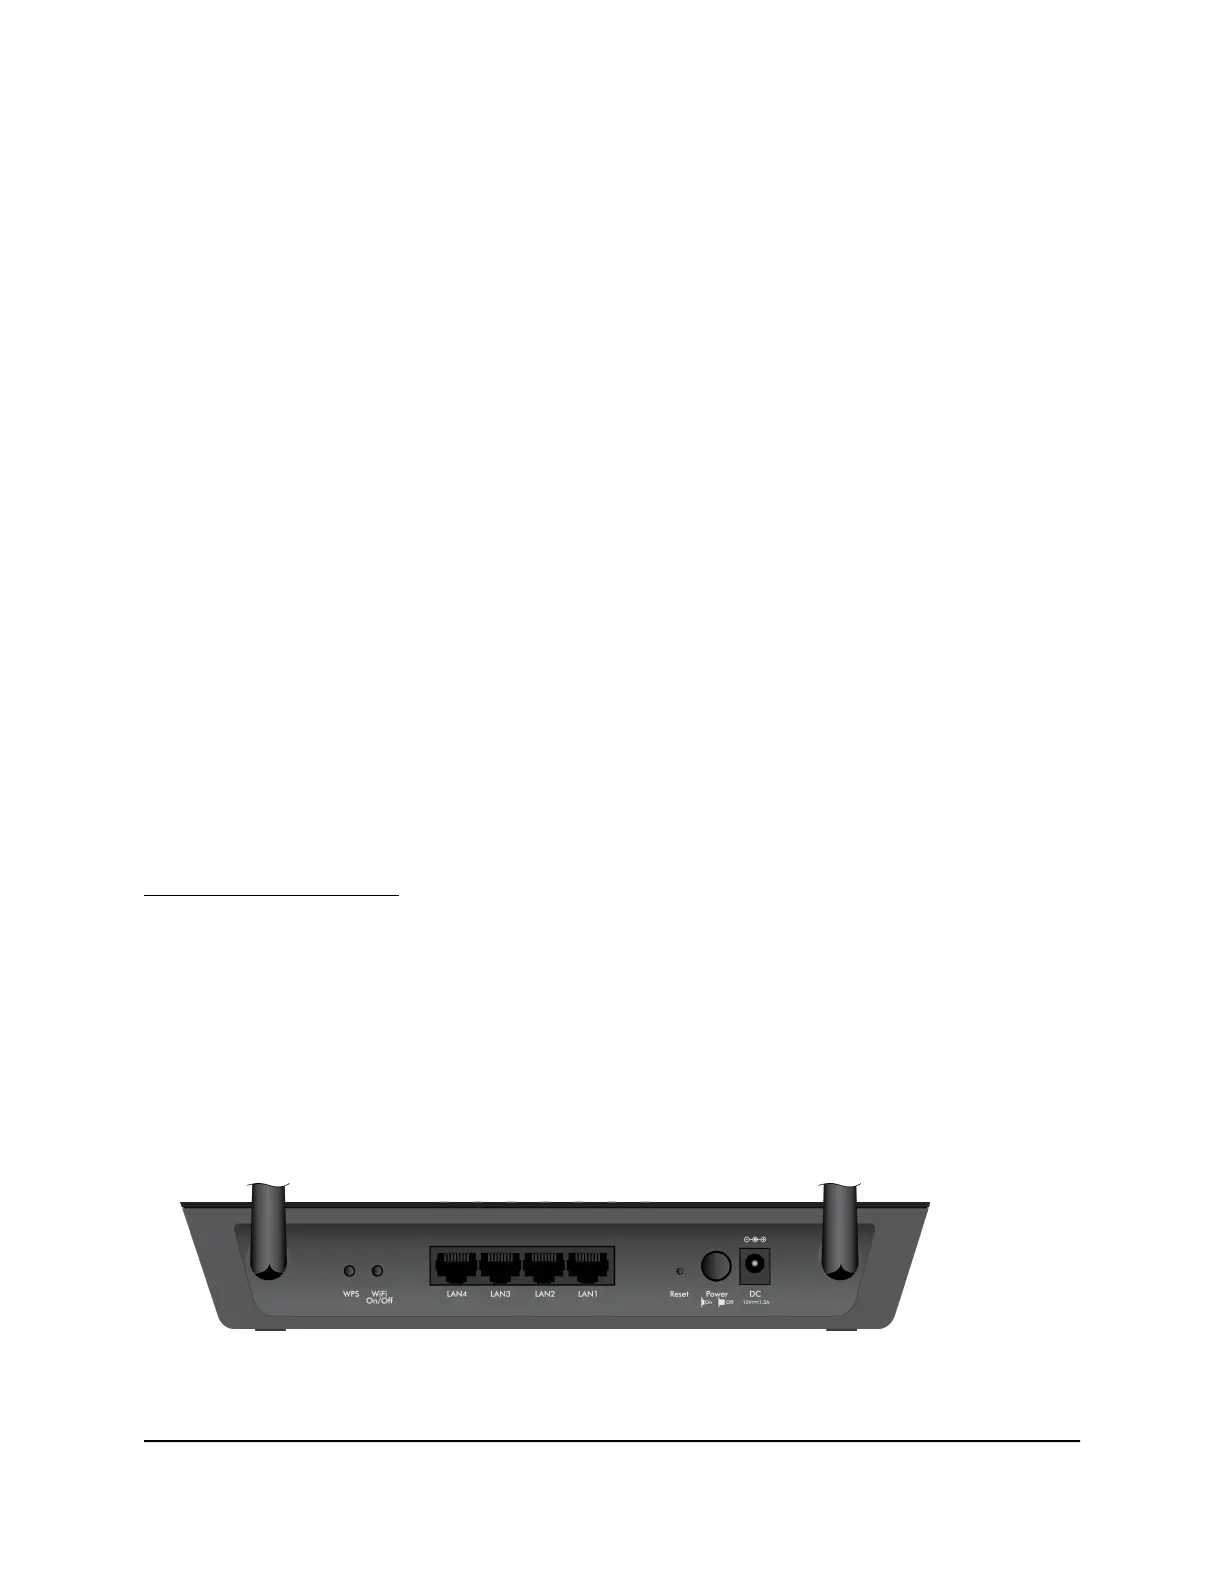
Use the Reset button
CAUTION: This process erases all settings that you configured in the AP.
To reset the AP to factory default settings:
1.
On the back of the AP, locate the recessed Reset button to the left of the Power
On/Off button.
2.
Using a straightened paper clip, press and hold the Reset button for at least 10
seconds.
User Manual55Manage the AP and Monitor the
Traffic
802.11ac Wireless Access Point Model WAC104