Doc# E107706 3 - 2
3: Hardware Installation
Electro Industries/GaugeTech
The Leader In Power Monitoring and Smart Grid Solutions
Electro Industries/GaugeTech
The Leader In Power Monitoring and Smart Grid Solutions
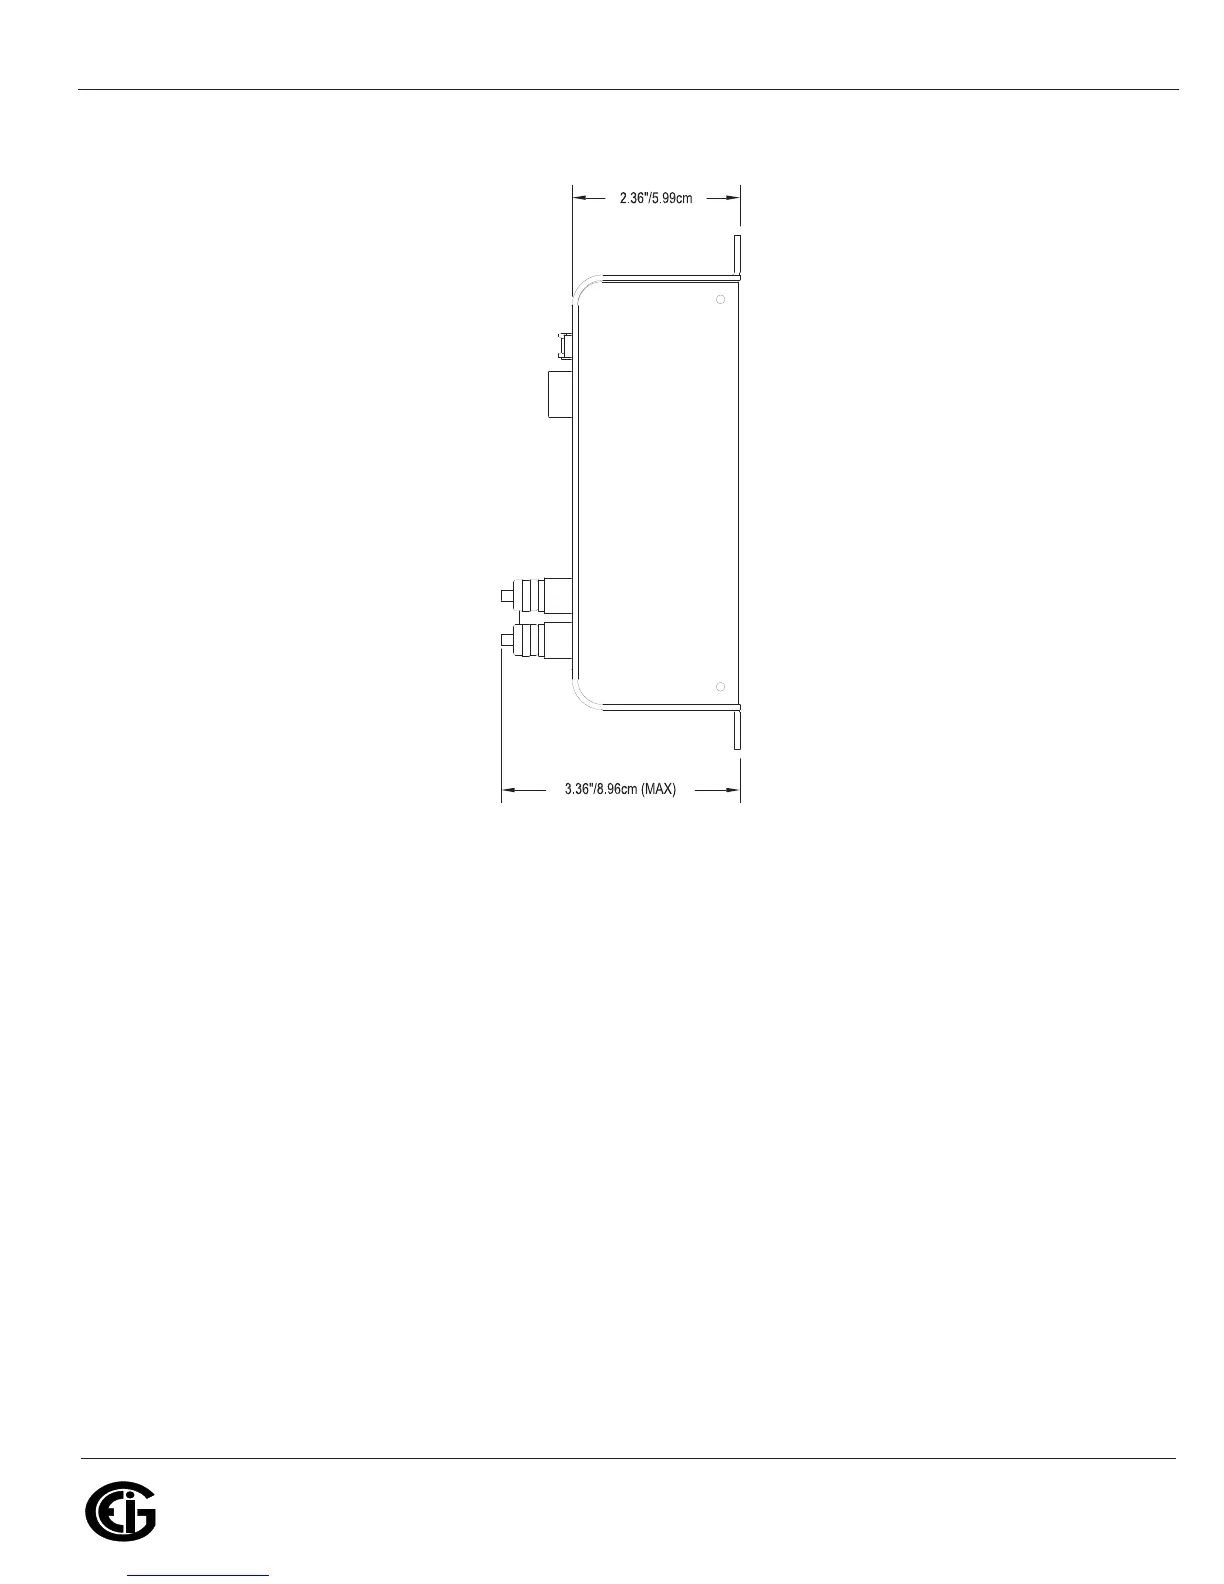
Figure 3.2: Nexus® 1250/1252 Mounting Diagram Side View
3.2: Mounting the Nexus
®
LED External Displays
The Nexus® 1250/1252 LED displays (model numbers P40N+, P41N+ and P43N+)
mount using a standard ANSI C39.1 drill plan.
Secure the four mounting studs to the back of the panel with the supplied nuts.
Six feet of RS485 communication/power cable harness is supplied. Allow for at least a
1.25-inch (3.17cm) diameter hole in the back for the cable harness. See Chapter 5 for
communication and power supply details.
The cable harness brings power to the display from the Nexus® 1250/1252 meter,
which supplies 15–20V DC. The P40N+ (or P41N+ or P43N+) can draw up to 500mA
in display test mode.