Doc# E107706 5 - 4
5: Communication Wiring
Electro Industries/GaugeTech
The Leader In Power Monitoring and Smart Grid Solutions
Electro Industries/GaugeTech
The Leader In Power Monitoring and Smart Grid Solutions
• You can use ANY port to connect a Nexus® display or RS485 Master. The I/O
modules use Port 3 or Port 4. Nexus® P40N+, P41N+ and P43N+ displays are
shipped pre-programmed to use Port 3—see Section 5.3.4 for details.
5.2: RS232 Connection (Port 1)
• Use Port 1 for RS232 communication. Set the selector switch beneath the port to
RS232.
• Insert one end of an RS232 extension cable into the Nexus® 1250/1252 meter’s 9-
pin female serial port. Insert the opposite end into a port on the computer.
• The RS232 standard limits the cable length to 50 feet (15.2 meters).
• The RS232 Port is configured as Data Communications Equipment (DCE).
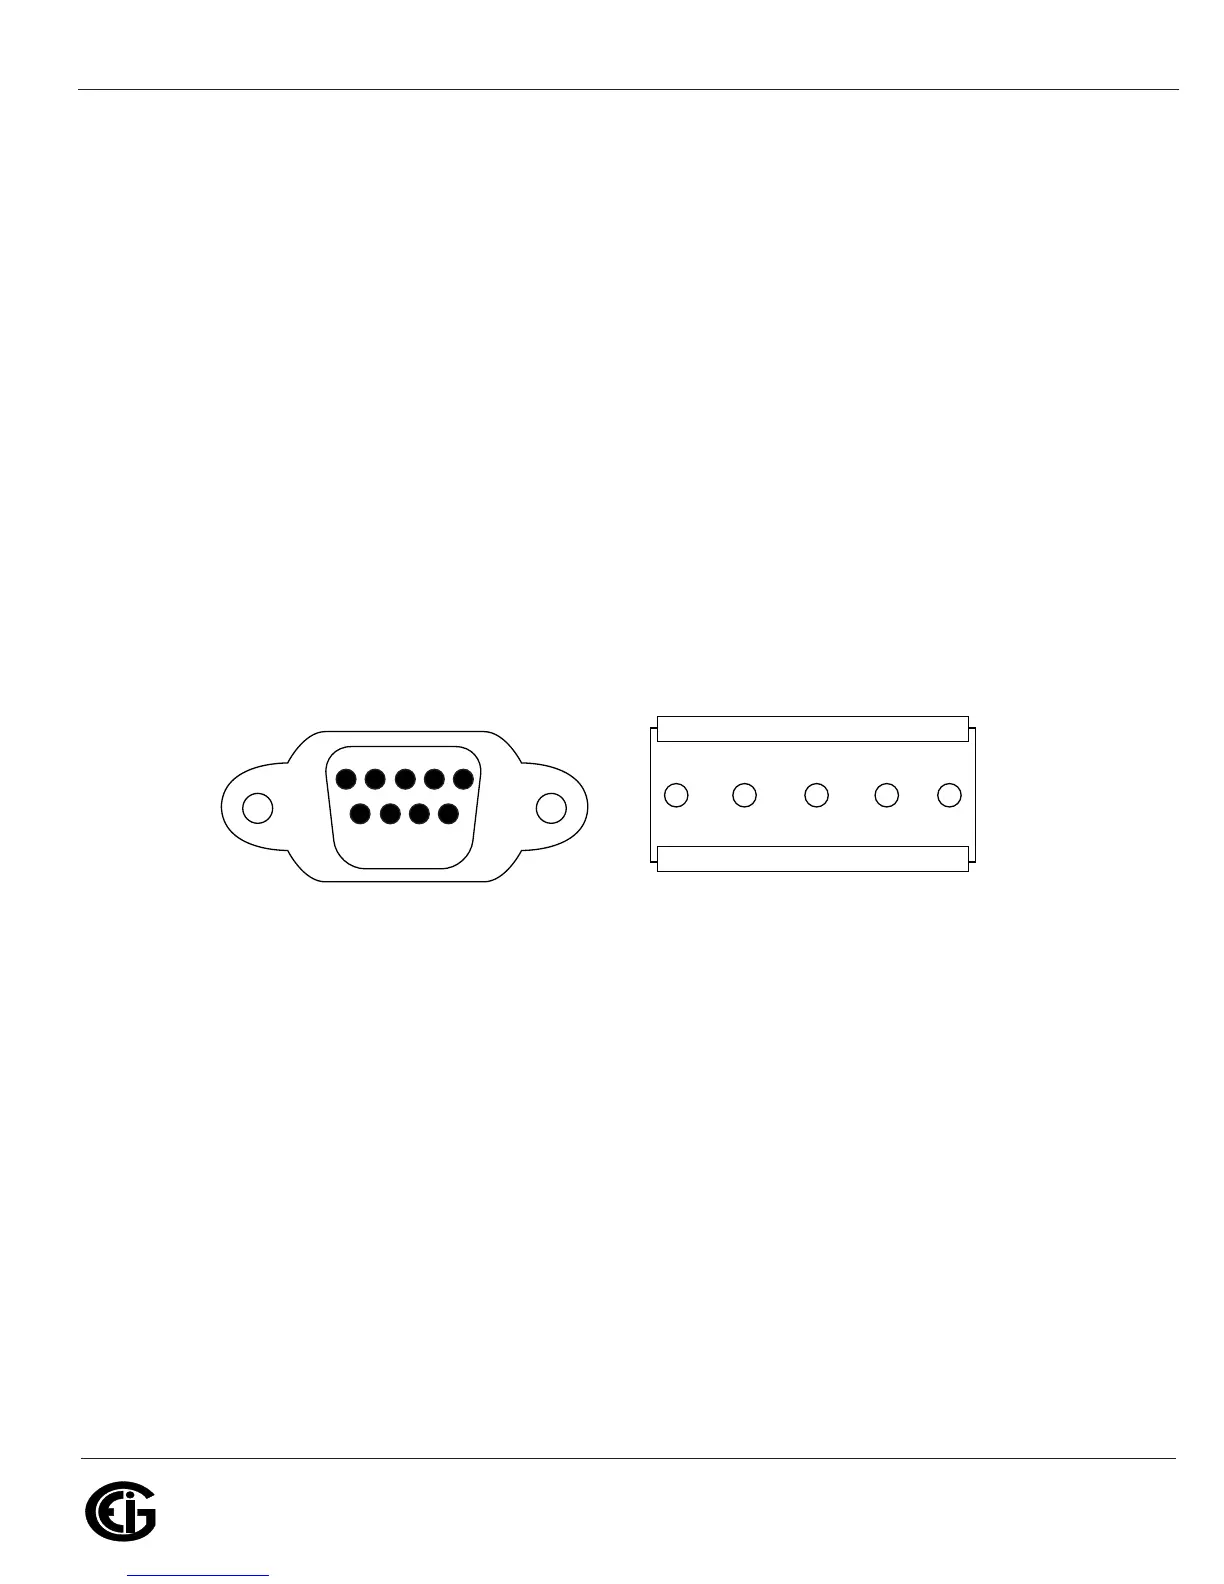
Figure 5.4: RS232/RS485 Port Detail
5.3: RS485 Communication
RS485 communication allows multiple devices to communicate on a bus. The Nexus®
1250/1252 meter’s Ports 1 to 4 are RS485 terminals, viable for a distance of up to
4000 feet (1219 meters). (Port 1 can be switched between RS232 and RS485.) The
following figure shows wiring detail of a 2-wire RS485 port.
RS232 Port RS485 Port
Pin #2=Transmit
Pin #3=Receive
Pin #5=Ground
5 4 3 2 1
9 8 7 6
Pins:
+ V - S - +
230ORT
63
230ORT
0IN4RANSMIT
0IN2ECEIVE
0IN'ROUND
0INS
 Loading...