34
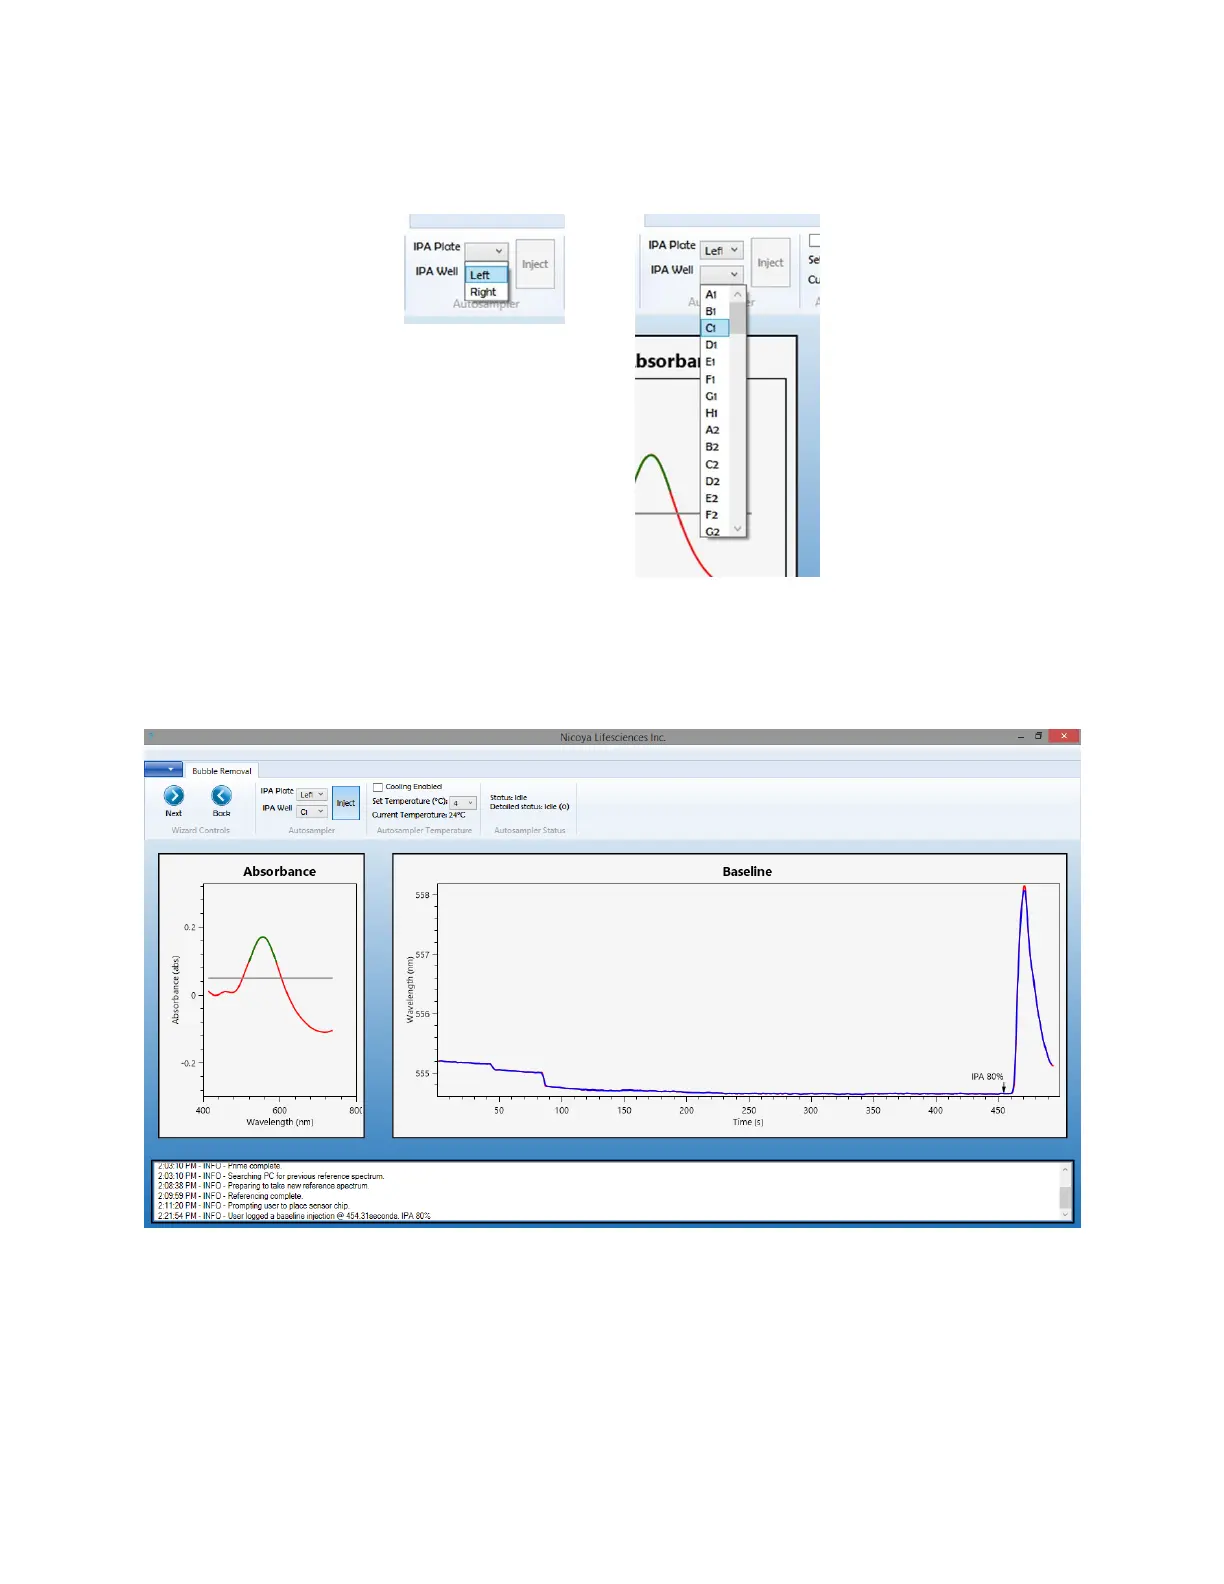
3. Using the Autosampler menu, select the appropriate plate position (left or right) and the
corresponding well on the plate to which the IPA solution was loaded [Figure 1.15].
Figure 2.15 Menus to select the appropriate plate position and well position for the IPA solution injection for bubble clearing.
4. Ensure the Sample Compartment Door is closed before the injection. Click “Inject” to begin
the injection. Upon injection, a marker will appear on the Baseline graph, and a shift of several
nm should be observed for a brief period of time [Figure 2.16].
Figure 2.16 Several nm shift observed on baseline graph after 80% IPA injuection to clear bubbles.
5. Inspect the Flow Cell for any evidence of bubbles. The design of OpenSPR
TM
allows the Flow
Cell microchannel to be examined visually while an experiment is running. A flash light can be
used to illuminate from the top of the Flow Cell in order to see it more clearly. An example of
a bubble in a Flow Cell is shown below [Figure 2.17].