Motor, Brake, and Encoder Connection
42-02-2M01 A1 2-11
2
Motion 4000
Brake Connection
Motion 4000 controllers may be ordered with or without a brake control module. The module
allows more precise control of brake lift and drop rates. The brake module must be calibrated
before it will pick the brake. If the job uses one machine brake as the service brake and the sec-
ond machine brake as an emergency brake, a brake module may be necessary for each depend-
ing upon the jurisdiction of the installation site.
Module Calibration (CAN Only)
If CAN control is used, modules must be calibrated for Motion 4000 use through the F5 con-
troller menu. Each module used, see “Calibration (CAN Only)” on page 5-91, must be calibrated.
1. On Machine Room Inspection, place the MPU F5 function switch in the UP position.
2. Press N until the FCL BRAKE UNIT, UTILITIES MENU is displayed. Press S to select.
3. Press N to advance to FCL ADJUSTMENT MENU. Press S to select.
4. CALIBRATE FCL:1, [S]-SELECT will appear. Use +/- buttons to select appropriate mod-
ule number. Press S to begin calibration.
5. PICK A DIRECTION TO CALIBRATE will be displayed. Press and hold either UP or
DOWN direction. The display will show CALIBRATING FCL: STATUS: ...
6. Continue holding UP or DOWN direction until CALIBRATION DONE [N]-NEXT
appears. If UP or DOWN is released too soon, the display will report CALIBRATE
ABORT [N]-NEXT and the process must be repeated.
7. Repeat if additional modules must be calibrated.
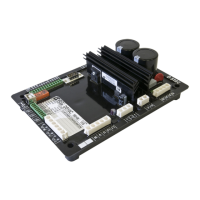
Module Trim pots and Function (Discrete Control Only)
Potentiometer settings are ignored when the module is being controlled through the TC-FCL,
J4 CAN connection.
• R67, Brake Pick Voltage (maximum output to lift brake), LED lights
• R68, Brake Hold Voltage (percentage of Pick Voltage), LED lights
• R69, Brake Relevel Voltage (percentage of Pick Voltage), LED lights
• R70, Brake Drop Rate (clockwise = faster)
• R71, Brake Pick Rate (clockwise = faster)
Module Setup for Adjustment
1. Disconnect power to the controller.
2. Discrete control only. Rotate trim pots R67, 68, and 69 counter-clockwise to locate the
begin stop, then clockwise to locate the end stop. Then set to the approximate center
position.
3. Connect Brake outputs FCO+/FCO- and BRBP2/BRBP4 (if used) as shown in your job
drawings. These connections are probably made from the module to a panel-mount con-
nector and from the panel-mount connector to the brake.
4. Connect the brake filter across SN1/SN2 as shown on the job prints. Connect the input
3- or single-phase power as shown in the job prints.
5. Connect control inputs from elevator controller as shown in your job prints (CAN or
Discrete control).
6. Connect a volt meter across the brake coil.
 Loading...