CT E300 Drive Parameters
42-02-2M01 A1 2-35
2
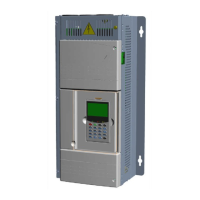
Motion 4000
Gearless: Adjust the Sheave Diameter parameter A29{E02}. Decrease this value to
increase the elevator’s speed. The Nominal Elevator Speed RPM parameter A33{E07} will be
automatically adjusted as A29{E02} is altered. The parameters A28{E01}, A29{E02},
A30{E03}, A31{E04}, and A32{E05} should have been initially adjusted in the order shown to
maintain correlation between them.
Verify One-Floor-Run Operation, Control Techniques E300
1. Move the elevator on inspection between landings and verify that it moves properly.
After taking the elevator out of inspection mode, verify that the elevator corrects to a
landing and stops properly. Make a one-floor-run and observe the elevator as it moves
between landings and stops at landings.
2. Follow procedure in Adjust for Response if necessary.
3. Follow procedure in Adjust Control Gains, Adjust Load Cell Compensation, and
Adjust Inertia Compensation as required.
Verify Contract Speed Operation, Control Techniques E300
1. Run the elevator between landings and verify that it moves properly. Observe the eleva-
tor as it starts from landings, moves between landings, and stops at landings. Progres-
sively increase the number of landings traveled until contract speed is reached. When
the elevator reaches contract speed, verify proper speed.
2. If required, adjust the Gear Ratio Numerator parameter A31{E04} if a geared applica-
tion, or the Sheave Diameter parameter A29{E02} if a gearless application, to fine tune
the speed of the elevator as described in Verify Motor Speed above.
3. Follow procedure in Adjust Control Gains, Adjust Load Cell Compensation, and
Adjust Inertia Compensation as required.
Temporary Run Box Hookup
The following illustration shows a temporary run box hookup. Disconnect controller power
before attempting to wire the run box. The temporary run box must have an enable button, an
up button, a down button, and a stop (Insp/Norm) switch.
For safety, keep the controller Machine Room Inspection switch in the INSP position while
the temporary run box is in use.
If a jumper was installed between HC-CTL board terminals SAFC and SAFH (Construction
Mode Jumper Requirements on page 2-21), it must be removed when the temporary run
box is connected.