25
H.264 4/8/16-channel Networkable DVRs
SECTION 3: DVR SETUP
14. Click the conrm icon (a) in the lower right corner of the screen, then click the Conrm button in the Note window.
15. If you setup the record schedule for a single channel, repeat this procedure to setup the other camera channels.
16. Press the MENU button on the front panel to return to the RECORD tab.
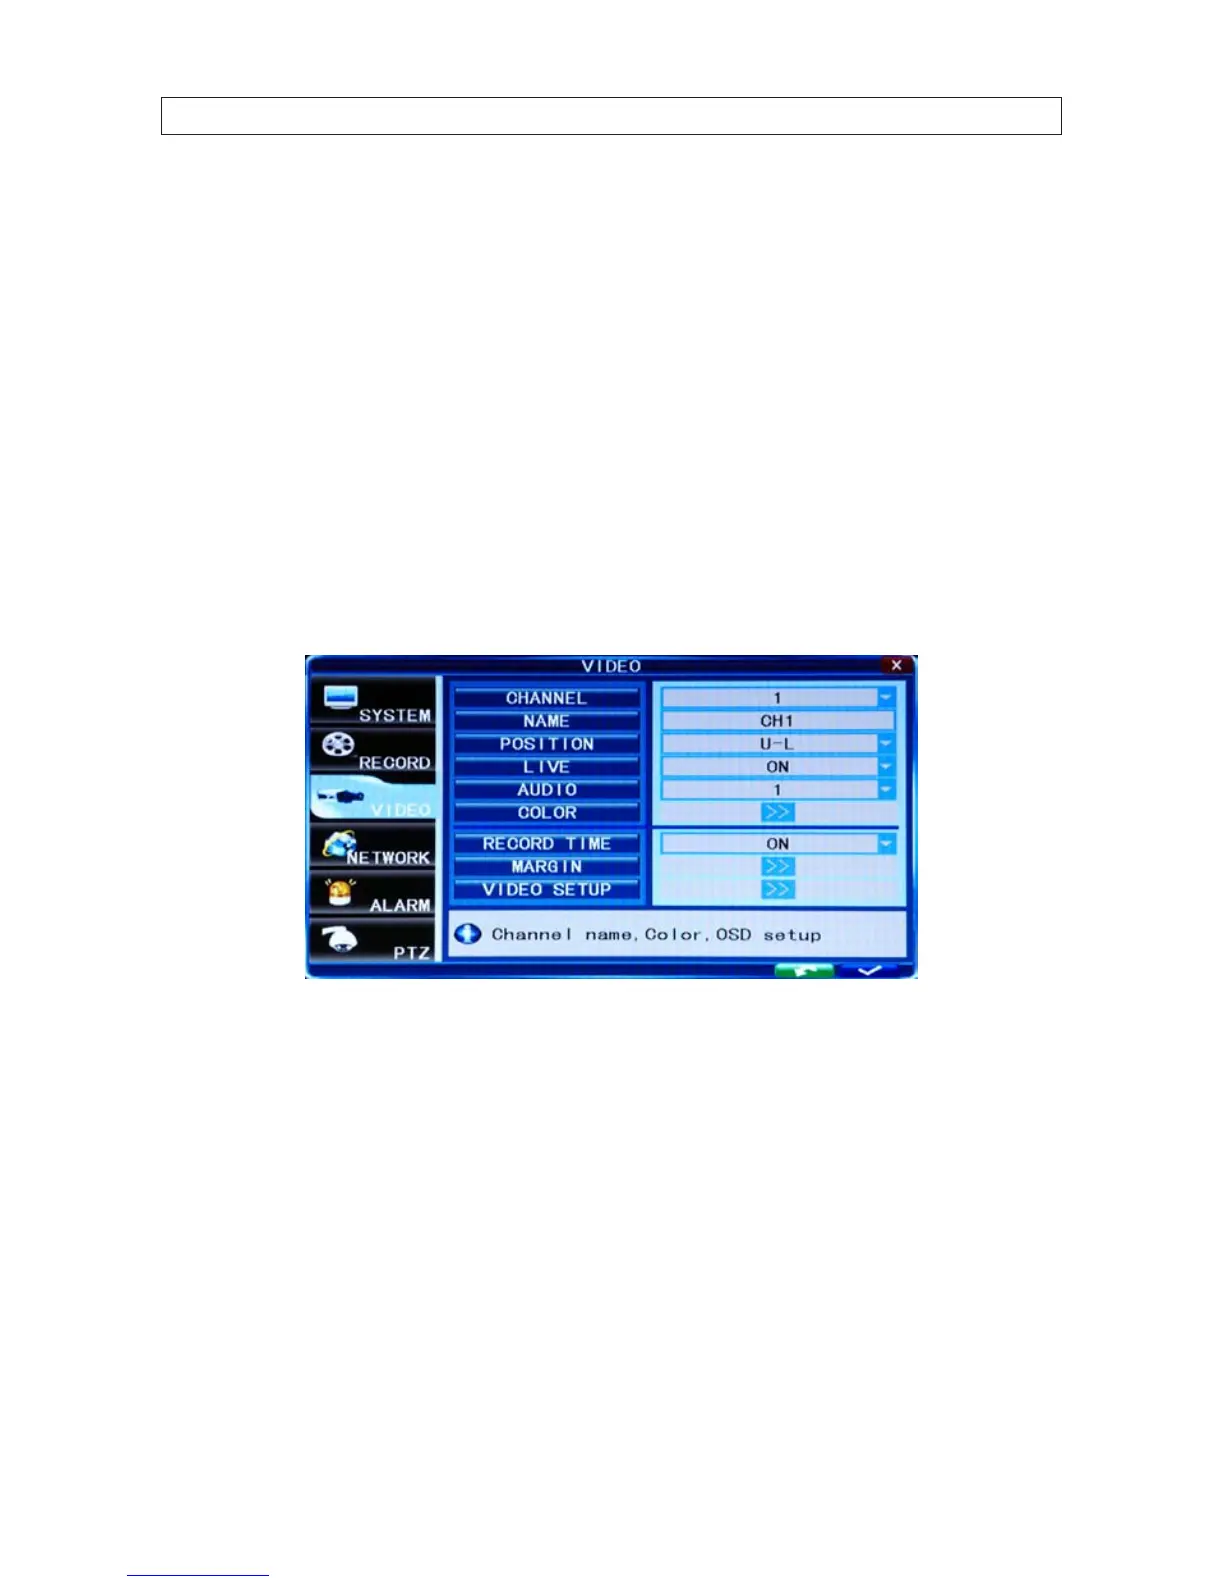
3.4 Video conguration settings
The video conguration settings aect the appearance of the camera video on the monitor. The conguration can be se setup for
each individual camera, or the same settings can be applied to all cameras.
1. Click the Settings icon on the Tool Bar to open the SYSTEM tab window.
2. Click VIDEO to open the VIDEO settings menu.
3. Click the q icon at the right end of the CHANNEL line. From the dropdown list, select the number of the camera channel you
want to setup, or select ALL to congure all channels.
4. Initially, camera channels are named CH1 .. CH4. You can change the name of the channel by clicking on the entry eld on the
NAME line to open a virtual keyboard. Use the keyboard to enter a new name, if needed, then click the = button to close the
keyboard.
5. Click the q icon at the right end of the POSITION line. The position option selects where the camera channel NAME appears
on the live display. Choose one of the owing: U-L (upper left), D-L (lower left), U-R (upper right), or D-R (lower right).
6. Click the q icon at the right end of the LIVE line. In the dropdown list, select ON (to view video from the camera on the Live
screen), or OFF.