Content Placeholder Length
Scale ID G 2-5
Vendor ID O 2-4
Current date D 2 (YY), 4 (YYMM), 6
(YYMMDD)
Current time J 2 (HH), 4 (HHMM), 6
(HHMMSS)
Counts of transaction Q 2-4
Total Price B 4-7
Ticket ID N 2-8
Barcode Check digit C 1
Examples:
Barcode type Configuration
Barcode EAN 8 with Ticket ID NNNNNNNC
Barcode EAN 8 with Item Number AAAAAAAC
Barcode EAN 8 with Total price BBBBBBBC
Barcode EAN 13 with Ticket ID + Vendor ID NNNNNNNOOOOC
Barcode EAN 13 with Ticket ID + Total price NNNNNNNBBBBBC
Barcode EAN 13 with "flag" fix identifier (21) + Item
Number + Total price
21AAAAABBBBBC
Assigning a barcode to a ticket
Once the barcode is defined, it needs to be assigned to the ticket.
• Only 1 barcode can be printed per ticket.
• If the barcode definition is wrong, no barcode will be printed. Please contact you service represen-
tative.
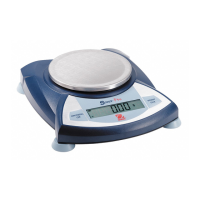
1 Enter the menu and navigate to sub-menu F246 Ticket
Content.
2 Press the OK key.
3 Use the arrow keys to select "Barcode" and confirm with the OK
key.
4 Enter the barcode ID number (reference) created before and
confirm with the OK key.
5 Press the Back key to return to the main menu/main screen.