4.3.3 Setting up a barcode
The barcode must first be defined in sub-menu F116.
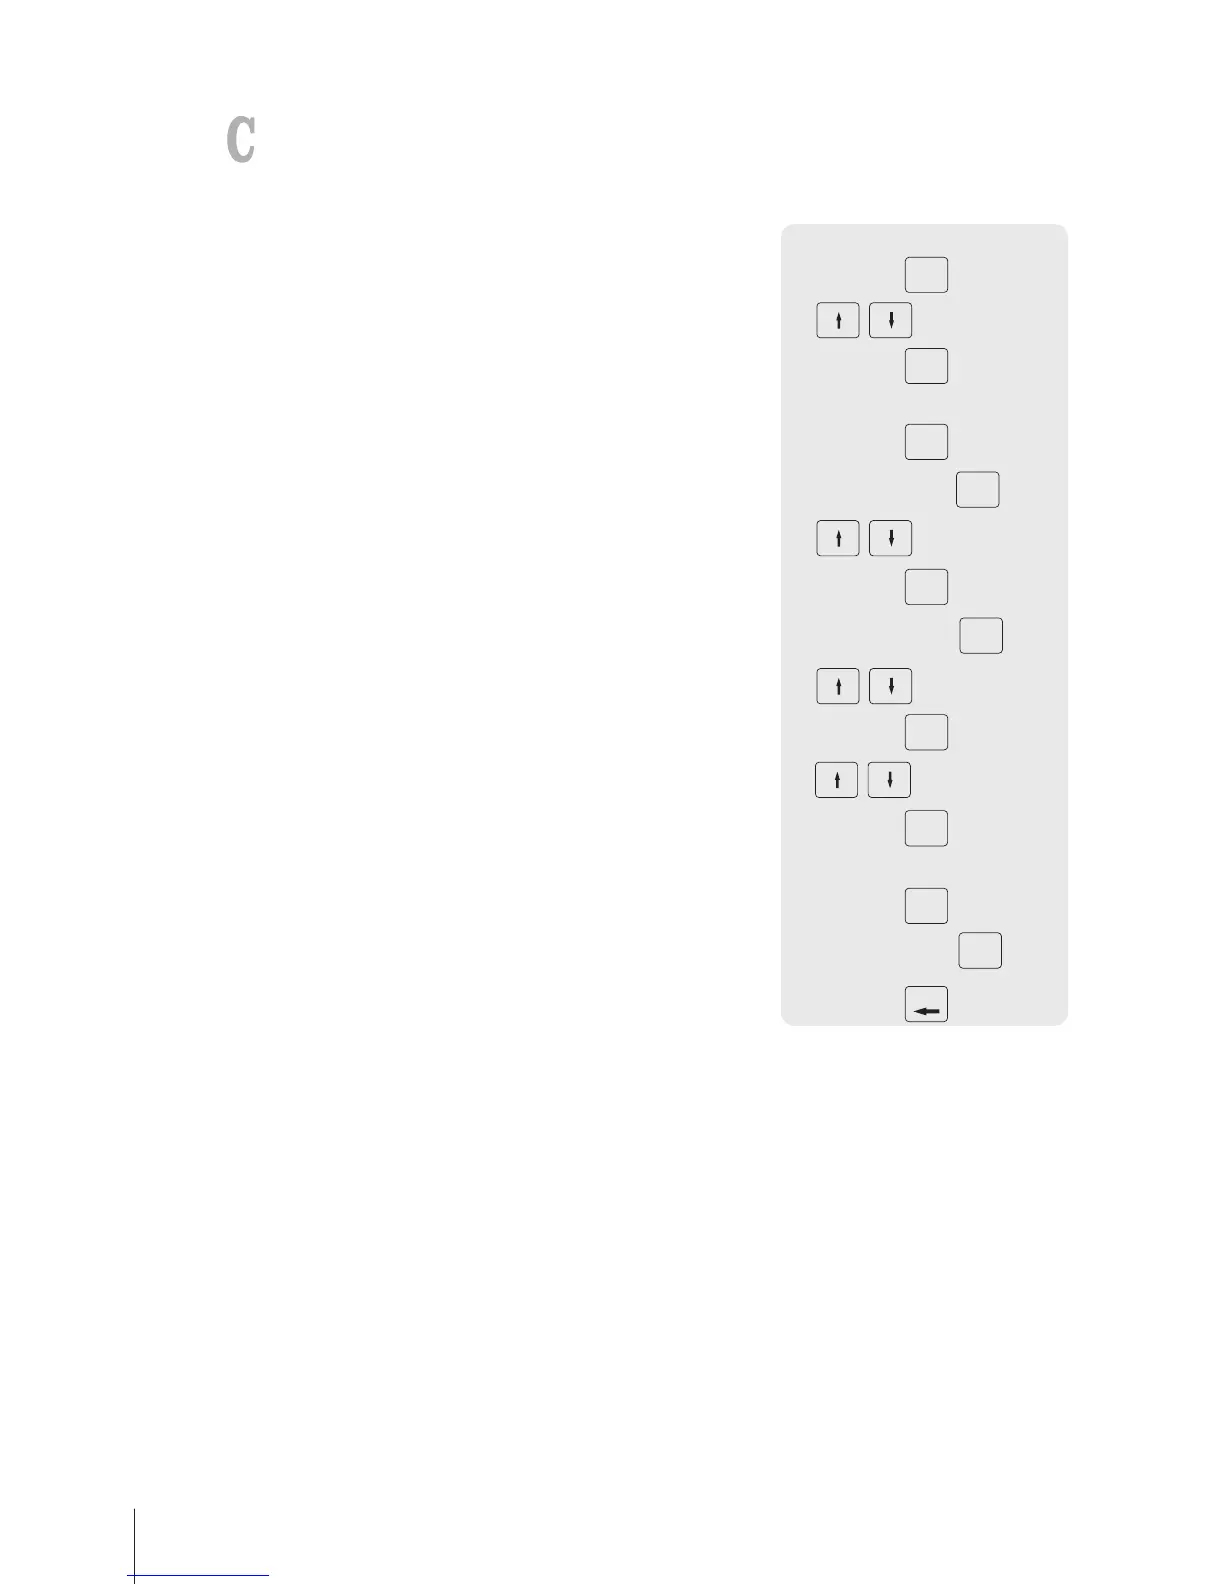
Configuring a barcode
1 Enter the menu and navigate to sub-menu F116 Barcode.
2 Press the OK key.
3 Use the arrow keys to select "Create New ?" and confirm with the
OKkey.
4 Select "Barcode ID" and confirm with the OK key.
5 Enter an unused barcode ID number and confirm with the OK key.
ð The next available barcode ID number is shown as default.
6 Use the arrow keys to select "Barcode Name" and confirm with the
OK key.
7 Define a name as reference with the keyboard for this barcode
and confirm with the OKkey.
8 Select "Barcode Type" and confirm with the OK key.
9 Use the arrow keys to select the desired barcode type and confirm
with the OK key.
ð Barcode type EAN 8 and EAN 13 from the GS1 standard are
available.
10 Select "Barcode Format" and confirm with the OK key.
11 Use the keyboard to enter the placeholders, see table below.
12 Confirm with the OK key.
13 Press the Back key repeatedly to return to the main menu/main
screen.