- 51 -
Printing on various papers
4
1
2
3
5
Apéndice Índice
Comprobar y cambiar
la conguración de la
impresora utilizando el
panel de control
Cong de
red
Concordar
los colores
Utilización
de software
de utilidades
Funciones de
impresión útiles
Using Windows XPS printer drivers
1
Click [Start], and then select [Devices
and printers].
2
Select [OKI (product name)(XPS)], and
select "Print Server Properties" in the
tool bar.
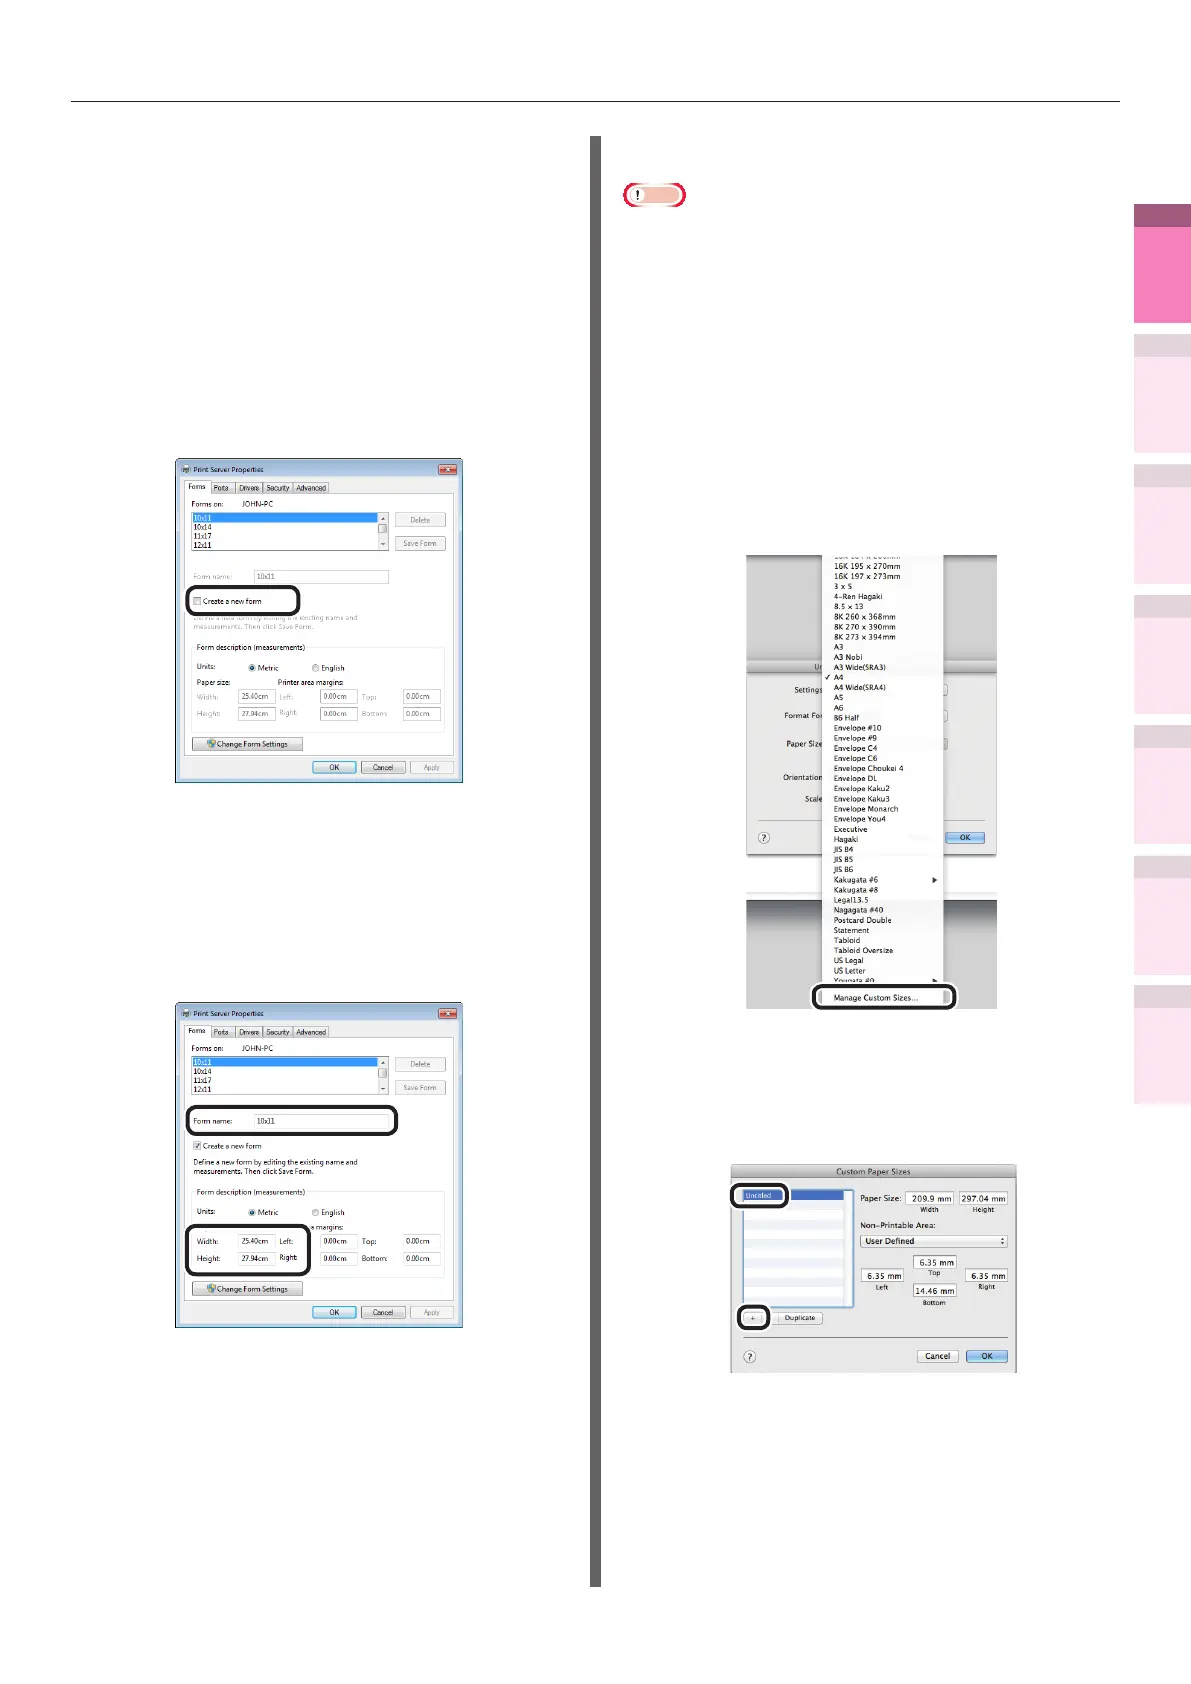
3
Enable the [Create a new form] check
box in the [Forms] tab.
4
Enter the name and size.
(1)
Enter the new size name in [Form
name].
(2)
Enter the [Width] and [Height]
values.
5
Click [Save Form].
6
Click [Close].
7
Open the le to be printed.
8
Specify the registered paper size to
print.
Using Mac OS X printer drivers
Note
z
Custom sizes exceeding the printable range can be
entered using Mac OS X, but printing will be incorrect. Set
within the correct range.
z
If a custom paper size with the same paper size as
registered in the OS is specied, the paper may be
handled as regular paper.
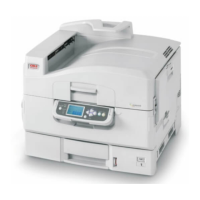
1
Open the le to be printed.
2
Select [Page Setup] in the [File] menu.
3
Select [Manage Custom Sizes] in [Paper
Size].
4
Click [+] in the "Custom Paper Sizes"
screen. Double-click [Untitled], and enter
a name in [Custom Paper Sizes]. Enter the
[Width] and [Height] page sizes.
5
Click [OK].
The created paper will be displayed at the
bottom of the [Paper Size] list in the [Page
Properties] panel.
6
Printing will be implemented.