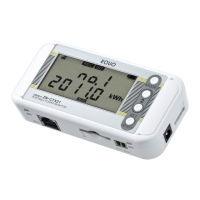
3. Check and Preparation
3-12
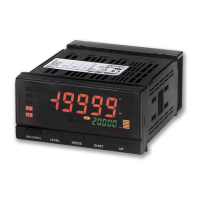
(3) Changing IP Address (from factory default: 192.168.0.20 to 192.168.0.21)
IP
DISP
Display the first segment of the IP address. Press the
▽
△
key until "P 1" appears at the upper row.
▽or △ Key
IP 1
192
Check that "192" is displayed at the lower row, and press the
▽
key.
If “192” is not displayed, change the value referring to the changing
“IP 4” example shown later.
▽
IP 2
168
Check that "168" is displayed at the lower row, and press the
▽
key.
If “168” is not displayed, change the value referring to the changing
“IP 4” example shown later.
▽
IP 3
0
Check that "0" is displayed at the lower row, and press the
▽
If “0” is not displayed, change the value referring to the changing
“IP 4” example shown later.
▽ Key
IP 4
20
Press the SET/REC/STOP key to change the value displayed at
the lower row to "21".
SET/REC/STOP Key
IP 4
020
↑Blinking
The value starts blinking. Press the
▽
△
value to "21".
▽
△
021
↑
Press the SET/REC/STOP key to apply the value. Blinking stops.
IP 4
21
To check or change the subnet mask, press the
▽
"SUB1" at the upper row.
▽
Check that SUB1 to SUB4 are set to 255, 255, 255 and 0 respectively and apply them
in the same way as the procedure above.
After the settings for IP 1 to IP 4 and SUB1 to SUB4 are completed, press the
MODE key.
"RESET" is displayed and the unit resets itself.