85
GB
1505093, Edition 2012-05, Version 5
8 Dismantling / Mounting in Case of Service
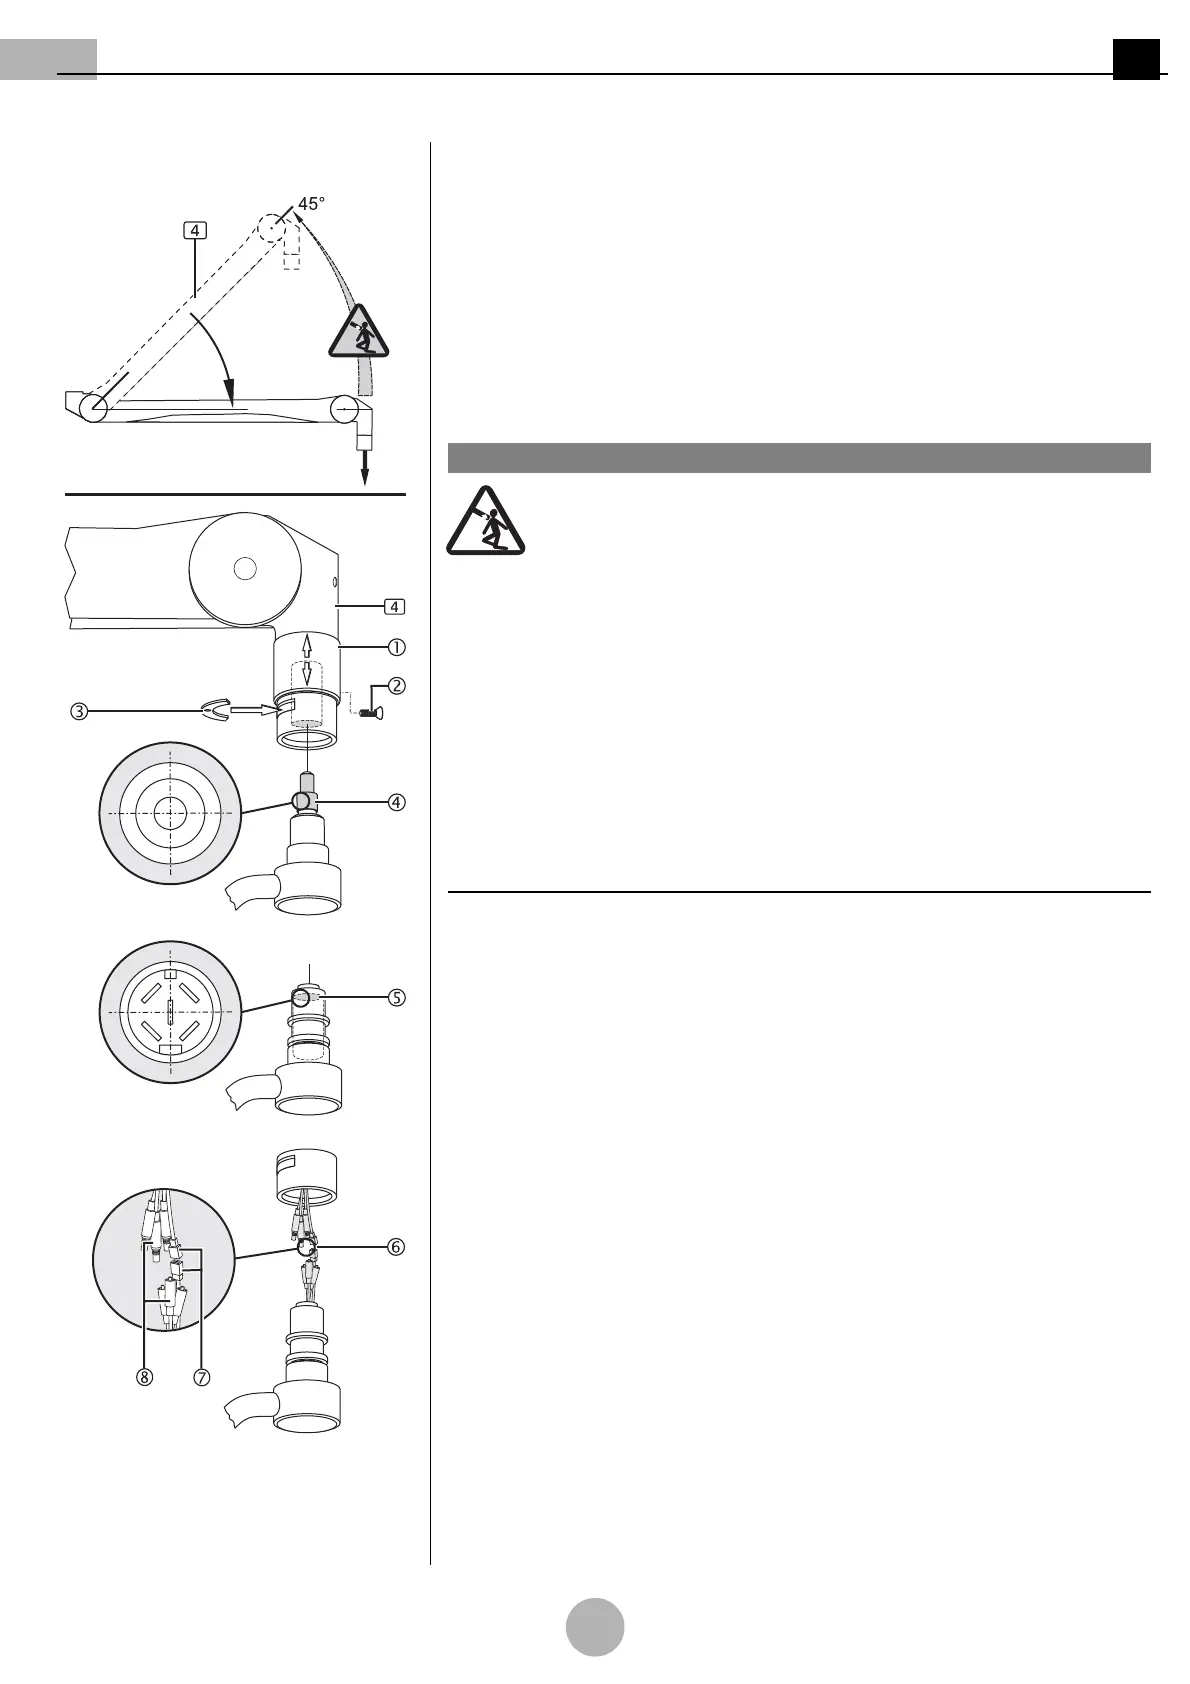
Figure 9: Dismantling the end device from
the spring arm (standard version)
8.3 Dismantling the end device from the ACROBAT2000 spring
arm
(See "Figure 9")
Follow the safety instructions
Follow the general safety instructions prescribed in
“Chapter 8.1” on page 80
.
1. Check whether the end device (e.g. OR lamp) on the spring arm 4 can now be ro-
tated more than 360degrees.
• If this is the case, an internal 3-, 5- or 7/9-pole plug coupling 4-6 has been mounted
and the end device (e.g. OR lamp) may be dismantled by you as a technician author-
ised by the operator.
Sudden release of spring arm
The spring arm 4 contains a powerful spring. When the end device (e.g.
OR lamp) is dismantled, the spring arm can suddenly jump up and may
cause serious injury:
• Before removing the end device (e.g. OR lamp), make sure that the
vertical lift of the spring arm 4 as described in
“Chapter 9.4.1” on
page 100
is restricted to the lowermost end stop (horizontal position).
2. Restrict the vertical lift of the spring arm 4 to the horizontal position as described in
“Chapter 9.4.1” on page 100
.
➥ It must no longer be possible to move the spring arm 4 upwards beyond the hori-
zontal position.
3. Unscrew the sleeve securing screw M3 x 8mm 2 and push the sleeve 1 upwards.
4. To relieve the securing segment 3 slightly lift the end device and remove it using a
suitable slotted screwdriver.
NOTE – Different plug couplings
Depending on the version of the end device (e.g. OR lamp), the spring arm 4 is equipped
with a 3-, 5- or 7/9-pole plug coupling.
For the 3-pole 4 and 5-pole plug couplings 5 only:
• Carefully remove the end device (e.g. OR lamp) from the spring arm 4, keeping it
straightly aligned.
For the 7/9-pole plug coupling 6 only:
• Carefully remove the end device (e.g. OR lamp) from the spring arm 4, keeping it
straightly aligned.
• Screw the 3 plug adapters 8 apart, disengage the 6-pole plug 7 and remove the end
device (e.g. OR lamp).
5. Insert the securing segment 3, push the sleeve 1 downwards and screw the slee-
ve securing screw M3 x 8mm 2 back in.
Marking
If you do not mount another end device (e.g. OR lamp) directly after dismantling, the plug
coupling in the spring arm 4 is energised whilst the mains supply is switched on.
1. Mark the mains supply in the room with a warning sign:
ELECTRIC SHOCK HAZARD – DO NOT SWITCH ON THE POWER SUPPLY!
2. Mount the end device (e.g. OR lamp) later as described in
“Chapter 8.4” on page 86
.
1WARNING