58
Configuring Various Settings
Ethernet settings
After your setting completes, it will take about
two seconds to write the setting to the NC-500.
If you turned off the NC-500 before completing
writing the setting, the setting will be lost. In such
case, do the necessary setting again.
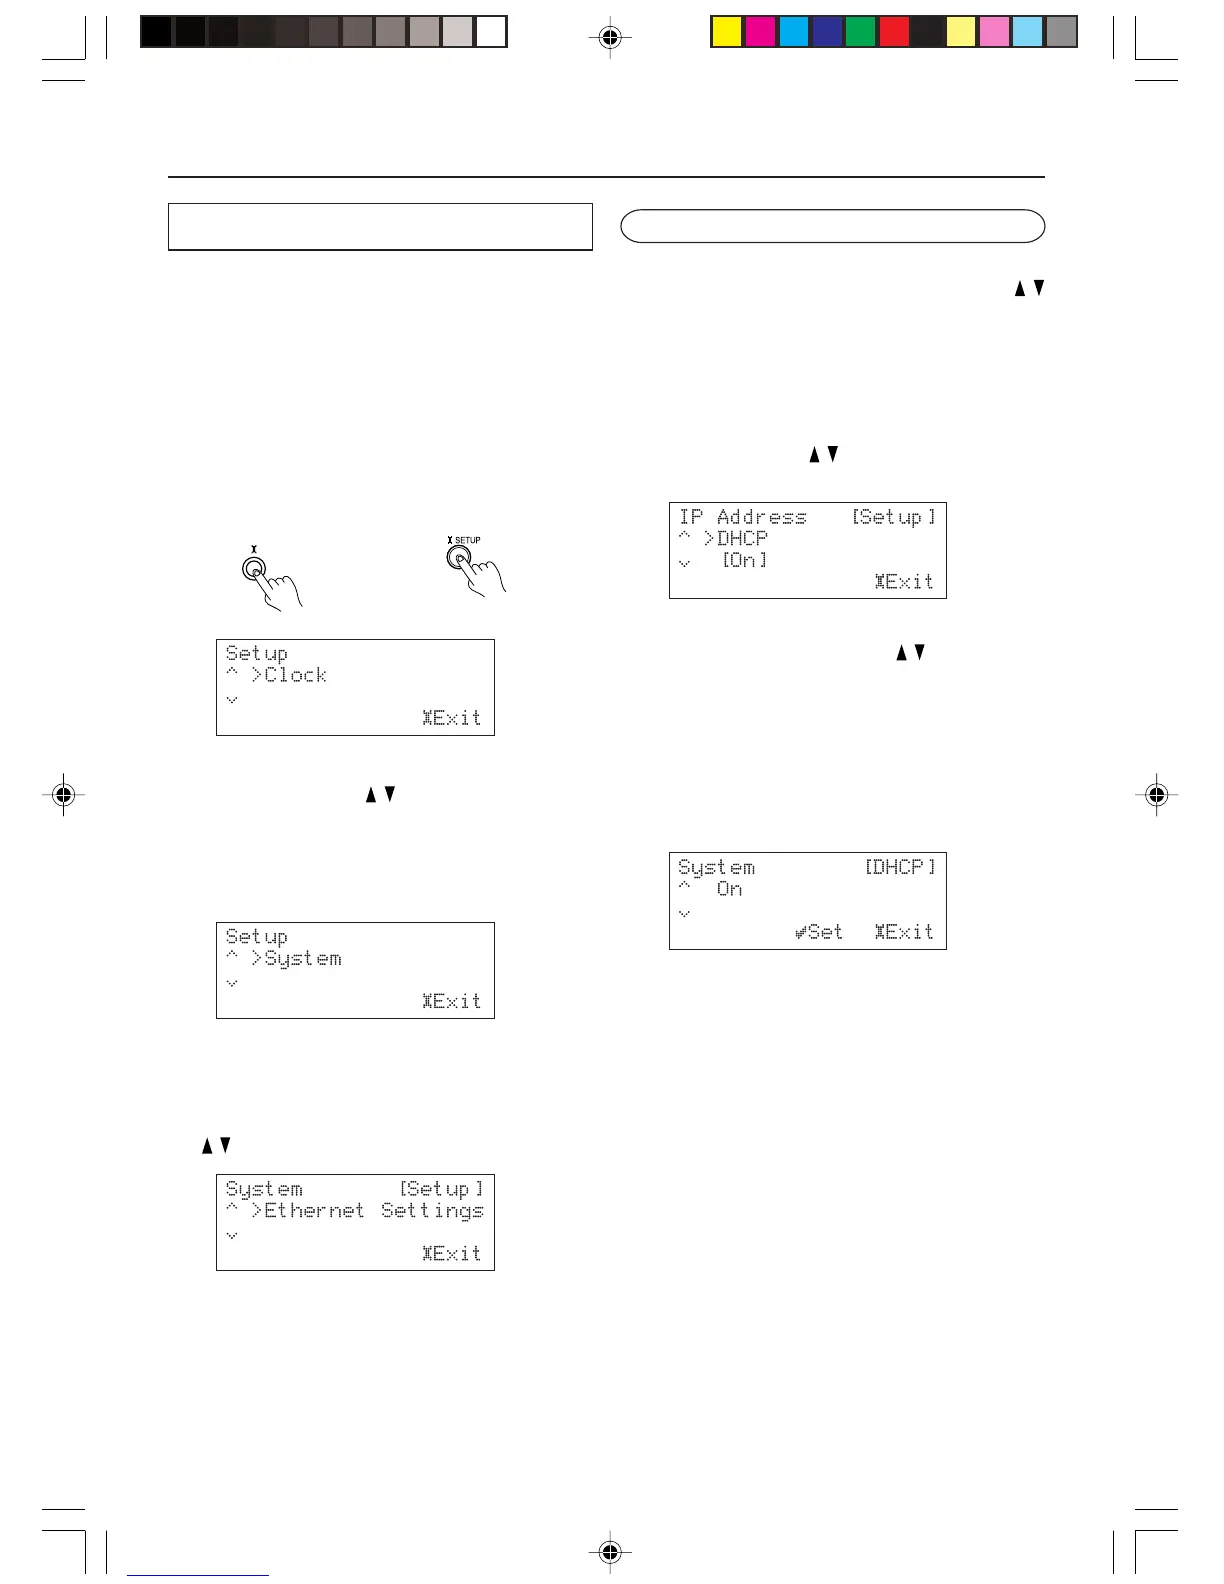
1. Activate menu mode.
Press the SETUP button to display the setup
items in the display area.
2. Select the System setting menu.
Press the Cursor / button repeatedly to
display “System” in the display area.
You are presented with the following menu
items in this order: Clock, Server, iNet Radio,
FM Radio, AM Radio and System.
Press the SETUP button.
3. Select “Ethernet Setting.”
Select “Ethernet Setting” using the Cursor
/ button, and press the SELECT button.
IP Address settings:
From the “System” → “Ethernet Settings,”
select “IP Address” using the Cursor /
button, and press the SELECT button.
• Turning on or off the DHCP feature:
From the “System” → “Ethernet Settings” →
“IP Address” setup menu, select “DHCP”
using the Cursor
/ button. Then press the
SELECT button.
Set this setting to On if your router is enabled
for DHCP using the Cursor / button.
With the DHCP feature set to On, the NC-500
automatically configures all the network
settings. This means that you do not have to
configure the following IP Address settings.
If you opt to turn off the feature, then you
need to configure the following IP Address
settings manually.
Press the SETUP button to confirm the new
setting.
NC-500 Remote controller
SETUP
 Loading...