Other Information
59
Configuring Various Settings
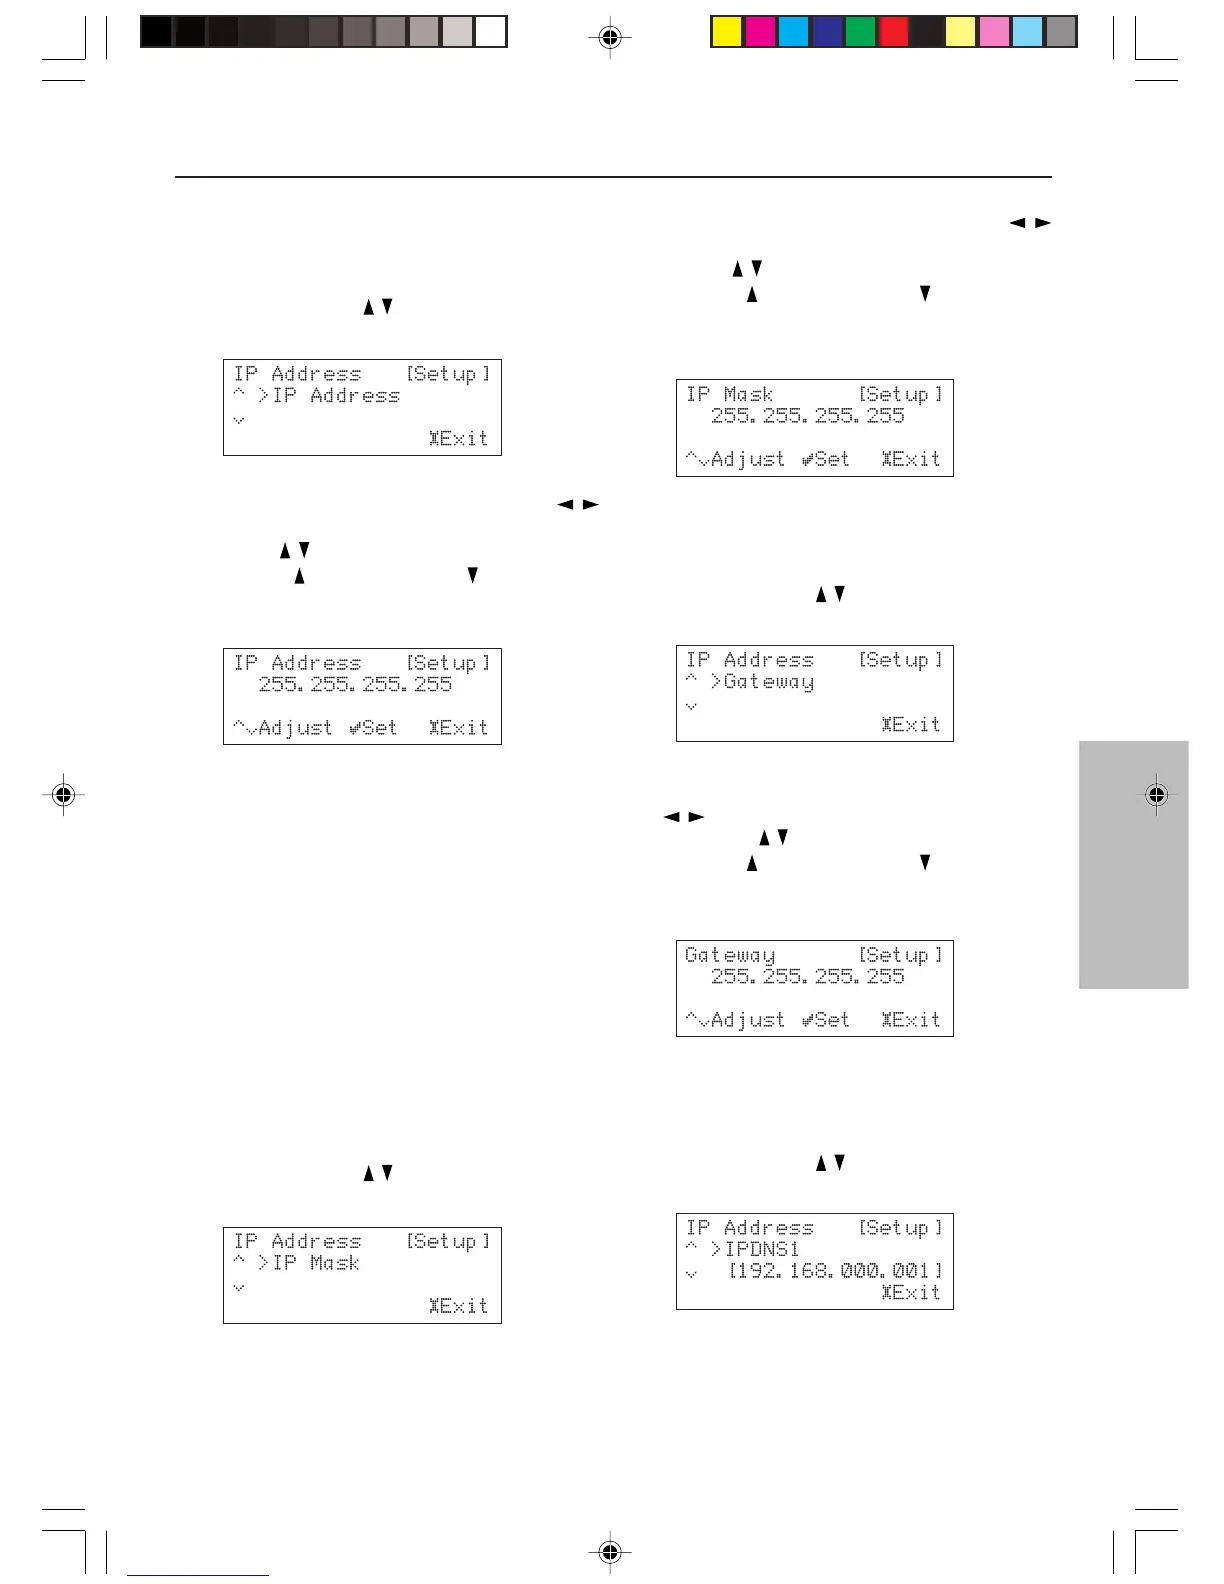
• Specifying the IP address:
From the “System” → “Ethernet Settings” →
“IP Address” setup menu, select “IP Address”
using the Cursor
/ button. Then press the
SELECT button.
Enter the IP address using the Cursor
/
button to select the digit to change and the
Cursor / button to change the number.
Press the
to increment and to decrement
the number. Then press the SELECT button
to confirm the new setting.
Specify the IP address within the following
range:
CLASS A: 10.0.0.0 to 10.255.255.255
CLASS B: 172.16.0.0 to 172.31.255.255
CLASS C: 192.168.0.0 to 192.168.255.255
Because the most of the routers commercially
available is set to the CLASS C IP address,
specify the CLASS C IP address for the NC-
500. If you set the IP address out of the ranges
shown above, you cannot use the Net Tune
function.
• Specifying the IP mask:
From the “System” → “Ethernet Settings” →
“IP Address” setup menu, select “IP Mask”
using the Cursor
/ button. Then press the
SELECT button.
Enter the IP mask using the Cursor
/
button to select the digit to change and the
Cursor / button to change the number.
Press the
to increment and to decrement
the number. Then press the SELECT button
to confirm the new setting.
• Specifying the gateway address:
From the “System” → “Ethernet Settings” →
“IP Address” setup menu, select “Gateway”
using the Cursor
/ button. Then press the
SELECT button.
Enter the gateway address using the Cursor
/ button to select the digit to change and
the Cursor / button to change the number.
Press the
to increment and to decrement
the number. Then press the SELECT button
to confirm the new setting.
• Specifying the DNS address:
From the “System” → “Ethernet Settings” →
“IP Address” setup menu, select “IP DNS1”
using the Cursor
/ button. Then press the
SELECT button.
 Loading...