Chapter 4 - Capture images
5. Ask the patient to look at the new alignment target, without moving their head. Align the scan head
to the eye steered alignment target. Make sure the patient can see the target, that the target is green
and that the cross hairs are close to the center of the pupil.
6. Capture the image either manually or using auto-capture.
l
Auto-capture: Auto-capture is enabled when Automatic is shown in green on the touch screen.
The system captures an image when the scan head is correctly aligned. You can press the
screen to manually capture the image. Auto-capture is turned off after capturing an image.
l Manual capture: Align the scan head into the correct position. Press the screen to capture the
image when the pupil is in the center of the cross hairs and the patient alignment target is
green. You can also capture using the hand control.
7. Check the quality of the images (see What to do after the image is captured on the previous page).
4.6 How to capture SLO stereo images
Depending on the features available on your device, you may be able to capture stereo pairs.
The stereo pair options are selected by touching an option or pushing the control in the required direction.
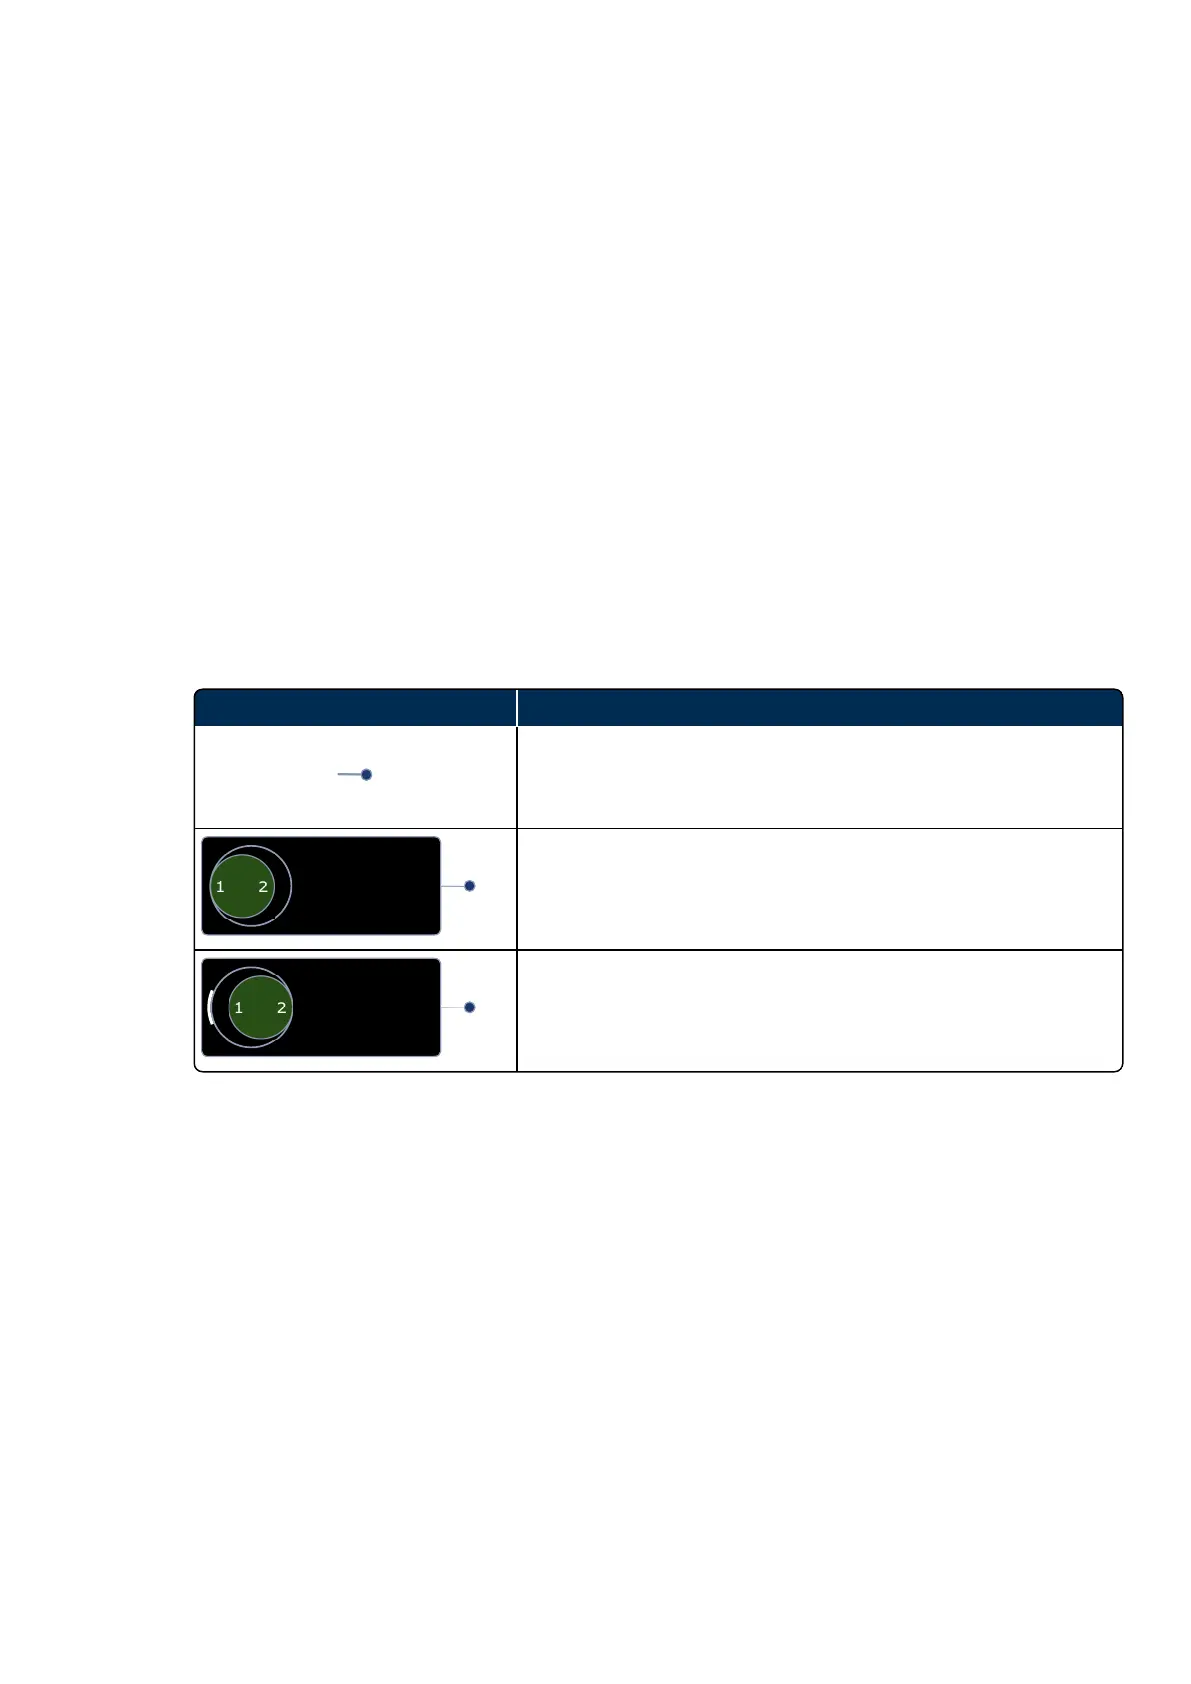
TABLE 6: Examples of stereo buttons
Description
Mode selector
Changes the control to display either eye steering or stereo
directions.
Stereo 1 selected
The next image captured will be a Stereo 1 image.
Stereo direction captured indicator
In this example, a Stereo 1 image has already been captured and
the next image captured will be a Stereo 2 image.
1. Position the patient (see How to prepare for image capture on page36).
2. Align the patient (see How to align the patient on page37).
3. Select the stereo pair options on the touch screen.
4. Select the first stereo image. The cross hairs will move to the left. Align the patient to the first stereo
alignment target. Make sure the patient can see the target, that the target is green and that the cross
hairs are close to the center of the pupil.
5. Capture the image either manually or using auto-capture.
l
Auto-capture: Auto-capture is enabled when Automatic is shown in green on the touch screen.
The system captures an image when the scan head is correctly aligned. You can press the
screen to manually capture the image. Auto-capture is turned off after capturing an image.
l Manual capture: Align the scan head into the correct position. Press the screen to capture the
image when the pupil is in the center of the cross hairs and the patient alignment target is
green. You can also capture using the hand control.
Part Number: G110230-003-ENG Page 41 of 84
Copyright 2019-2021, Optos plc. All rights reserved. English