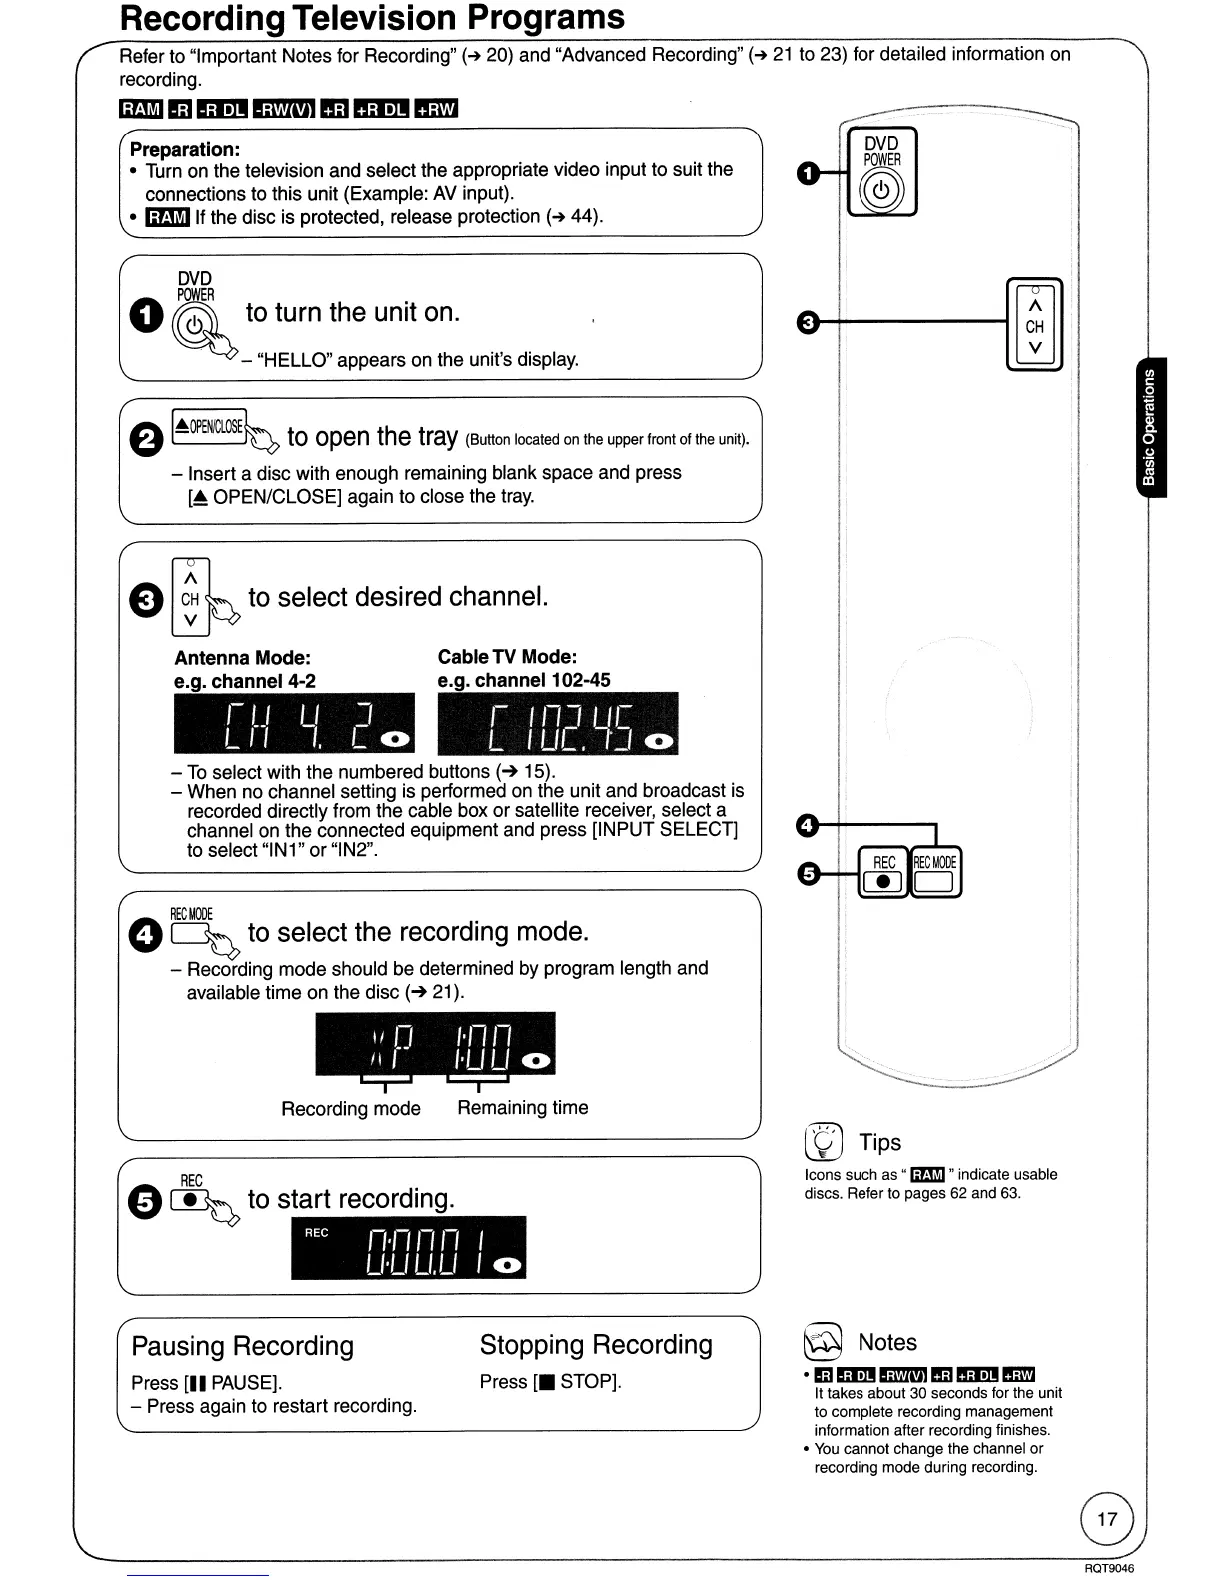
Recording Television Programs
Refer to "Important Notes for Recording"
(-+
20) and "Advanced Recording"
(-+
21
to 23) for detailed information
on
recording.
lim!
iii
ED
OM
1m
IDm
Im'l'J
Preparation:
• Turn
on
the television and select the appropriate video input to suit the
connections to this unit (Example:
AV
input).
• lim! If the disc is protected, release protection
(-+
44).
DVD
POWER
o
~
to turn the unit on.
- "HELLO" appears on the unit's display.
ft
I~OPEWCLOSE~
V
to
open
the tray (Sutton located
on
the upper front
of
the
unit).
- Insert a disc with enough remaining blank space and press
[~
OPEN/CLOSE] again to close the
tray.
eI
~
~
to select desired channel.
Antenna Mode: Cable
TV
Mode:
e.g. channel
4-2
e.g. channel 102-45
n-l------~
[
~
I
'-u u ]
LIt
t.
L 0
,- 11l111'-
L t
LlC.
-,.] 0
-
To
select with the numbered buttons
(-+
15).
- When no channel setting is performed
on
the unit and broadcast is
recorded directly from the cable box or satellite receiver, select a
channel on the connected equipment and press [INPUT SELECT]
to select "IN1"
or
"IN2".
RECMOOE
o
~
to select the recording mode.
- Recording mode should be determined by program length and
available time on the disc
(-+
21).
II
Il /·Illl
II
,--
I·LI
LI
0
- -
Recording mode
REC
o
~
to start recording.
Remaining time
[J
Tips
Icons such as
"1:&
"indicate usable
discs. Refer to pages 62 and 63.
REC
1l.1l1l1l
I
LI·LI
Ll.LI
t 0
Pausing Recording
Press
[II
PAUSE].
- Press again to restart recording.
Stopping Recording
Press
[.
STOP].
@ Notes
•
!iJ
mll!m'll'1I
1m
mEl
m
It takes about 30 seconds for the unit
to complete recording management
information after recording finishes.
•
You
cannot change the channel
or
recording mode during recording.
RQT9046
 Loading...