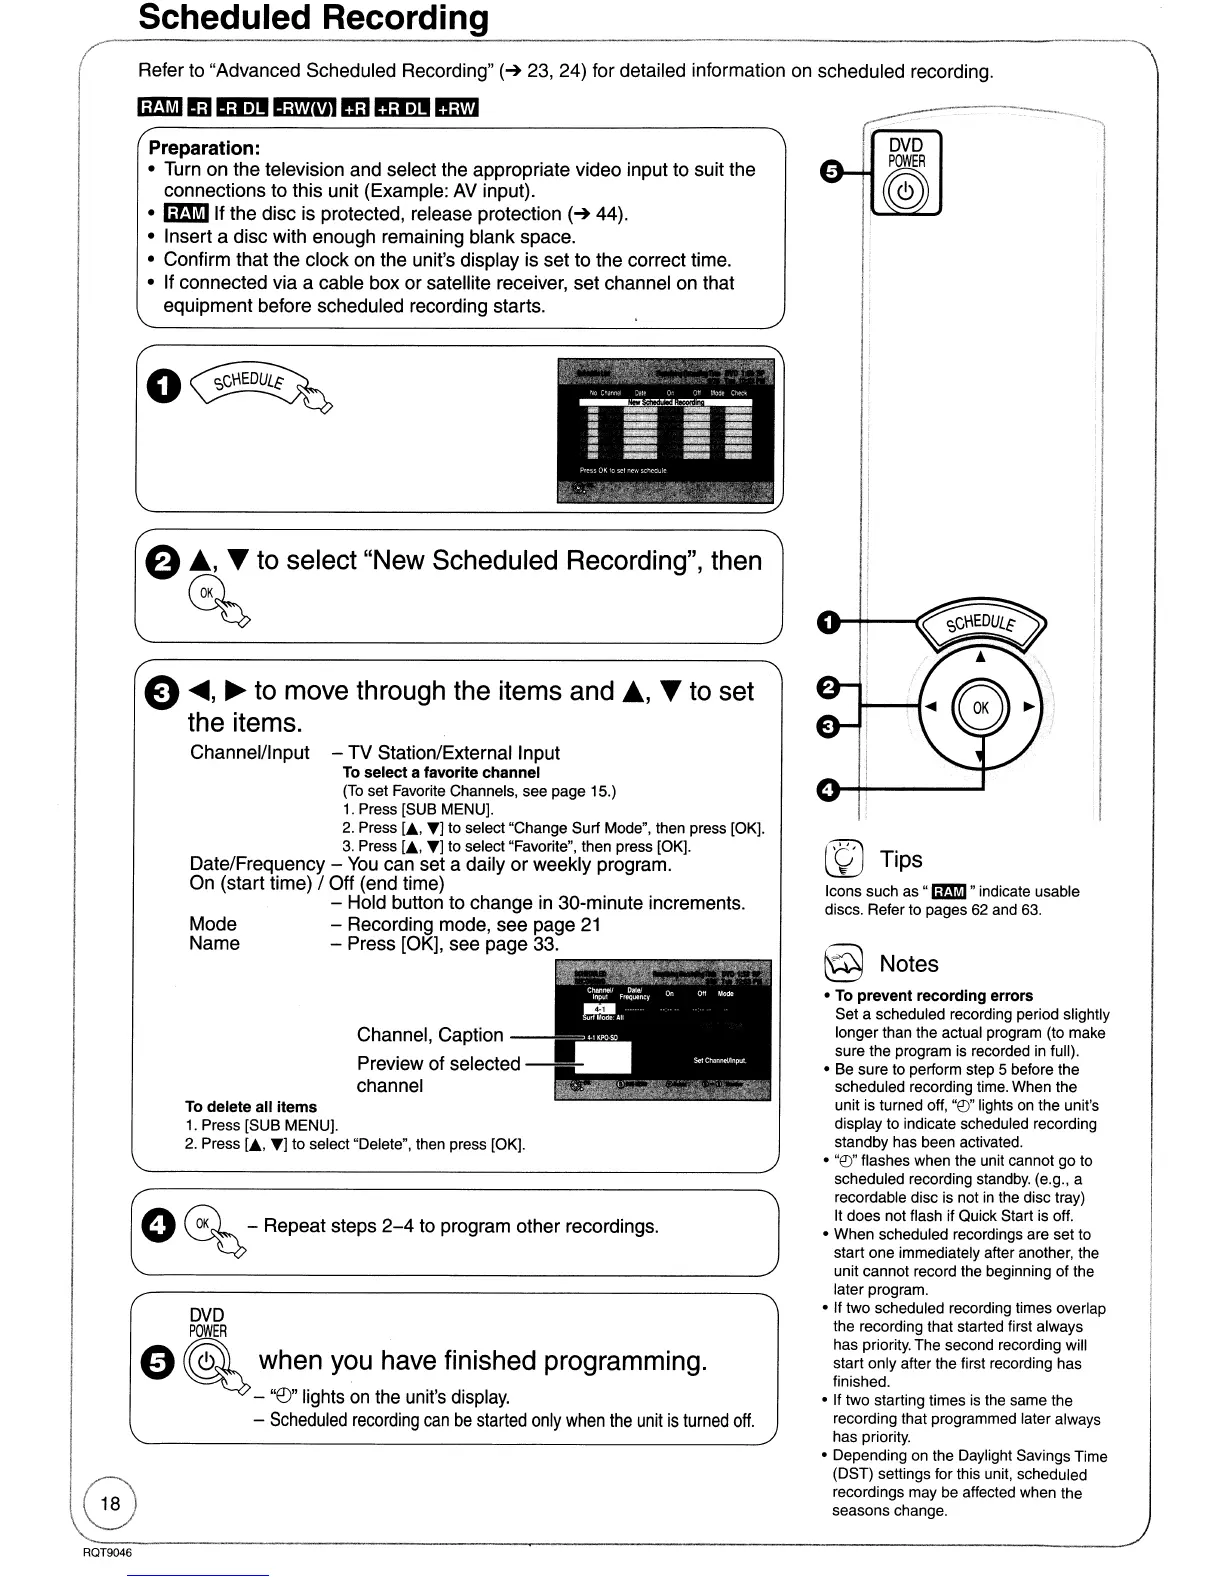
Scheduled Recording
Refer to "Advanced Scheduled Recording"
(~
23, 24) for detailed information on scheduled recording.
IIlDI
EJ
Elm
EMM
1m
nmm
mm
@ Notes
o
To
prevent recording errors
Set a scheduled recording period slightly
longer than the actual program (to make
sure the program is recorded
in
full).
o Be sure to perform step 5 before the
scheduled recording time. When the
unit is turned off,
"e:J"
lights on the unit's
display to indicate scheduled recording
standby has been activated.
o
"e:J"
flashes when the unit cannot go to
scheduled recording standby. (e.g., a
recordable disc is not
in
the disc tray)
It does not flash if Quick Start is off.
o When scheduled recordings are set to
start one immediately after another. the
unit cannot record the beginning of the
later program.
o If two scheduled recording times overlap
the recording that started first always
has priority. The second recording will
start only after the first recording has
finished.
o If two starting times is the same the
recording that programmed later always
has priority.
o Depending
on
the Daylight SaVings Time
(DST) settings for this unit, scheduled
recordings may be affected when the
seasons change.
lfJ
Tips
Icons such as "
IilJi!iI
"indicate usable
discs. Refer to pages 62 and 63.
Channel, Caption
Preview of selected
---
channel
To
delete all items
1. Press [SUB MENU).
2.
Press [....
T)
to select "Delete". then press [OK).
Preparation:
• Turn on the television and select the appropriate video input to suit the
connections to this unit (Example:
AV
input).
•
IIlDIlf
the disc is protected, release protection
(~
44).
• Insert a disc with enough remaining blank space.
• Confirm that the clock on the unit's display is set to the correct time.
• If connected via a cable box or satellite receiver, set channel on that
equipment before scheduled recording starts.
o~
a
A,
~
to select "New Scheduled Recording", then
C%
e
.....
,
~
to move through the items and
A,
~
to set
the items.
Channel/Input -
TV
Station/External Input
To
select a favorite channel
(To
set Favorite Channels, see page 15.)
1.
Press [SUB MENU).
2.
Press L
T)
to select "Change Surf Mode". then press [OK).
3.
Press L
T)
to select "Favorite", then press [OK).
Date/Frequency -
You
can set a daily
or
weekly program.
On (start time) / Off (end time)
- Hold button to change in 30-minute increments.
Mode - Recording mode, see page
21
Name - Press [OK], see page 33.
o
C%
-Repeat steps
2-4
to program other recordings.
DVD
POWER
e
~
when you have finished programming.
-
"E9"
lights
on
the unit's display.
-
Scheduled
recording
can
be
started
only
when
the
unit
is
turned
off.
ROT9046
 Loading...