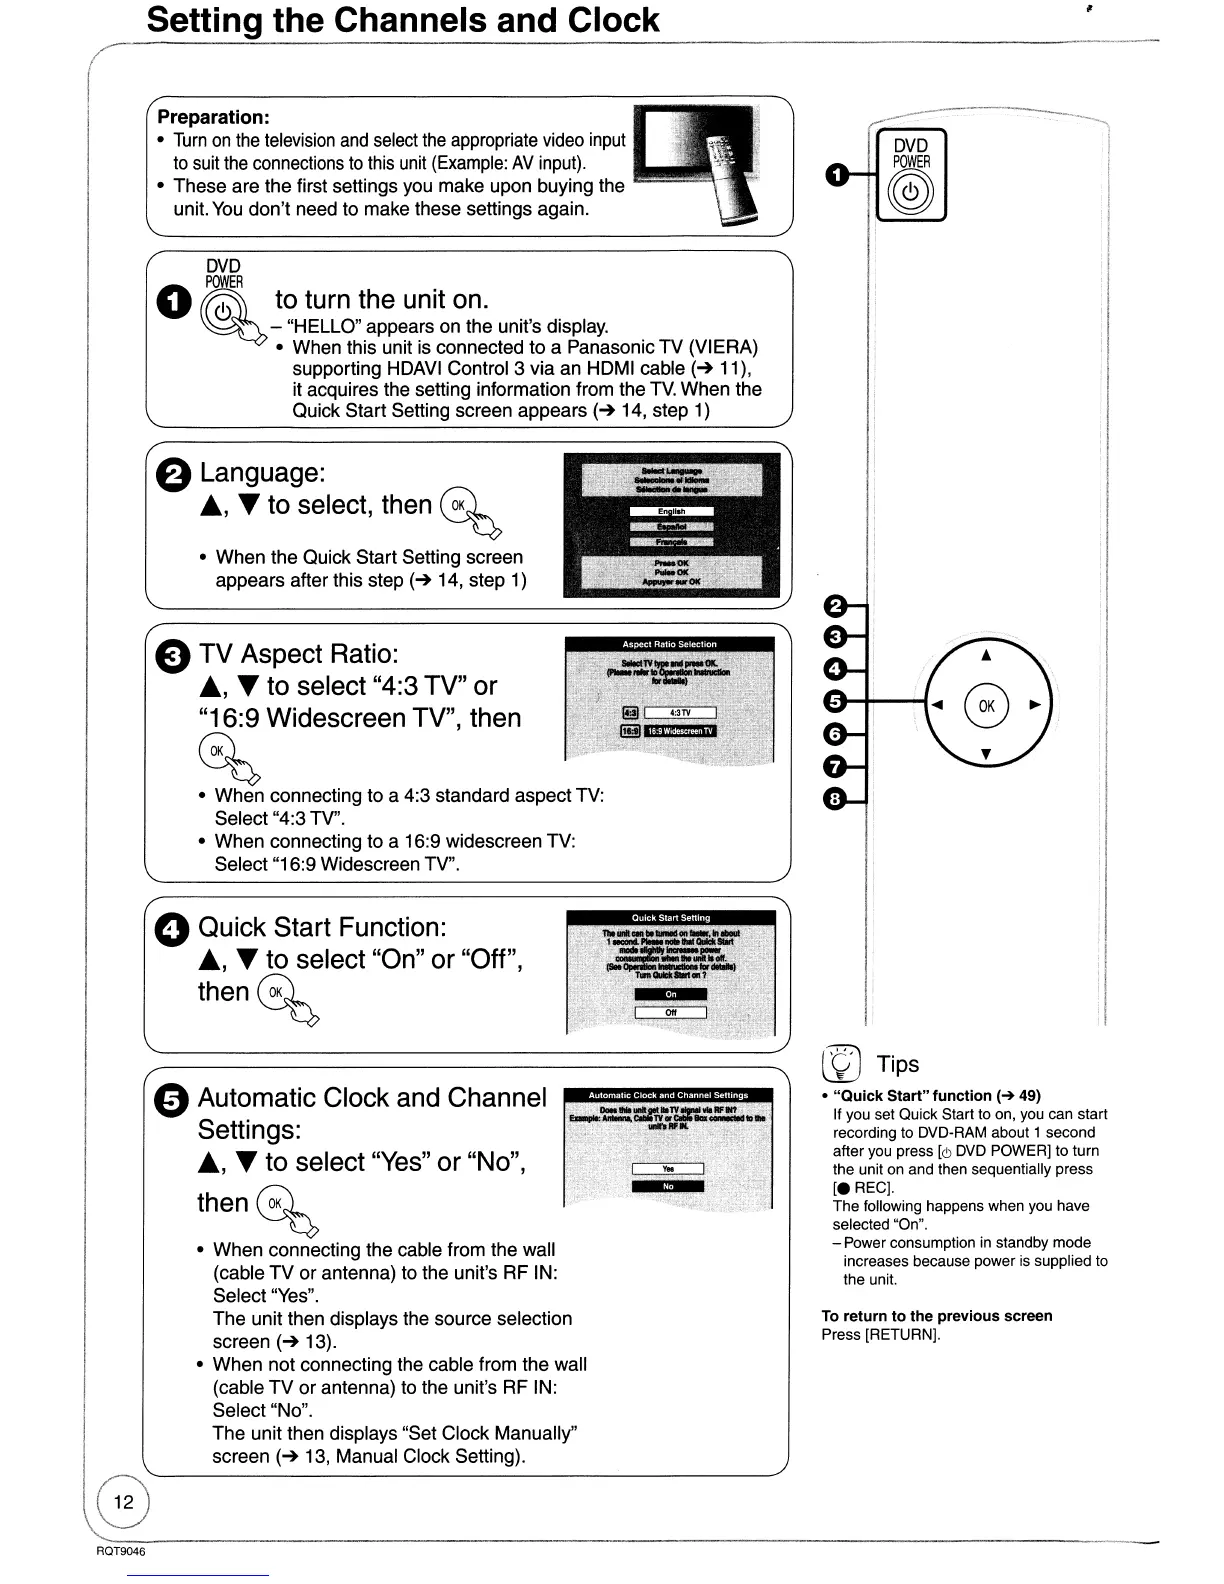
Setting the Channels and Clock
DVD
POWER
®
To return to the previous screen
Press [RETURN].
© Tips
•
"Quick
Start" function
(-+
49)
If you set Quick Start
to
on, you can start
recording to DVD-RAM about 1 second
after you press
[c!J
DVD POWER] to turn
the unit on and then sequentially press
[e
REG].
The following happens when you have
selected "On".
- Power consumption
in
standby mode
increases because power
is
supplied
to
the unit.
=t1Y
..
JYc:r-
....
llFlIlt;I~;;'
.;~~].~~:
;~f~~;
,,~,
' .
/;c
,
DVD
POWER
o® to turn the unit on.
~
- "HELLO" appears on the unit's display.
• When this unit is connected
to
a Panasonic
TV
(VIERA)
supporting HDAVI Control 3 via an HDMI cable
(~
11),
it acquires the setting information from the
TV.
When the
Quick Start Setting screen appears
(~
14, step 1)
Preparation:
•
Turn
on
the
television
and
select
the
appropriate video
input
to
suit
the
connections
to
this
unit
(Example:
AV
input).
• These are the first settings you make upon buying the
unit.
You
don't need to make these settings again.
a Language:
.&.,
T to select, then
~
• When the Quick Start Setting screen
appears after this step
(~
14, step 1)
e TV Aspect Ratio:
.&.,
T to select "4:3 TV"
or
"16:9 Widescreen TV", then
~
• When connecting to a 4:3 standard aspect TV:
Select "4:3 TV".
• When connecting to a 16:9 widescreen TV:
Select "16:9 Widescreen TV".
oQuick Start Function:
.&.,
T to select "On" or "Off",
then~
oAutomatic Clock and Channel
Settings:
.&.,
T to select
"Yes"
or "No",
then~
• When connecting the cable from the wall
(cable
TV
or antenna) to the unit's RF IN:
Select "Yes".
The unit then displays the source selection
screen
(~
13).
• When not connecting the cable from the wall
(cable
TV
or
antenna) to the unit's RF IN:
Select "No".
The unit then displays "Set Clock Manually"
screen
(~
13, Manual Clock Setting).
r
 Loading...