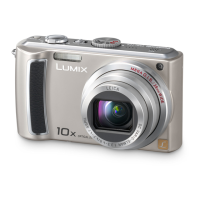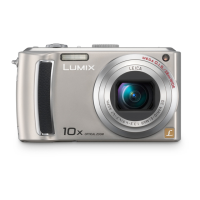
Do you have a question about the Panasonic Lumix DMC-TZ10 and is the answer not in the manual?
| Brand | Panasonic |
|---|---|
| Model | Lumix DMC-TZ10 |
| Category | Digital Camera |
| Language | English |
Important introductory notes, disclaimers, and advice for safe camera operation.
Information on LCD monitor, unit temperature, and preventing damage/malfunctions.
Details the functions of the directional buttons on the camera.
Explains the function of the left directional button.
Explains the function of the down directional button.
Explains the function of the up directional button.
Explains the function of the right directional button.
Discusses compatible battery types and potential risks of counterfeit products.
Provides estimates for picture count and recording duration based on conditions.
Explains the standard conditions under which recording figures are measured.
Details recording time for motion pictures under various conditions.
Explains how to use an AC adapter and DC coupler for continuous power.
Initial step to power on the camera and begin clock setting.
Action to initiate the clock setting process.
Detailed steps for setting the clock and date format.
Option to enable automatic time correction via GPS.
Navigating menus to access clock settings.
Continuing the clock setting procedure.
Feature for setting local time for travel destinations.
Initial step to power on the camera and begin clock setting.
Detailed steps for setting the clock and date format.
Final step to confirm and save clock settings.
Procedure to modify the clock settings via the setup menu.
Feature for setting local time for travel destinations.
How to access the camera's main menu system.
Navigating to the specific SETUP menu.
Choosing an item from the menu list.
Adjusting the chosen setting.
Exiting the menu system.
Overview of different menu types ([REC], [MOTION PICTURE], etc.).
Setting the camera's date, time, and display format.
Adjusting or muting camera beep and shutter sounds.
Controlling the volume of the camera's speakers.
Registering and recalling custom camera settings.
Options to adjust LCD monitor brightness and visibility.
Customizing display of recording information and guidelines.
Verifying the recordable area for motion pictures before shooting.
Settings to conserve battery by dimming LCD or shutting down power.
Automatic power-off feature to save battery life.
Automatically displays still pictures after they are taken.
Remembers the last zoom position when the camera is turned off.
Resets picture file numbers, potentially affecting folder numbering.
Resets camera settings to default values.
Selects communication method for USB connection.
Sets video output format for TV connection.
Adjusts aspect ratio for TV display.
Sets output resolution for HD TVs via HDMI connection.
Enables automatic linking and operation with VIERA Link compatible devices.
Displays the current camera firmware version.
Formats the memory card or built-in memory, erasing all data.
Changes the camera's display language.
Provides a demonstration of camera functions.
Steps to power on the camera.
Selecting the mode for still pictures or playback.
Choosing the appropriate shooting mode via the mode dial.
Basic procedure for taking a picture.
Proper grip and posture for stable shooting.
Explains the different shooting modes available on the mode dial.
Camera automatically sets optimal shooting parameters.
Instructions for using the flash in automatic mode.
Camera automatically identifies and adapts to various scenes.
How to set the 'HAPPY' color effect for vivid coloring.
How the camera detects and recognizes faces for focus and exposure.
Maintaining focus on a moving subject.
Allows manual adjustment of settings for creative control.
Techniques for focusing when the subject is off-center.
Automatic vertical playback of still pictures.
How to use the zoom lever for optical and digital zoom.
Table showing zoom capabilities based on picture size and type.
Explanation of the EZ zoom feature and its benefits.
Using super resolution technology to enhance zoom ratio.
Feature for quick zoom adjustment.
Activating and using digital zoom for extended magnification.
Navigating between captured images.
Using zoom to magnify pictures during playback.
Viewing pictures in a multi-image or calendar format.
Accessing other playback options like slideshows.
How to view recorded video files.
Initial step to prepare for deletion.
Process to delete the currently viewed picture.
Confirming the deletion action.
Methods for batch deletion of images.
Steps to cycle through display options.
Information displayed on the LCD during recording.
Information displayed on the LCD during playback.
Explanation of the brightness histogram display.
Usage of compositional guide lines on the screen.
Accessing flash settings.
Choosing various flash modes.
Explains different flash modes and their applications.
Table showing flash mode availability across different shooting modes.
Accessing the macro mode settings.
Activating autofocus for macro photography.
General instruction for taking a close-up shot.
Table detailing focus range based on ISO and zoom settings.
Using 'Tele macro' for subjects that are distant.
Explanation of the Tele macro feature.
Using [MACRO ZOOM] for greater magnification.
Details on using macro zoom for extreme close-ups.
Focus range charts for specific shooting conditions.
Accessing the self-timer settings.
Choosing the delay time for the self-timer.
The process of taking a photo using the self-timer.
Accessing exposure compensation settings.
Adjusting exposure compensation to correct brightness.
Taking multiple shots with varying exposure settings.
Accessing the auto-bracketing function.
Choosing the exposure compensation steps for bracketing.
Capturing images in multiple aspect ratios simultaneously.
Activating the multi-aspect ratio function.
Turning on the multi-aspect feature.
Setting aperture manually while shutter speed is automatic.
Adjusting aperture for depth of field control.
Table of available aperture values.
Setting shutter speed manually while aperture is automatic.
Adjusting shutter speed for motion blur control.
Table of available shutter speeds.
Manually setting both aperture and shutter speed.
Adjusting both exposure parameters.
Tables for available aperture and shutter speed combinations.
Saving and recalling custom shooting settings.
Process for saving custom configurations.
Using preset modes optimized for specific scenes.
Saving frequently used scene modes to custom slots.
Overview of scene modes and their uses.
Mode for flattering portraits with natural skin tones.
Mode for smoothing skin colors in portraits.
Mode for adjusting subject appearance (slim/glamorous).
Mode for taking self-portraits, often with self-timer.
Mode for clear pictures of distant subjects.
Mode for capturing multiple shots to create a panorama.
Mode for capturing fast-moving subjects.
Mode for preventing blur in dark indoor conditions.
Capturing rapid sequences of still pictures.
Continuous still pictures with flash, useful in dim locations.
Mode for clear pictures of starry skies or dark subjects.
Mode for clear pictures of fireworks in the night sky.
Mode to capture blue skies and seas without darkening subjects.
Mode for natural colors in snowy scenes.
Mode for taking pictures from aircraft windows.
Mode for a retro effect by darkening the area around the screen.
Mode for black and white pictures with a grainy texture.
Reduces over/underexposure in backlit scenes.
Explains different recording formats like AVCHD Lite and Motion JPEG.
Using Intelligent Auto for motion pictures.
Recording motion pictures using PASM modes.
Recording motion pictures using scene modes.
Recording motion pictures in custom modes.
Estimates for recording time based on card size and format.
Information displayed on the LCD during recording.
Information displayed on the LCD during playback.
Explanation of the brightness histogram display.
Usage of compositional guide lines on the screen.
Problems related to camera power and battery.
Troubleshooting the LCD screen and lens operations.
Problems with timekeeping and file numbering sequences.
Troubleshooting GPS positioning and recording failures.
Issues with picture brightness, color, clarity, blur, and interference.
Troubleshooting flash not firing, multiple flashes, and unviewable pictures.
Troubleshooting playback on TV, computer transfer, and printer connectivity.
Covers common issues like language, lens noise, clock, and file numbering.
Explanation of the Global Positioning System and its use in the camera.
Features enabled by the GPS function (location recording, time correction).
How to acquire GPS signals for positioning.
Precautions for GPS use in restricted areas.
Steps to enable and configure the GPS function.
Icons and status indicators for GPS positioning.
How location names are recorded and displayed.
Details of location data stored with images.
Feature to select or change recorded place names.
How to disable place name recording.
Using GPS for automatic time and destination settings.
GPS display customization.
Setting the world time for travel destinations.
Using GPS for automatic time and destination settings.
Recording destination information.
Adjusting for summer time settings.
Recording the date when pictures were taken for travel itinerary.
How to clear travel date information.
Setting the resolution and aspect ratio for pictures.
Guidance on choosing picture size for quality and capacity.
Setting the picture quality (Fine/Standard).
Adjusting aspect ratio for different displays or printing.
Automatic ISO adjustment for lighting and movement.
Manually setting ISO sensitivity.
Adjusting colors based on light source.
Registering people for prioritized focus and recognition.
Changing focus modes (Face detection, AF tracking).
Explains focus area modes.
Continuous autofocus adjustment.
Setting how the camera measures light for exposure.
Adjusting contrast and exposure for lifelike colors.
Setting minimum shutter speed for brighter dark shots.
Enabling rapid succession of pictures.
Using super resolution for sharper outlines.
Multiplying optical or extra optical zoom effects.
Applying color effects to pictures.
Automatically detecting and preventing jitter.
Adjusting picture quality elements like contrast and sharpness.
Recording sound with pictures for conversation or memos.
Setting the camera's clock.
Setting the motion picture recording format.
Reducing picture size for email or web use.
Reducing wind noise during motion picture recording.
Using clipboard mode for timetables and maps.
Steps for taking pictures in clipboard mode.
Feature for enlarging and saving parts of maps.
How to view pictures saved in clipboard mode.
Steps to delete pictures from clipboard storage.
Special menu options for clipboard mode.
Accessing the quick menu.
Steps to bring up the quick menu.
Making adjustments via the quick menu.
Choosing character input modes (alphabet, symbols).
Entering text using the cursor and buttons.
Modifying entered text.
Standard playback of all pictures.
Choosing playback options like 'All' or 'Picture Only'.
Selecting music and screen transition effects for slideshows.
Choosing a geographical area for picture playback.
Selecting a specific location for playback.
Viewing pictures based on the selected location.
Choosing to play back still pictures or motion pictures only.
Viewing selected picture or motion picture data.
Viewing pictures categorized by travel date.
Selecting a specific date to view recorded pictures.
Viewing the selected picture.
Viewing pictures categorized by recorded destination.
Selecting a destination for picture playback.
Viewing the selected picture.
Choosing a category to view pictures (e.g., Portrait, Scenery).
Viewing pictures classified by the selected category.
Manually playing back pictures marked as favorites.
Viewing pictures taken on specific dates via a calendar.
Adding titles to favorite still pictures.
Stamping date, time, or text onto pictures.
Reducing picture size for email or web use.
Enlarging and cropping unwanted areas of still pictures.
Converting aspect ratios of pictures for printing.
Correcting slight slanting in still pictures.
Automatically rotating portrait still pictures.
Labeling pictures with a star for easy access and selection.
Setting print options for DPOF compatible shops or printers.
Setting protection to prevent accidental deletion of pictures.
Editing or deleting face recognition information for pictures.
Editing place name information recorded by GPS function.
Copying pictures between built-in memory and memory card.
Methods for dubbing video to other devices using AV cables.
Using software to manage and copy pictures to a computer.
System requirements for PC connection and software compatibility.
Preparation steps for connecting the camera to a computer.
Structure of folders and file naming conventions on computer.
Instructions for playing AVCHD Lite videos on PC using software.
Instructions for playing Motion JPEG videos on PC using software.
Steps to connect the camera to a PictBridge printer.
Setting the camera for PictBridge printing.
Initiating the printing process.
Instructions for printing multiple pictures.
Embedding date and text information into printed pictures.
Configuring print options directly on the camera.
Steps to connect the camera to a television.
Ensuring the television is powered on and set correctly.
Powering on the camera after connection.
Playing pictures directly from SD card on compatible devices.
Explanation of HDMI interface for digital video devices.
Connecting camera to HD TV via HDMI for high-resolution viewing.
Function for automatic linking and operation with VIERA Link devices.
Using VIERA remote control for camera operations.
Options to switch between different playback modes.
Viewing pictures and navigating through playback modes.
Additional operations like power control and automatic input selection.
Information displayed on the LCD during recording.
Information displayed on the LCD during playback.
Messages related to memory card compatibility, protection, or errors.
Messages for unplayable, protected, or uncopyable pictures.
Messages indicating insufficient memory space.
Messages related to card or built-in memory formatting.
Messages for recording cancellations or folder creation issues.
Messages related to battery status and camera power.
Problems related to camera power and battery.
Troubleshooting the LCD screen and lens operations.
Problems with timekeeping and file numbering sequences.
Troubleshooting GPS positioning and recording failures.
Issues with picture brightness, color, clarity, blur, and interference.
Troubleshooting flash not firing, multiple flashes, and unviewable pictures.
Troubleshooting playback on TV, computer transfer, and printer connectivity.
Covers common issues like language, lens noise, clock, and file numbering.
General advice for optimal camera performance and avoiding interference.
Instructions for cleaning and maintaining the camera.
Guidance on storing the camera and battery for long periods.
Precautions for handling memory cards and data security.
Notes on LCD monitor usage and care.
Handling of personal data stored in the camera and disclaimer.
Disclaimer regarding the warranty and provided data.
Limitation of Panasonic's liability for data loss or damage.
Agreement regarding compliance with export laws.
Information on the coordinate system used for GPS data.
Information about copyright restrictions on map data.
Lists countries where landmark data is available for GPS.
Lists countries where landmark data is not available.
