VQT2R48 145
Some printers can print directly from the camera’s memory card.
For details, see the manual for your printer.
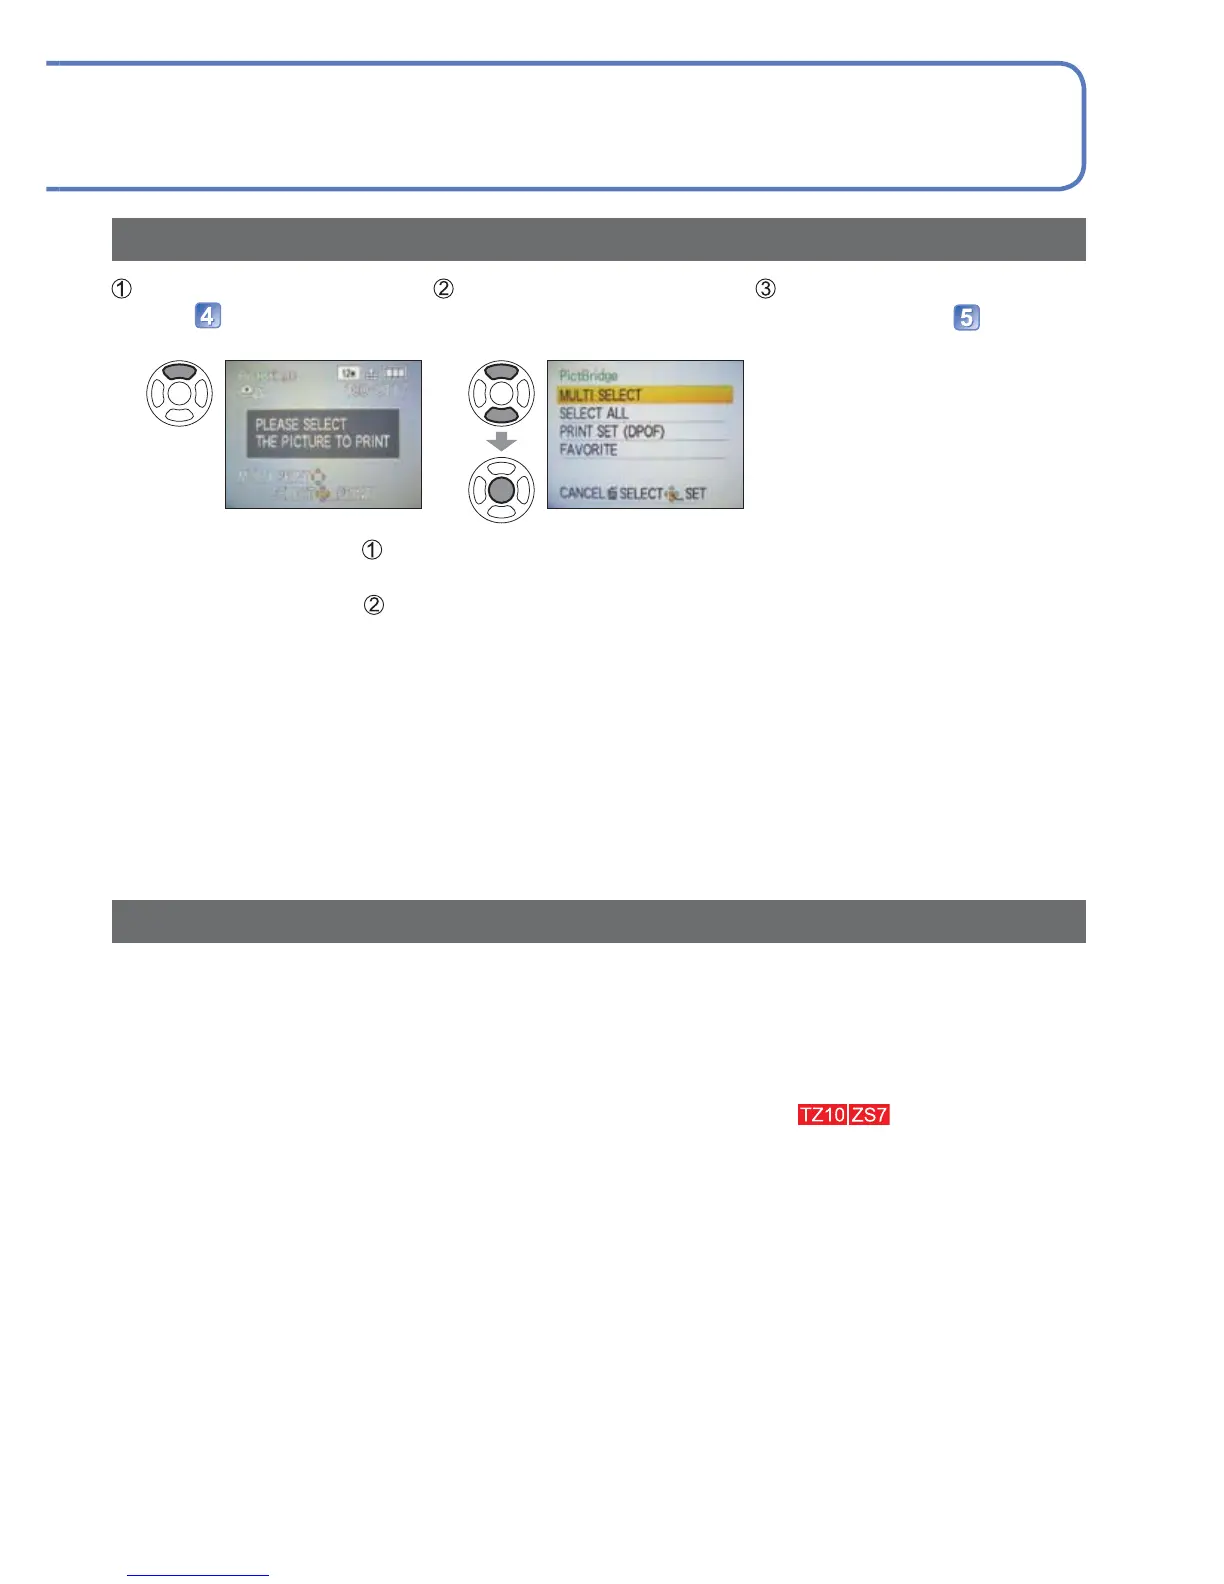
Printing multiple pictures
Select [MULTI PRINT] in
step
on the previous
page
Select item
(See below for details)
Print
(Previous page
)
• [MULTI SELECT] :
Scroll between pictures with , select pictures to print with the
[DISPLAY] button. (Press [DISPLAY] button again to release selection.)
Press [MENU/SET] when selection is complete.
• [SELECT ALL] :Print all pictures.
• [PRINT SET (DPOF)] : Print pictures selected in [PRINT SET]. (134)
• [FAVORITE] : Print pictures selected as [FAVORITE]. (133)
(displayed only when [FAVORITE] pictures are present and setting
is set to [ON]).
Select [YES] if print confirmation screen is displayed.
An orange
displayed during printing indicates an error message.
Print may be divided into several times if printing a large amount of pictures.
(Remaining sheets display may differ from set number.)
Print with date and text
With [TEXT STAMP]
Recording date and following information can be embedded into still pictures (128):
Recording date
[NAME] and [AGE] from [BABY] and [PET] Scene Modes
[TRAVEL DATE] elapsed days and destination
Text registered in [TITLE EDIT]
Names registered in [FACE RECOG.]
Location name information recorded with the GPS function
• Do not add date printing in stores or with printers to still pictures where [TEXT
STAMP] is applied (text may overlap).
Printing date without [TEXT STAMP]
Printing in store: Only recording date can be printed. Request date printing in store.
•
Making [PRINT SET] settings on the camera in advance allows settings for numbers
of copies and date printing to be designated before giving the card to the store.
• When printing still pictures of 16:9 Aspect Ratio, check in advance that the store
can accept this size.
Using computer : Print settings for recording date and text information can be made
using the supplied CD-ROM ‘PHOTOfunSTUDIO’.
Using printer : Recording date can be printed by setting [PRINT SET] on the
camera, or by setting [PRINT WITH DATE] to [ON] when connecting
to a printer compatible with date printing.

 Loading...