VQT2R48 19
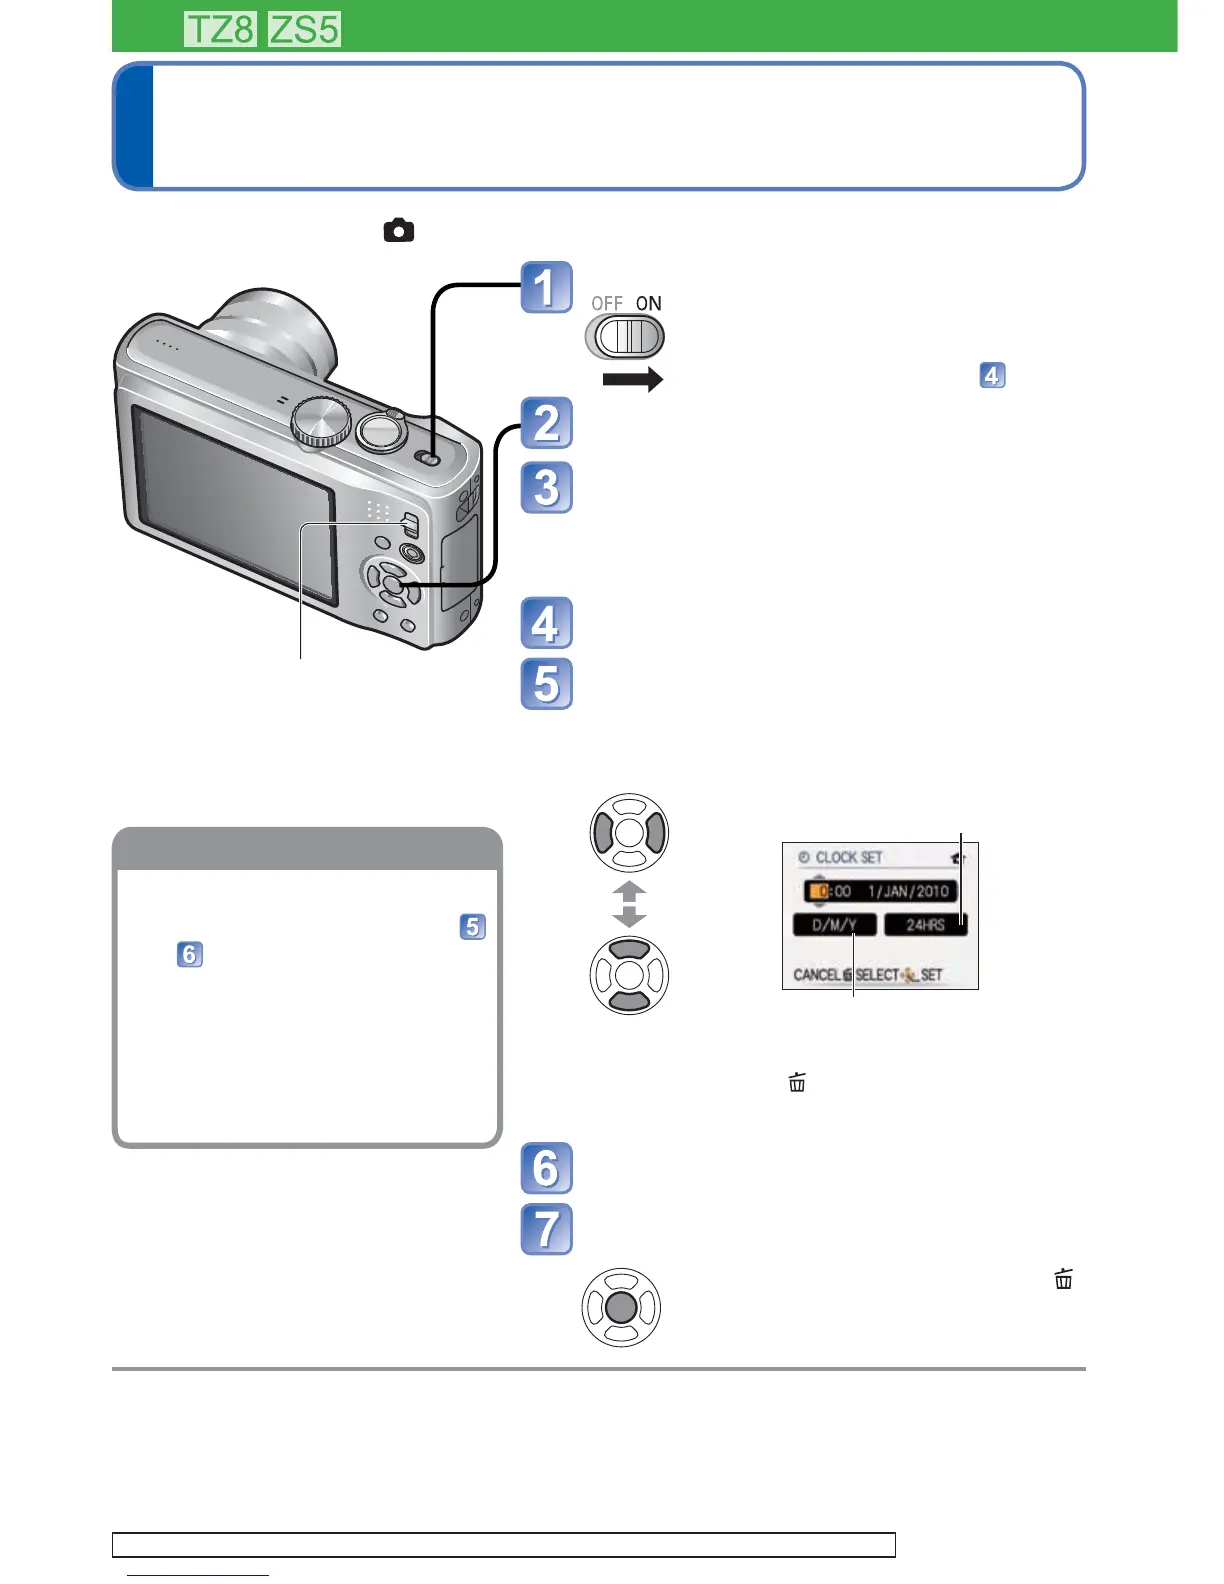
Setting the Clock
( The Clock is not set when the
camera is shipped.)
Turn on the power
The power is turned on.
If the language select screen is not
displayed, proceed to step
.
Press [MENU/SET] while the
message is displayed
Press to select the language,
and press [MENU/SET]
• The [PLEASE SET THE CLOCK] message
appears. (This message does not appear in
Playback Mode.)
Press [MENU/SET]
Press to select the items
(year, month, day, hour, minute,
display order or time display
format), and press to set
Select the
setting
item
Select either [24HRS] or [AM/
PM] for the time display format.
Select the display order for the
day, month, and year ([M/D/Y],
[D/M/Y], or [Y/M/D]).
Change
the values
and
settings
• To cancel Press .
• When set to [AM/PM], 0:00 midnight is AM 12:00,
and 0:00 noon is PM 12:00.
Press [MENU/SET]
Confirm the setting and press
[MENU/SET]
•
To return to the previous screen, press .
Turn on the power again and check the time display.
(Time and date can be displayed by
pressing [DISPLAY] several times.)
Set REC/PLAY switch to before turning on the power.
REC/PLAY switch
Select [CLOCK SET] from the
[SETUP] menu (22), perform
and .
• Clock settings will be saved for
approx. 3 months even after
battery is removed, provided
a fully-charged battery was
installed in the camera for 24
hours beforehand.
To set local time at travel
destination
[WORLD TIME] (93)
Failure to set the date and time will cause the date/time to be improperly printed when printing
pictures at a digital photo centre or when using [TEXT STAMP].
Year can be set between 2000 and 2099.
After the time has been set, the date can be printed correctly even if the date is not displayed on the
camera screen.
For the operating procedures for the DMC-TZ10/DMC-ZS7 (17)

 Loading...