Chapter 5 Operations — Using the web control function
226 - ENGLISH
Note
f The edit screen can be displayed by clicking [USER1], [USER2], or [USER3] registered with test pattern in the test pattern selection buttons
displayed on the right side of the control page.
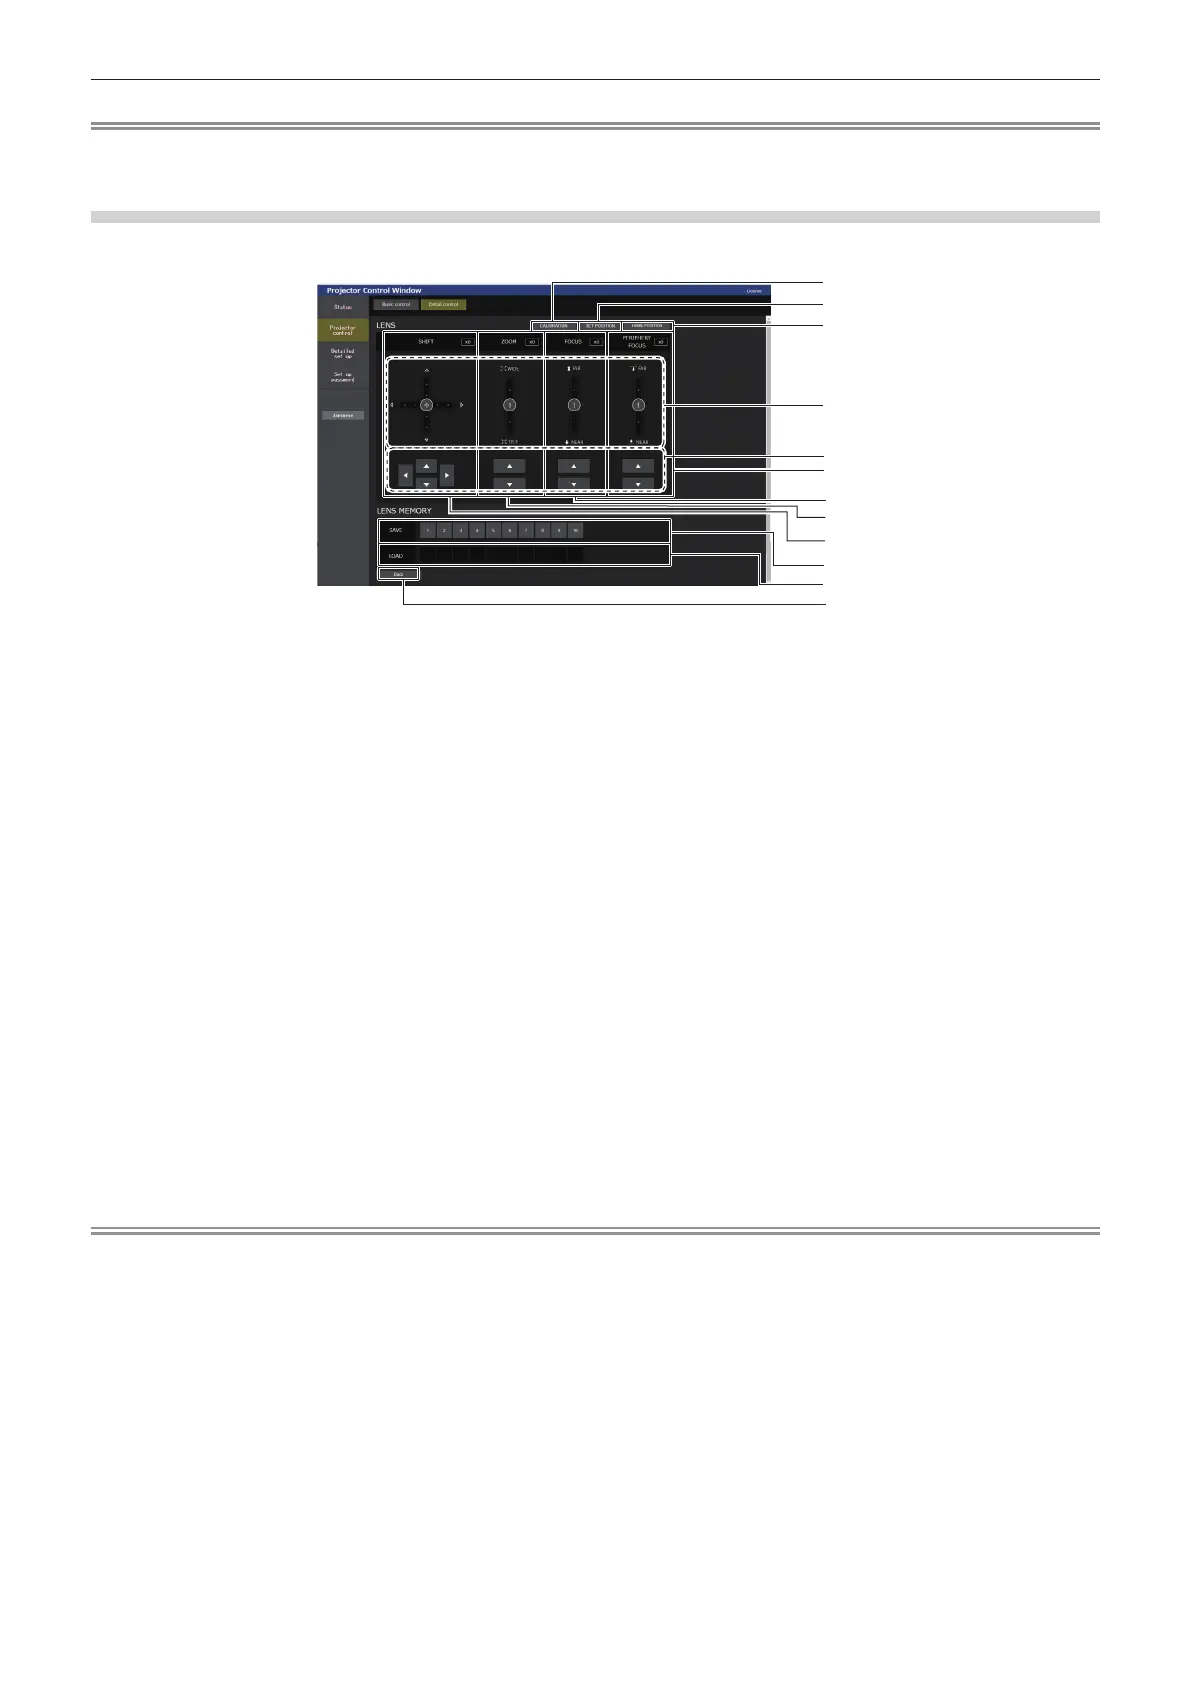
[LENS] page
Click [Projector control] → [Detail control] → [LENS].
2
1
3
4
5
6
7
8
11
12
9
10
1 [CALIBRATION]
The calibration execution page (x page 227) is displayed.
2 [SET POSITION]
The lens position setting page (x page 227) is displayed.
3 [HOME POSITION]
Moves the projection lens to the home position.
4 Slider bar
Adjusts the lens shift, zoom, focus and periphery focus by
dragging the slide button in the center over the slide rail. The
operation speed will become faster when the drag position is
further away from the center.
5 Adjustment buttons
Click asqw to adjust the lens shift, zoom, focus and
periphery focus.
6 [PERIPHERY FOCUS]
Use the slider bar or as to adjust the periphery focus.
The adjustment can be performed in two operating speeds by
the position which the slide button is dragged to.
Click as to make ne adjustments. The adjustment can be
performed faster by holding down.
7 [FOCUS]
Use the slider bar or as to adjust the focus.
The adjustment can be performed in two operating speeds by
the position which the slide button is dragged to.
Click as to make ne adjustments. The adjustment can be
performed faster by holding down.
8 [ZOOM]
Use the slider bar or as to adjust the zoom.
The adjustment can be performed in two operating speeds by
the position which the slide button is dragged to.
Click as to make ne adjustments. The adjustment can be
performed faster by holding down.
9 [SHIFT]
Use the slider bar or asqw to adjust the lens shift (vertical
position and horizontal position).
The adjustment can be performed in three operating speeds by
the position which the slide button is dragged to.
Click asqw to make ne adjustments. The adjustment can
be performed faster by holding the button for three seconds or
longer.
10 [SAVE]
Saves the current lens position (vertical position, horizontal
position, focus position, periphery focus position and zoom
position) by selecting the number of the lens memory. Operate
following the instruction displayed in the screen.
11 [LOAD]
Loads the lens position (vertical position, horizontal position,
focus position, periphery focus position and zoom position)
saved in the specied lens memory, and automatically moves to
that position. Operate following the instruction displayed in the
screen.
12 [Back]
Returns to the [Detail control] page.
Note
f [PERIPHERY FOCUS] is displayed only when following projection lens is attached.
Zoom Lens (Model No.: ET-C1W300, ET-C1W400, ET-C1W500)

 Loading...