Installing the Drive 3-1
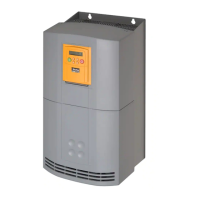
650V AC Drive
Chapter 3 INSTALLING THE DRIVE
IMPORTANT: Read Chapter 9: “Certification for the Drive” before installing this unit.
Mechanical Installation
W
H
W 1
Heat
Sink
Control
D
H1
H2
Top Cover increased height shown by H2
Approximate Frame C shown for illustration purposes
Figure Chapter 3 -1 Mechanical Dimensions for 650V Drives
9.3/20.5
348.0
(13.70)
335.0
(13.19)
365.0
(14.37)
201.0
(7.91)
150
(5.90)
208.0
(8.19)
Slot 7mm wide
Use M5 or M6
fixings.
17.4/38.2
453.0
(17.8)
440.0
(17.3)
471.0
(18.5)
252.0
(9.92)
150
(5.90)
245.0
(9.65)
Slot 7mm wide
Use M5 or M6
fixings.
32.5/72
668.6
(26.3)
630.0
(24.8)
676.0
(26.6)
257.0
(10.1)
150.0
(5.9)
312
(12.3)
Use M6 fixings
41/90.4 720.0
(28.3)
700.0
(27.6)
Not
257.0
(10.1)
150.0
(5.9)
355.0
(14.0)
Use M6 fixings
All dimensions are in millimetres (inches)
Note:
For details of a through-panel mounting option for Frames D & E refer to pages 3-5
and 3-7 respectively.
Mounting the Drive
The unit must be mounted vertically on a solid, flat, vertical surface. It can be wall-mounted, or
mounted inside a suitable cubicle, depending upon the required level of EMC compliance - refer
to Chapter 9: “Technical Specifications”.
Ventilation
The drive gives off heat in normal operation and must therefore be mounted to allow the free
flow of air through the ventilation slots and heatsink. Maintain minimum clearances for
ventilation as given in the tables below to ensure adequate cooling of the drive, and that heat
generated by other adjacent equipment is not transmitted to the drive. Be aware that other
equipment may have its own clearance requirements. When mounting two or more 650V units
together, these clearances are additive. Ensure that the mounting surface is normally cool.
If wall-mounted, the unit
must be fitted with the
Top Cover firmly screwed
into position.
 Loading...