39
Feed
dog
height
(subcl.
-911/..)
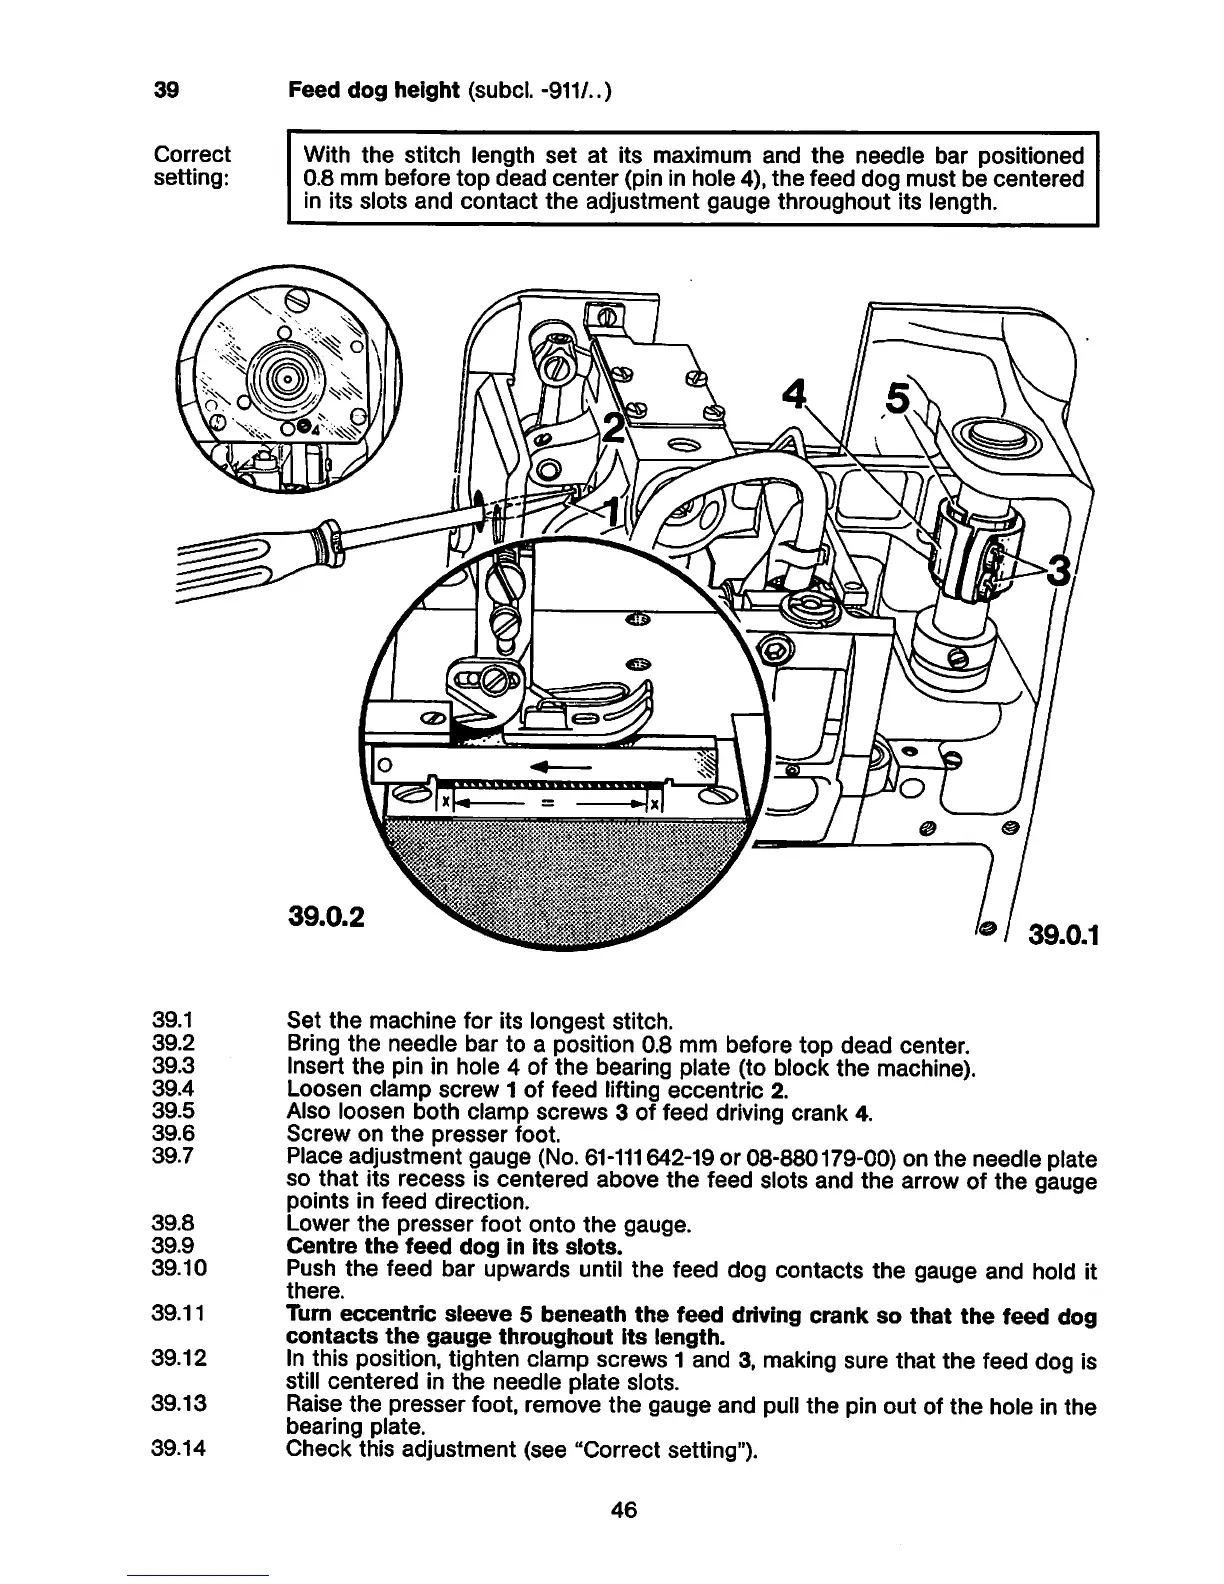
Correct
With
the
stitch
length
set
at
its maximum
and
the
needle
bar
positioned
setting: 0.8 mm
before
top
dead
center
(pin in hole 4),
the
feed
dog
must
be
centered
in its
slots
and
contact
the
adjustment
gauge
throughout
its length.
©
39.1
Set
the
machine
for its
longest
stitch.
39.2 Bring
the
needle
bar to a position 0.8 mm before
top
dead
center.
39.3 Insert the pin in hole 4 of
the
bearing plate (to block
the
machine).
39.4
Loosen
clamp
screw
1 of
feed
lifting
eccentric
2.
39.5 Also loosen
both
clamp
screws
3 of
feed
driving
crank
4.
39.6
Screw
on
the
presser
foot.
39.7 Place adjustment gauge (No.
61-111642-19
or 08-880179-00) on the needle plate
so that its recess is centered above
the
feed slots and the arrow of
the
gauge
points
in
feed
direction.
39.8
Lower
the
presser
foot
onto
the
gauge.
39.9
Centre
the
feed
dog
In
Its
slots.
39.10 Push
the
feed bar upwards until the feed dog contacts
the
gauge and hold it
there.
39.11 Turn eccentric
sleeve
5
beneath
the
feed driving crank
so
that
the
feed
dog
contacts
the
gauge
throughout
Its
length.
39.12 In this position, tighten clamp screws 1 and 3, making sure that the feed dog is
still
centered
in
the
needle
plate
slots.
39.13 Raise the
presser
foot, remove
the
gauge
and pull
the
pin out of
the
hole in
the
bearing
plate.
39.14
Check
this
adjustment
(see
"Correct setting").
46