9 CONTROL PANEL
User’s Manual Planmeca ProOne 31
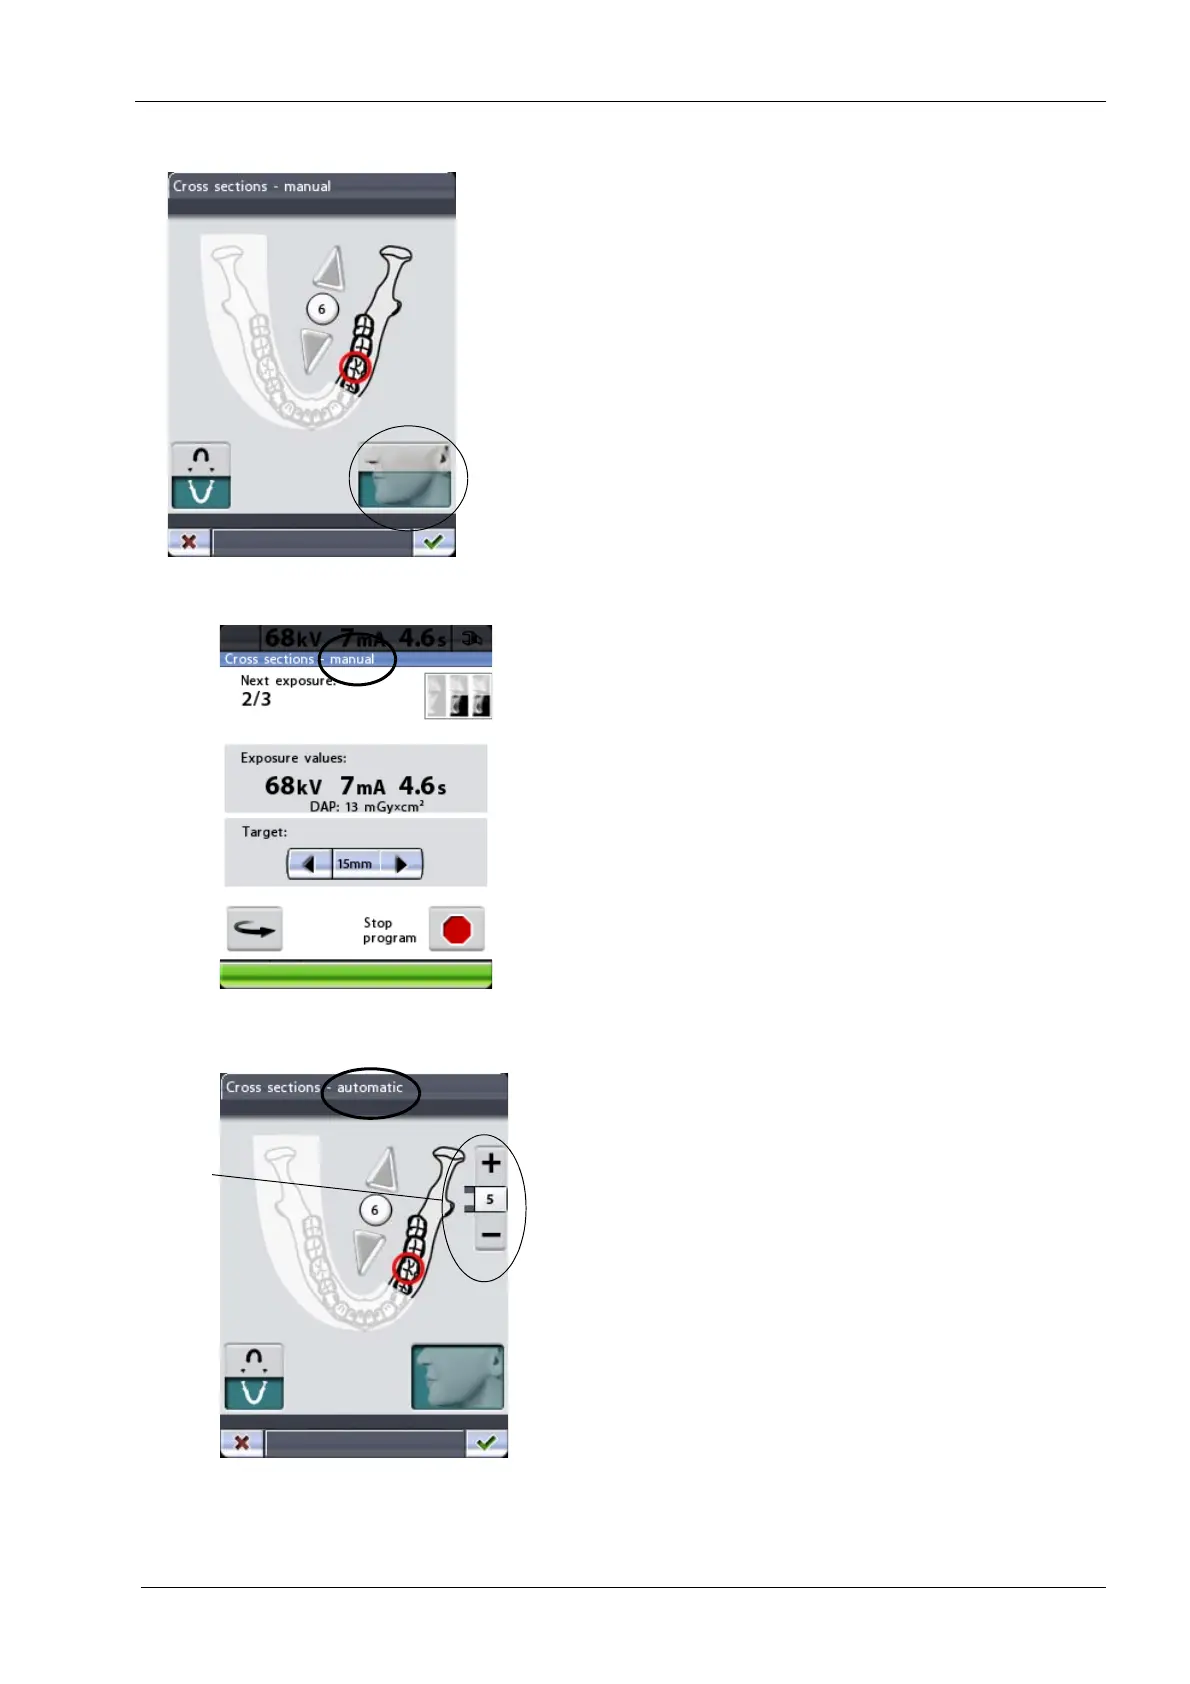
Touch the collimation field in the bottom right corner of the
display to select the exposure area. You can set the
collimation field so that only one jaw half (upper/lower
jaw) or both jaw halves (full size exposure) will be
exposed. Turning collimation on will reduce the radiation
dose as the exposed area is smaller.
The area that will be exposed is highlighted. Touch the
collimation field again to turn collimation off.
In the manual exposure program you can decide how
many exposures you wish to have in one image. The
minimum is one and the maximum is three.
Between exposures a display is shown where you can
change the exposure values (kV and mA) and move the
target position.
If you take only one or two exposures you will have to stop
the exposure procedure by touching the stop button at the
bottom of the display.
In the automatic program the target position will be
automatically moved between exposures. The movement
step is adjustable between 1-10 mm. Select the
movement step by touching the plus or minus button next
to the step value.
Collimation
(upper jaw/lower jaw/
full size exposure)