9 CONTROL PANEL
30 Planmeca ProOne User’s Manual
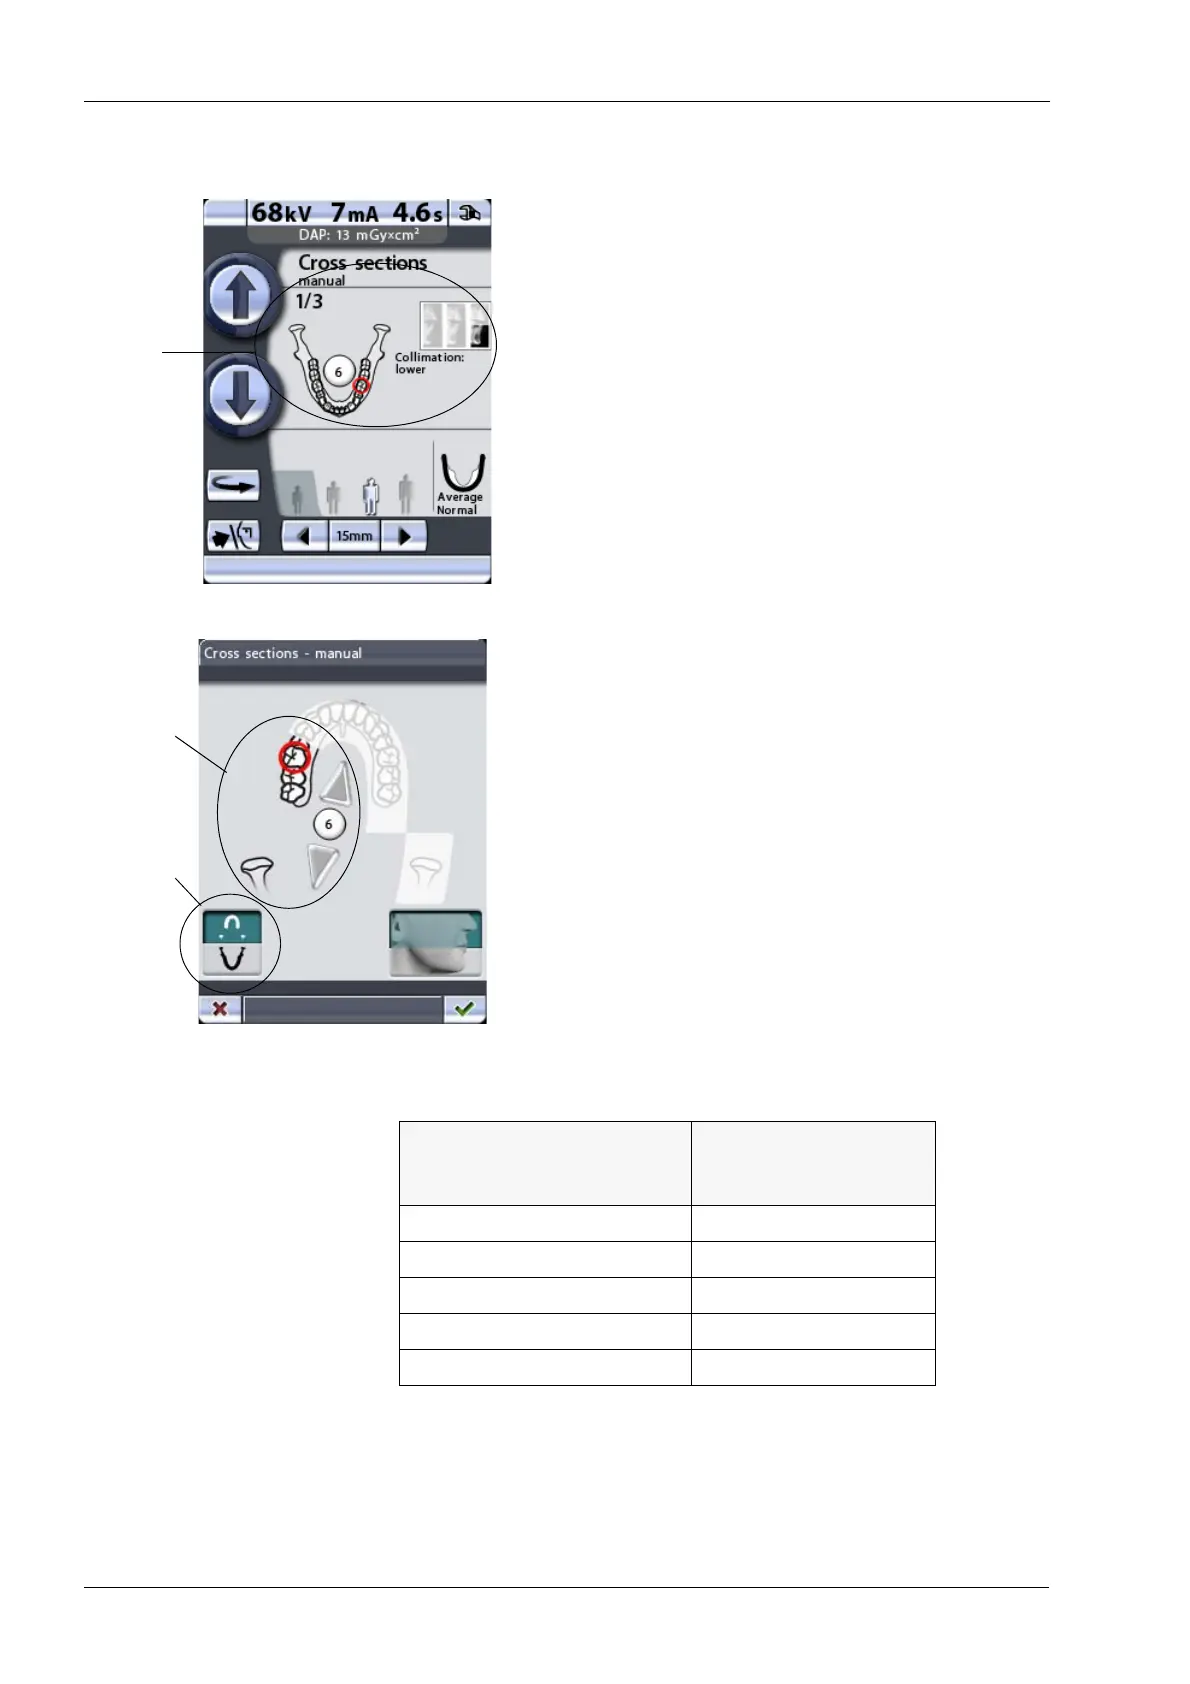
9.5.1 Selecting imaging position for cross-sectional exposures
Touch the image position field in the middle of the display
to select the imaging position.
The X-ray image in the top right corner of the field shows
in which order the images will appear on the radiograph.
The active exposure is shown in full colour. The number in
the top left corner indicates the number of the active
exposure.
On the display that appears you can select the imaging
position.
Select the upper or lower jaw by touching the
corresponding jaw half in the bottom left corner. The icon
of the selected jaw half will be highlighted.
Select the left or right jaw side by touching the
corresponding jaw side in the middle of the display. The
selected jaw side will be shown in full colour.
Select the target position (tooth number 5-8 or TMJ) by
either touching the corresponding position on the jaw icon
or by tapping the small arrows next to the tooth number.
The upwards pointing arrow moves the target position
forwards on the dental arch and the downwards pointing
arrow moves the target position backwards on the dental
arch. The selected target position will be marked with a
red circle.
Each preprogrammed target position has a fixed
magnification:
The tooth numbering system can be changed by the user.
Refer to section14.2.2 “Program presets (P2200)” on page
84 for more information.
Tooth No.
(according to Planmeca
numbering system)
Magnification
51.48
61.51
71.56
81.61
TMJ 1.89
Upper/lower
Tooth
jaw
number
(5-8) or TMJ