10 PANORAMIC EXPOSURE
46 Planmeca ProOne User’s Manual
When you have taken the exposure the image will be
shown on the computer screen. Note that you must
accept the image in the Romexis program - only accepted
images will be stored in the database. Refer to the
Romexis User’s Manual for further information.
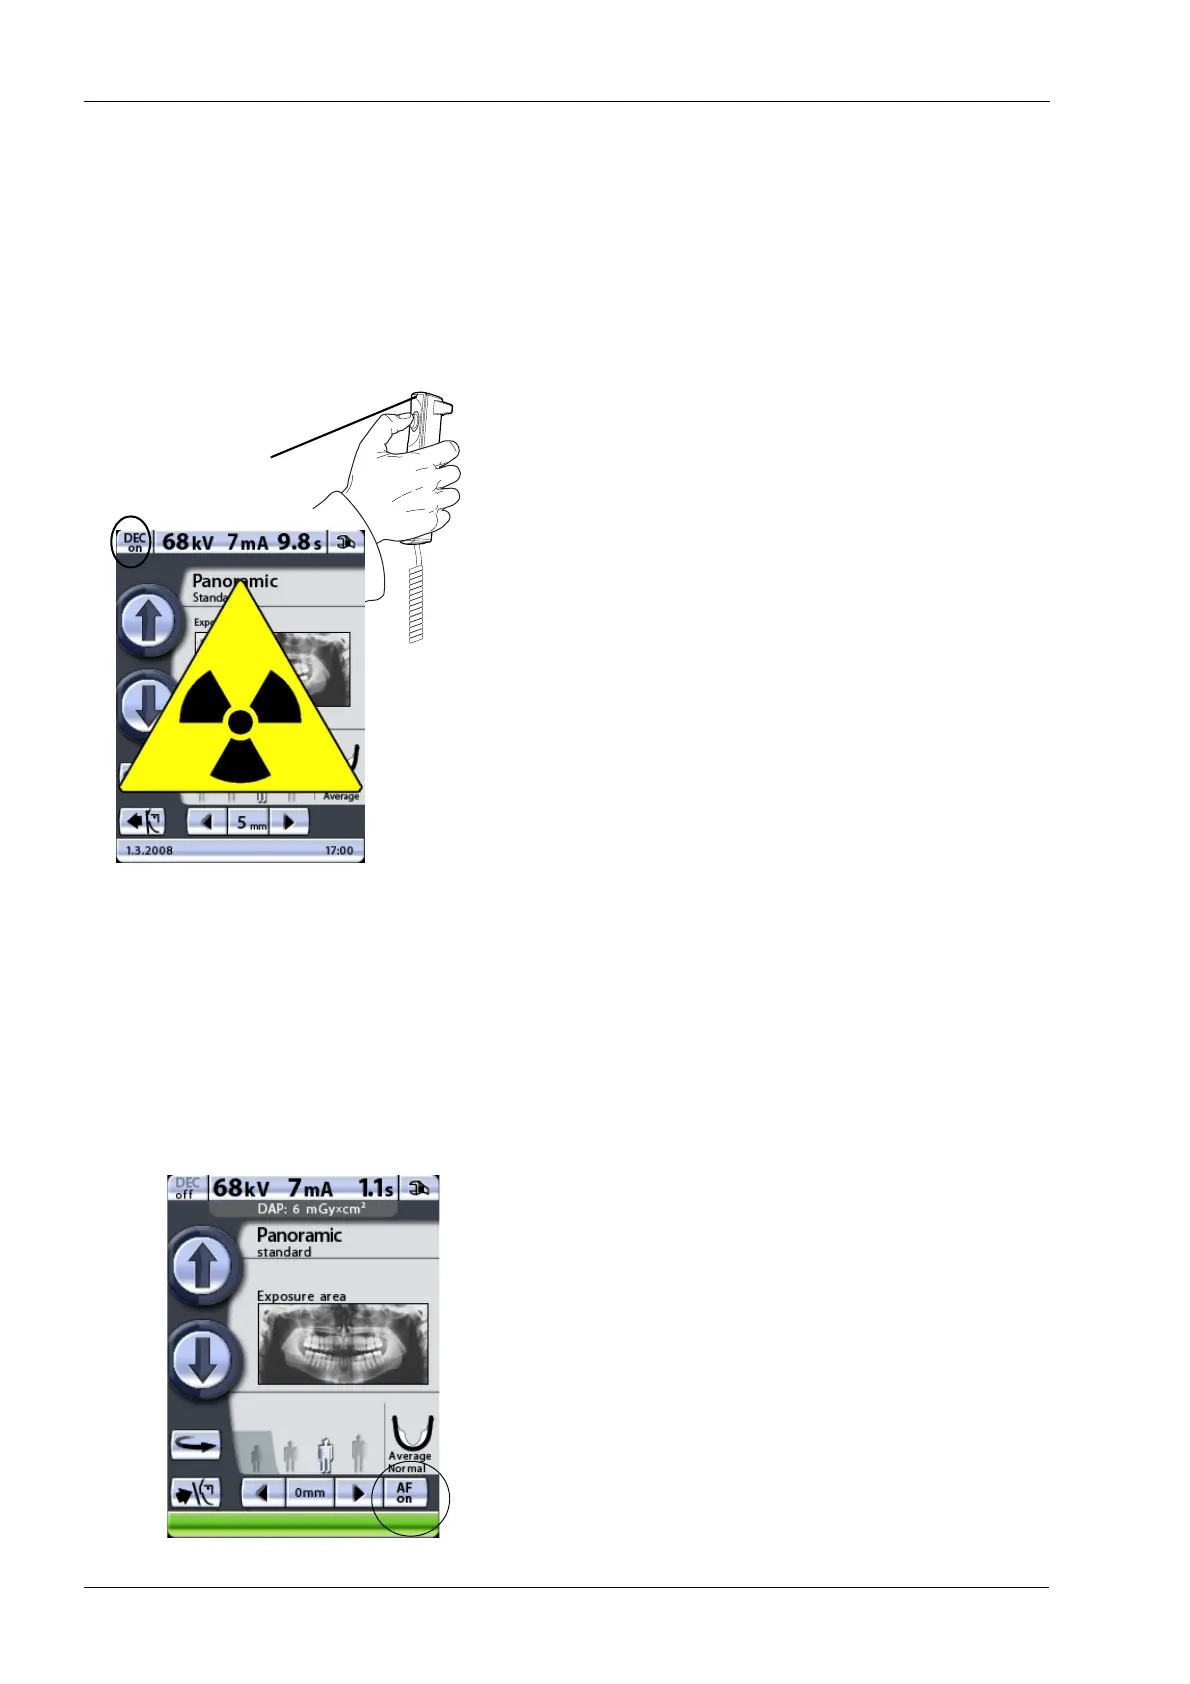
10.2.1 Taking an exposure with DEC
Touch the DEC button to switch Dynamic Exposure
Control (DEC) on.
If the optional DEC (Dynamic Exposure Control) function
is switched on, the exposure will be taken in two stages
and the C-arm will move twice. The exposure values (kV
and mA) will be adjusted during the first (short) exposure.
The second exposure will produce the actual image and
the C-arm will now move through one complete exposure
cycle.
Press and hold down the exposure button for the duration
of both exposures.
Do not release the exposure button before the end of the
second exposure.
10.2.2 Taking an exposure with Autofocus (AF)
The layer light is switched off when Autofocus is selected.
Always switch Autofocus on before starting the imaging
process in the Romexis program.
Images taken with Autofocus cannot be saved on a USB
memory stick.
We recommend that you use the bite piece when taking
exposures with Autofocus.
Touch the AF button to switch Autofocus (AF) on.
Autofocus adjusts the layer position automatically. The
function positions the image layer individually for each
patient based on the position and angle of the apices of
the upper central incisors.
PXR_Dsw._2eps
Amber exposure
indicator light