11 TEMPOROMANDIBULAR JOINT EXPOSURE
User’s Manual Planmeca ProOne 55
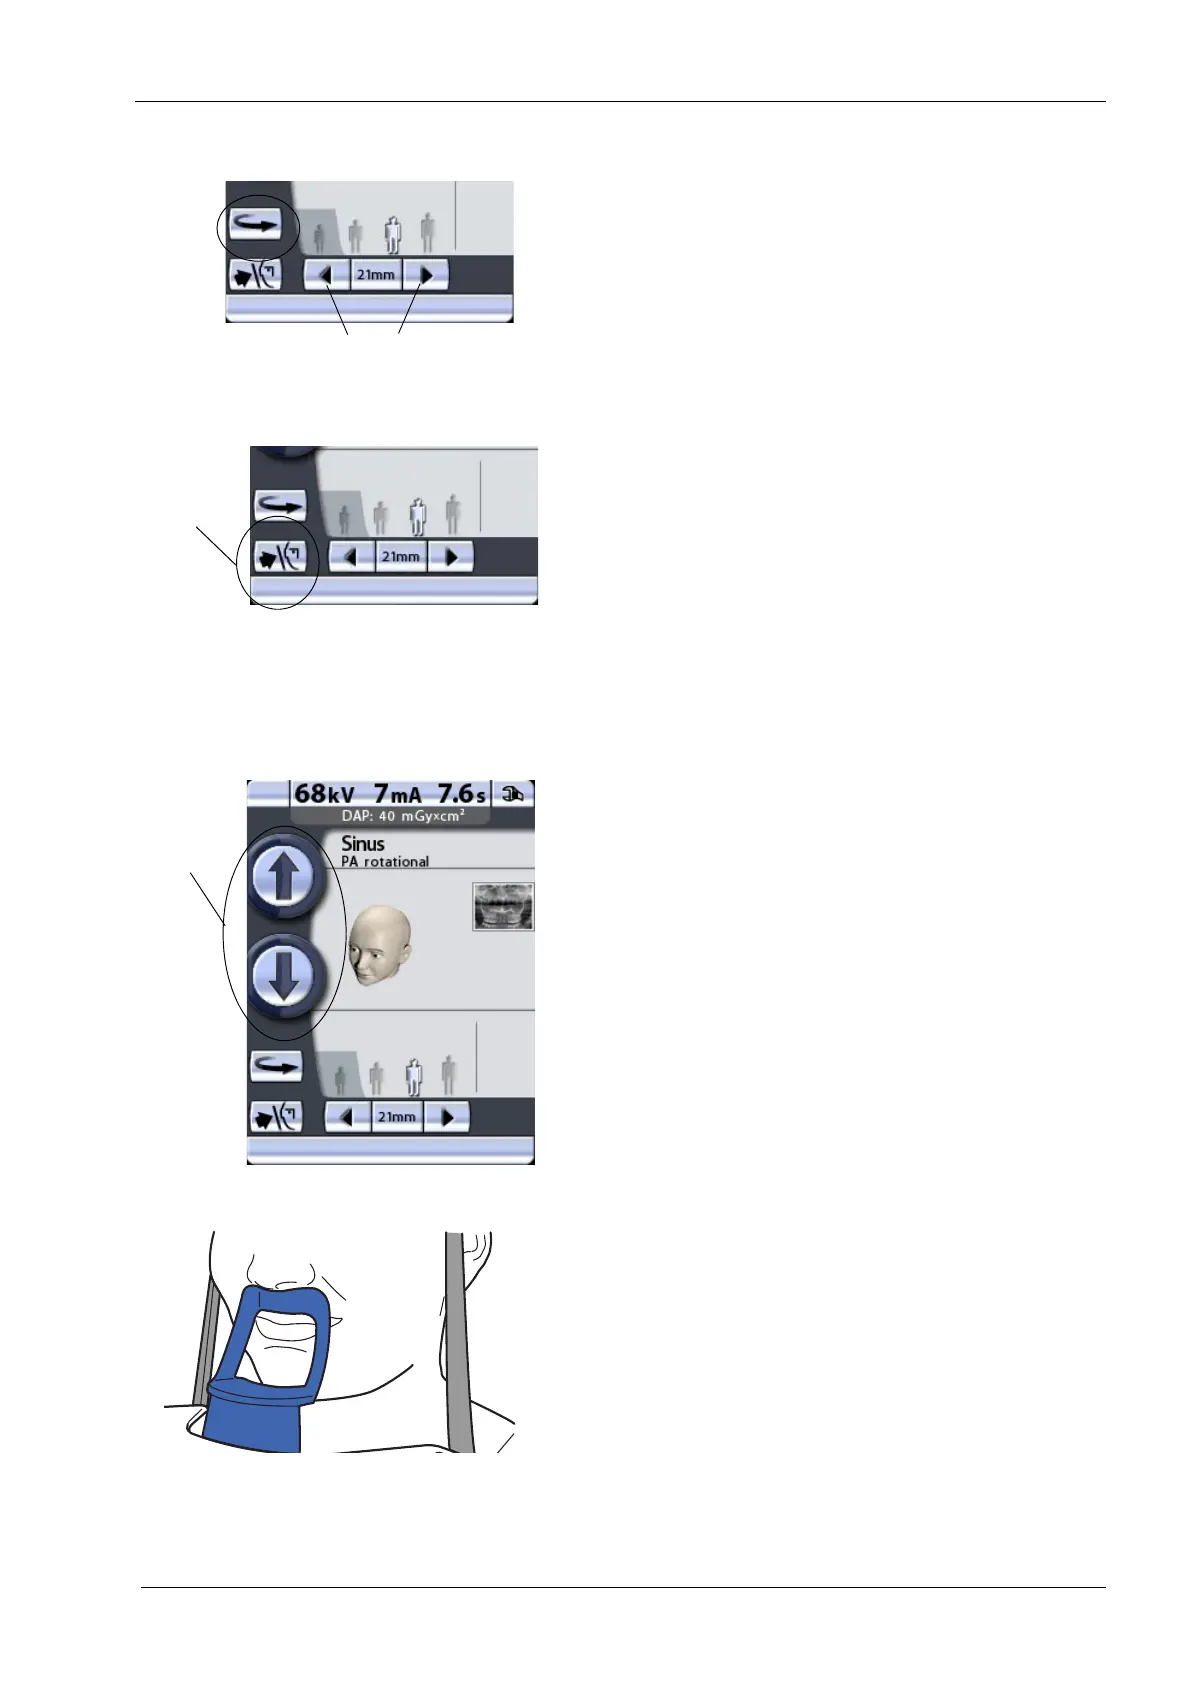
11.2.1 Patient positioning
Touch the C-arm return button to move the C-arm to the
patient entry position if it is not already there.
Alternatively, you can touch either of the target position
arrows to move the C-arm to the patient entry position.
You can set the X-ray unit so that the C-arm will
automatically return to the patient entry position at the end
of an exposure cycle. Refer to section 14.2.3 “Functions
after exposure (P2300)” on page 86 for more information.
Touch the temple support button to open the temple
supports if they are not already open.
Guide the patient to the unit so that they are facing the
chin support. Explain to the patient that you will take a
multi-angle exposure and that the C-arm will move three
times during the exposure cycle.
To adjust the height of the unit, press either of the height
adjusting buttons on the display until the opening in the
chin support is approximately level with the patient’s
mouth.
The unit moves slowly at first, then faster.
Ask the patient to step forward, grasp the patient handles
and press their lips against the chin support. The patient's
nose must rest on top of the support and their mouth must
be closed, their teeth together.
Patients are not allowed to hang on the patient handles.
The pull-down force applied to the patient handles may not
exceed 15 kg (33 lb).
We recommend that you image patients with poor health
in a sitting position.
C-arm
Target position arrows
return
button