3.76
9929422 R02 - 2017-2019 ACE 900 Service Manual
© Copyright Polaris Industries Inc.
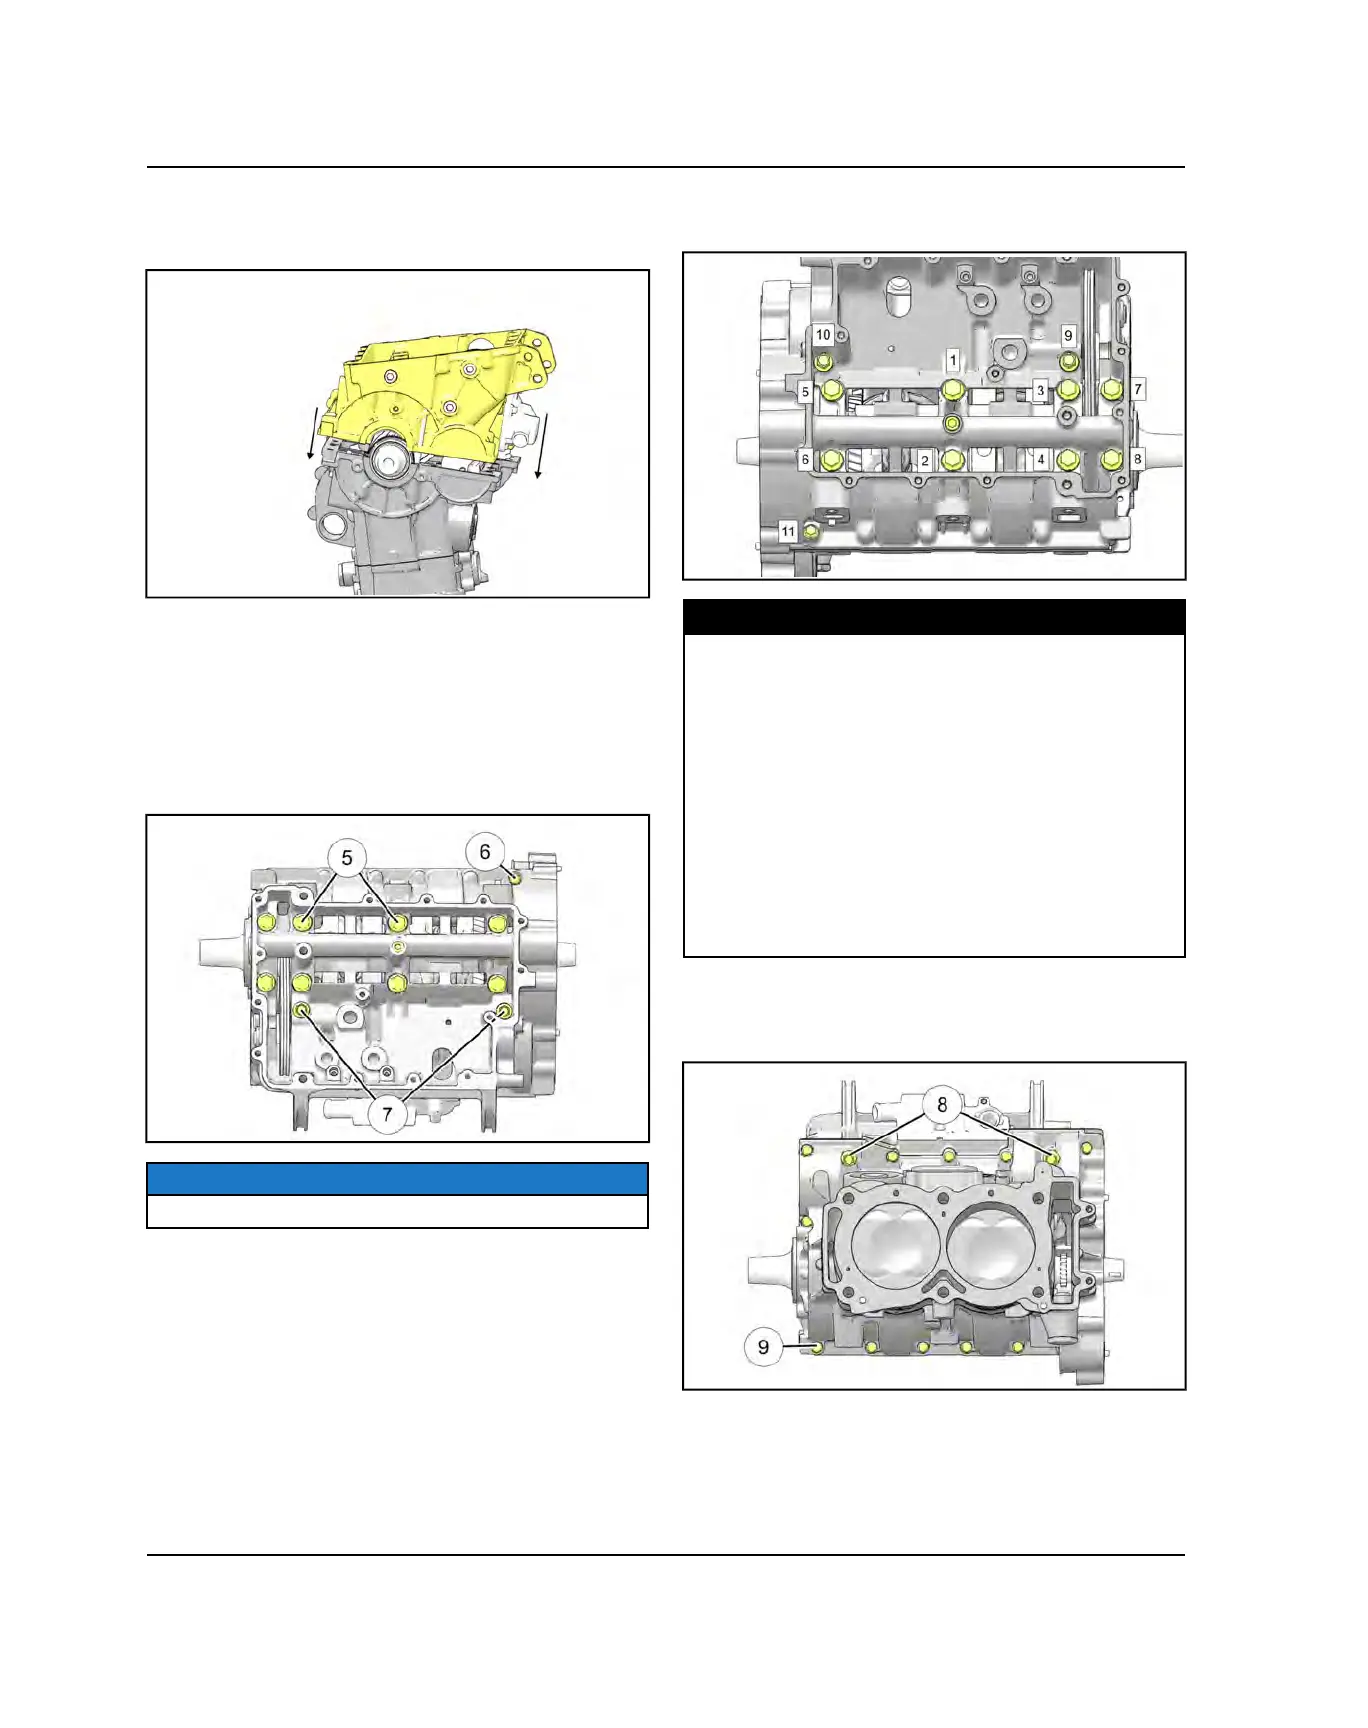
6. Carefully place lower crankcase on upper case,
making sure the oil pump drive chain is fed through
the lower crankcase.
7. Tap lower crankcase with a rubber hammer to seat
the case halves together.
8. Inspect crankcase mating surfaces to be sure they
are joined properly. Investigate the cause of any
gaps.
9. Install the eight M10
t
, one M6
y
and two M8
u
lower crankcase bolts. Tighten all bolts lightly by
hand.
NOTICE
Install new M10 lower crankcase bolts.
10. Torque lower crankcase bolts in sequence to
specification. Repeat sequence to verify final torque.
TORQUE
Lower Crankcase Bolts:
M10 Bolts:
Torque in sequence
Step 1: 9 ft-lb (12 Nm)
Step 2: 21 ft-lb (28 Nm)
Step 3: Tighten add’n 90°
M8 Bolts:
26 ft-lb (35 Nm)
M6 Bolts:
9 ft-lb (12 Nm)
11. Rotate the engine so the cylinder is facing up.
12. Install the two M8
i
and eleven M6
o
upper
crankcase bolts. Tighten all bolts lightly by hand.
ENGINE / COOLING SYSTEM
 Loading...