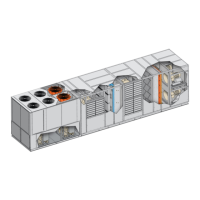
www.poolpak.com | 800-959-772552 | MPK Series - Installation, Operation and Maintenance
Multi-Unit Network Operation
When there is more than one PoolPak
®
unit servicing a single room, the units should be connected together. The
CPCS controller allows up to five PoolPak
®
units to be connected together over a proprietary, private network. The
networked units will then work together to maintain space conditions. Refer to the field wiring section of this manual
for instructions to connect the units.
Networked units operate in a MASTER/SLAVE environment. The fuzzy logic engine in the master unit determines the
heating, cooling and dehumidification requirements and broadcasts them over the network to the other units. This
ensures that each unit will make control decisions based on the same information. During steady state conditions,
all units networked together will operate in the same basic mode (ie. heating or cooling). Changing the setpoints on
any of the networked units changes setpoints for all networked units. If a networked unit is manually disconnected
from the network, this unit will revert to its local setpoint settings.
Each networked unit must contain all sensors and controls necessary for independent operation to be capable to
taking over the MASTER role. Units on the network are identified by an address of one to five. The unit with the
lowest address with having no uncleared alarms is the MASTER unit. In the event of a failure or uncleared alarm, the
unit with the next lowest address and no uncleared alarms will become the MASTER unit. In the unlikely event that all
units have uncleared alarms, each unit will function individually. Refer to CM1 Network Configuration for instructions
on viewing and adjusting the unit ID.
A single RIU can be used to monitor all units on the network. While the RIU is connected to any of the units, press
Esc + at the same time to view the next unit’s display within the network. Refer to the Status Screens section under
Controller Navigation for more description on how to simply view network status. If separate RIUs are desired, they
must be uniquely addressed on the network. Refer to RIU network configuration below.
CM1 NETWORK CONFIGURATION
The unit networking address is set by pressing the small button to the right of the CM1 plug, J3. Pressing the button
one time will display the current Unit ID address setting. On single unit installations, this should be 1. On multi-unit
installations, each unit should be set to a different address between 1 and 5. No two Unit IDs can be the same
while connected to the same network.
To change the I/O address, press and hold the button for approximately 5 seconds until it begins flashing slowly.
Once flashing, release the button and press it sequentially until the desired address is displayed (must be 1, 2, 3,
4 or 5) and release the button. After approximately 5 seconds, the displayed number will begin flashing faster to
indicate the new address has been set. Cycle power at the Control Power switch to complete the address change.
RIU NETWORK CONFIGURATION
To set up multiple keypads in the same network, each keypad must be uniquely addressed. The RIU network address
is set by pressing the
, and
buttons simultaneously and holding them down for approximately 5 seconds.
The display will show “Display address setting”. Press the to move the cursor to the current address field. Use the
and keys to change the address to either 10, 11 or 12 and press
.
To configure the ECC III RIU addresses, press the
, and
buttons simultaneously and hold them down for
approximately 5 seconds. The display will show “Display address setting”. Press the key
four times to move
the cursor past the screens showing “Display address setting”, “I/O Board address” and “Terminal config
Press
to continue. Use the keypad to enter the RIU configuration as follows:
P: 0x Adr Priv/Shared (x = CM1 I/O address)
Trm1 10 Sh
Trm2 11 Sh
Trm3 12 Sh Ok? Y
When prompted “OK?”, select “Y” to save the configuration and to exit. The RIU will go blank and then beep
several times before bringing up the normal status display.