CONTROLS AND INSTRUMENTS
Note: For extinguisher's location, refer to
"Emergency Features And Safety Equipment"
chapter 6.
High/Low Battery Voltage Indicators
Illuminates when the battery
voltage exceeds 30 volts or drops
below 24 volts.
Note: The high/low battery voltage indicator will
illuminate for a few seconds after the engine is
started because of the voltage drop when the
starter is engaged.
Battery Equalizer Indicator
Illuminates when the battery
voltage is not equalized.
Note: If the battery equalizer indicator
illuminates, make sure that the battery equalizer
circuit breakers are reset before requesting
breakdown assistance (if battery equalizer is
equipped with circuit breakers). Wait 15 minutes
after setting breakers to allow batteries to
equalize. The breakers are located in the main
power compartment.
Low Air Conditioning (A/C) Pressure
Indicator
Illuminates when the A/C system
pressure is too low. If the A/C
pressure is too low, the
compressor clutch is disengaged
and the fan is turned OFF.
Note: In cold weather, the low A/C pressure
indicator may light up. This is not an abnormal
condition.
High A/C Pressure Indicator
Illuminates when the A/C system
pressure is too high. If the A/C
pressure is too high, the
compressor clutch is disengaged,
but the fan remains activated.
Note: In hot weather, the high A/C pressure
indicator may light up. This is not an abnormal
condition.
STEERING COLUMN CONTROLS
Many of the most frequently used controls are
conveniently placed on the steering column or
the steering wheel, just like a passenger car.
The Multi-function lever is located on the left
side of the steering wheel while the optional
transmission retarder lever is located on the
right side of the steering wheel. Switches for the
electric horn and the air horn are located directly
on the steering wheel.
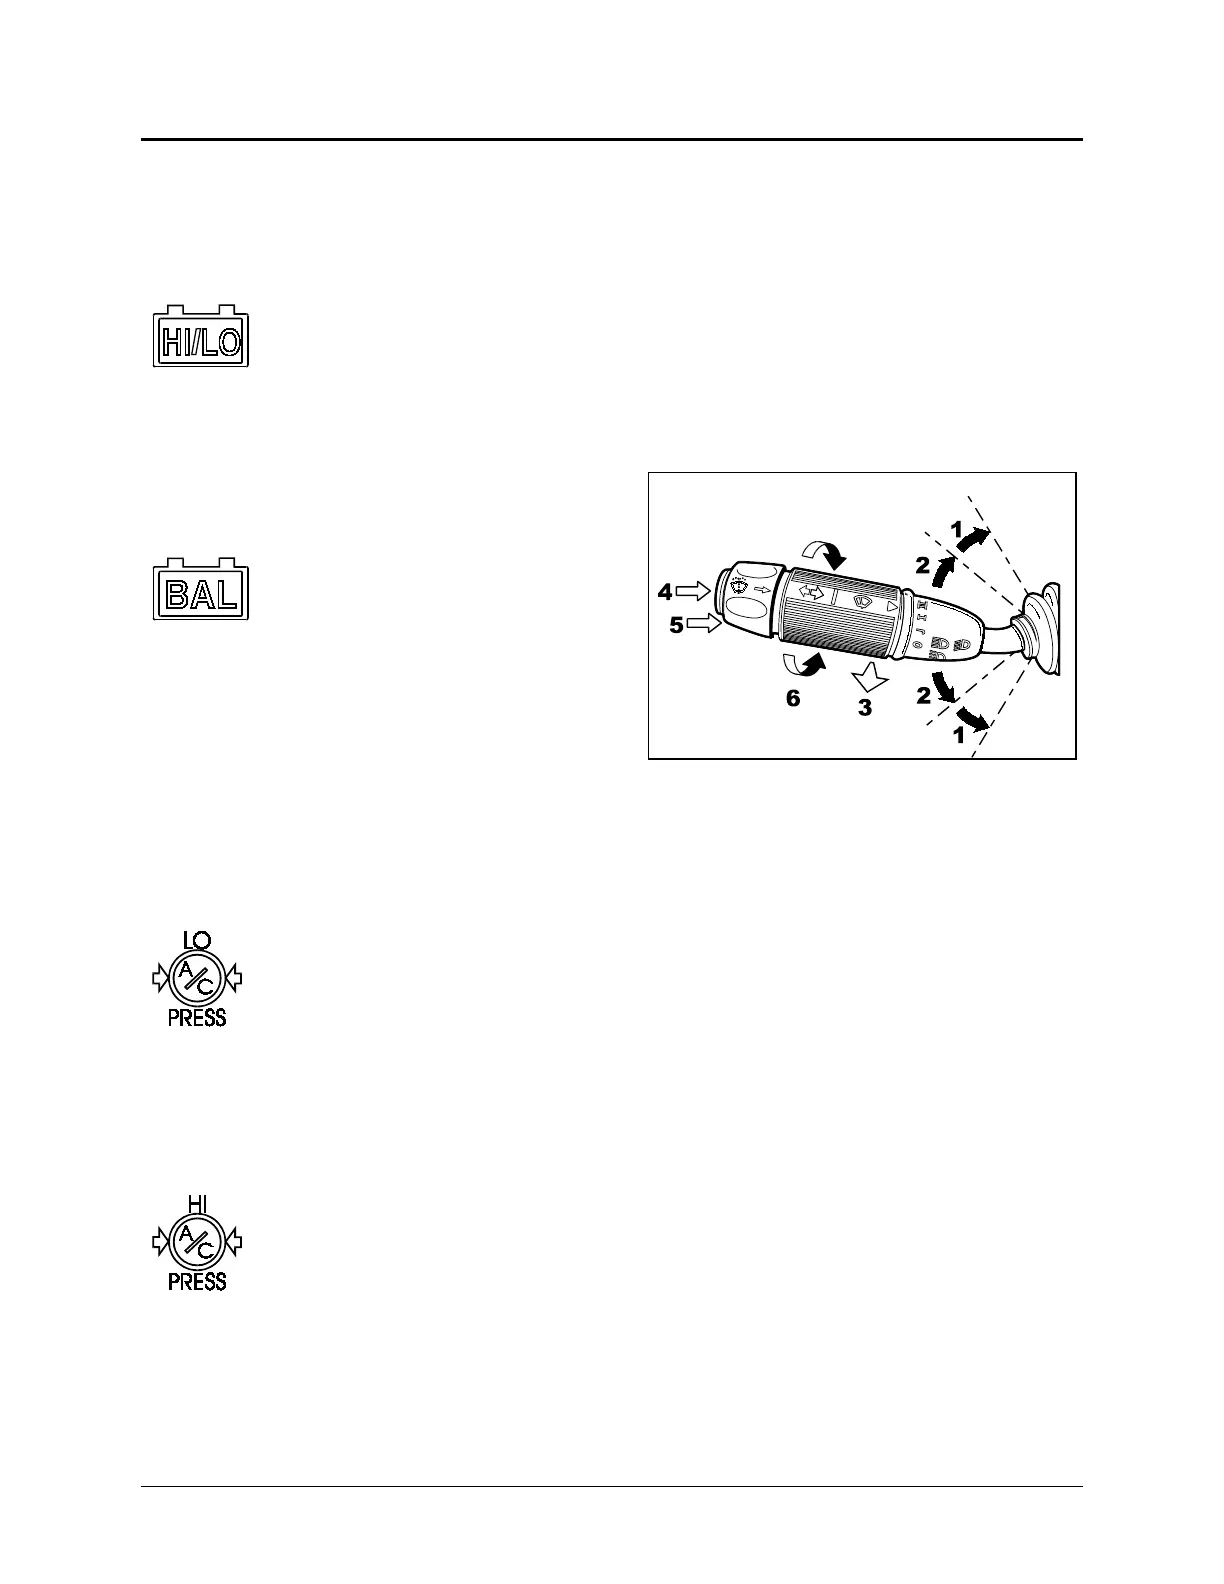
MULTI-FUNCTION LEVER
MULTI-FUNCTION LEVER 23133
The multi-function lever is used to operate the
following:
Turn Signal (1)
Move the lever all the way up until it locks in
position to signal a right turn. Move the lever all
the way down until it locks in position to signal a
left turn. The lever automatically returns to the
horizontal OFF position once the turn is
completed.
Lane Change Signal (2)
Move the lever part way to the catch position
and hold until the lane change maneuver is
completed. The lever will spring back into the
OFF position once released.
Headlight Beam Toggle Switch (3)
Toggle between high and low beams by pulling
the lever rearward. Pulling the lever rearward
while the lights are OFF will flash the headlights.
Courtesy Blinkers (4)
Clearance and parking lights can be flashed by
pressing the button located on the lever tip.
3-18