OTHER FEATURES
Programming Heating Start Time
Press
and the display shows the time at
which the heater will start. You can alter the
starting time by pressing either
(backwards)
or
(forwards) button. The longer you hold the
button down, the faster the display changes.
The last few minutes are set accurately by quick
pushes. The display fades after 20 seconds.
Start time 1 remains on the display, and the
yellow light stays on. Starting time #1 is now
activated.
Button
allows you to program a second
starting time:
Press button
which de-activates starting time
1, then proceed as with
.
The activation of the second starting time is
indicated by the symbol 2.
To Check (or activate) Start Time
Press button
or briefly. The display shows
the programmed starting time for 20 seconds.
This also programs the timer to start the heater
at the time shown.
To Cancel Heating Start Time
Press button
or briefly. The appropriate
number in the display goes out, together with the
yellow light.
Note: Switch on the preheating system briefly
about once a month, even during the warm
season.
Caution: When welding on the vehicle,
disconnect the preheater module connector in
order to protect this system from voltage surges.
Caution: To avoid running down the batteries,
do not turn on the preheating system for more
than one hour before starting the engine.
Warning: The preheating system uses the
same fuel as the engine. Do not operate in a
building or while refueling. Operate only in a
well-ventilated area.
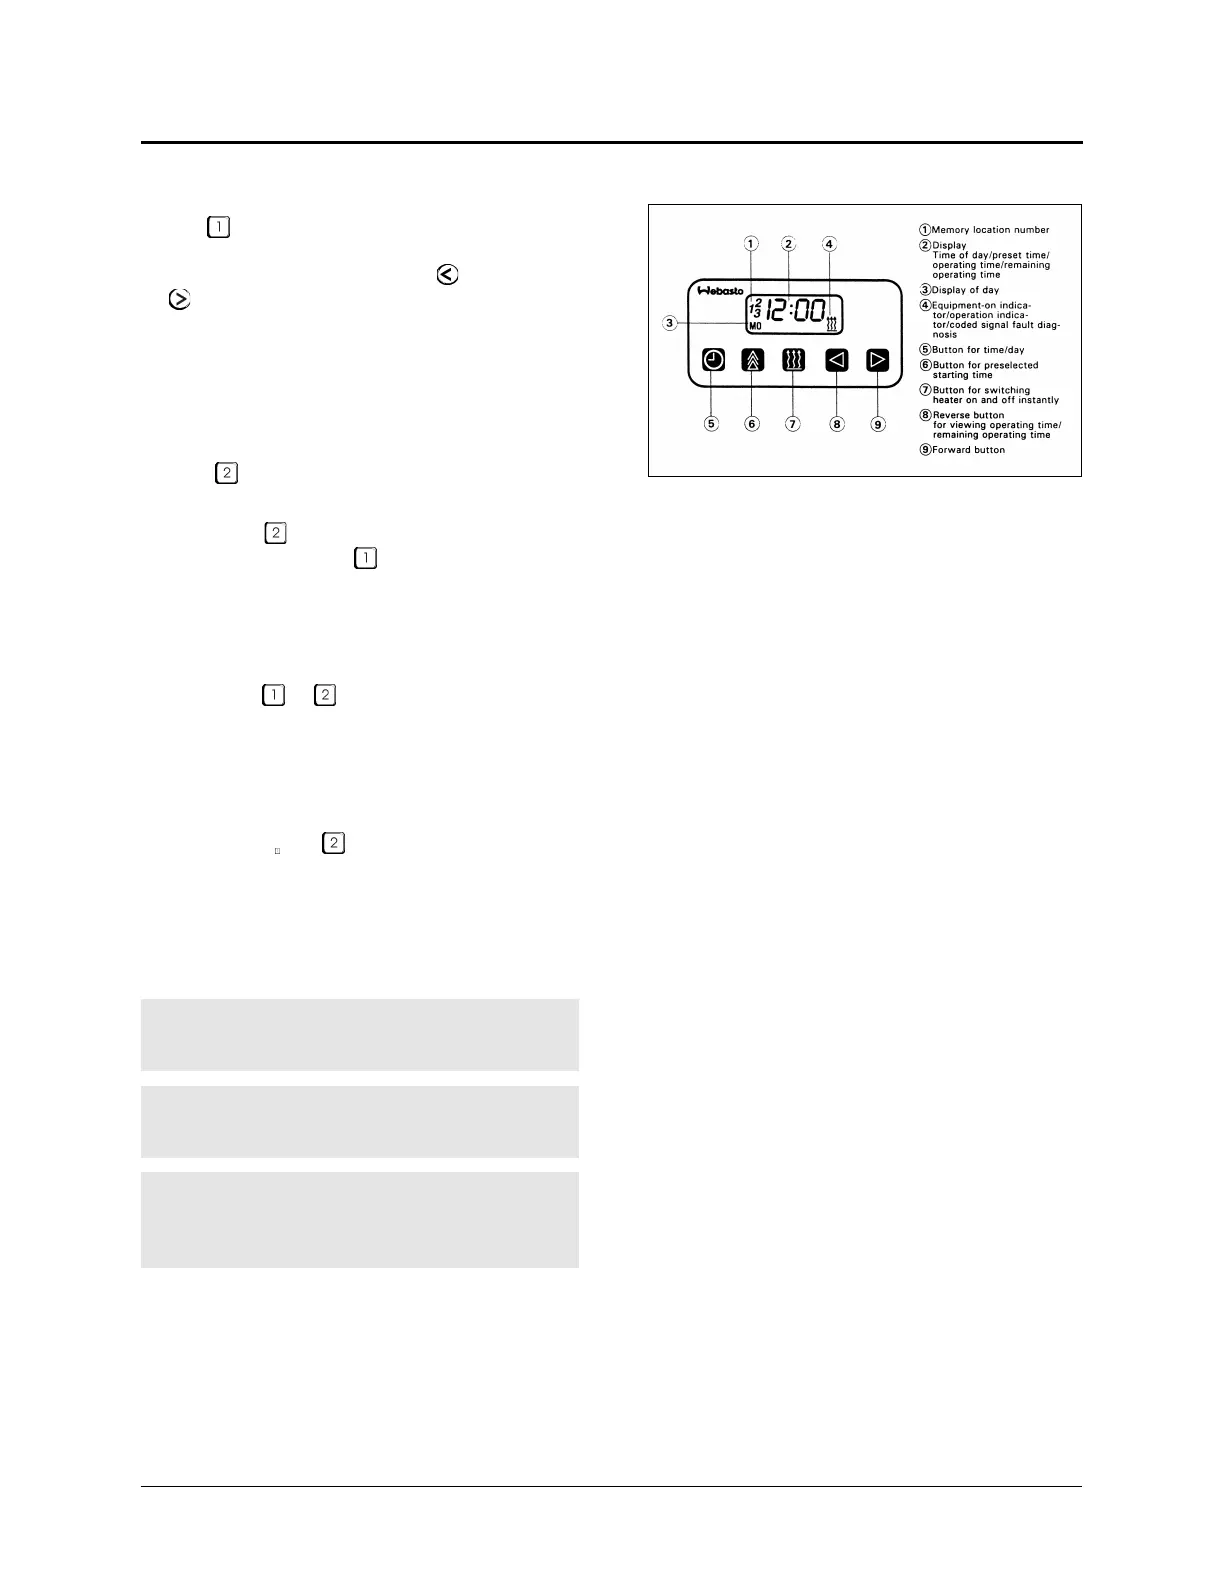
Timer operating instructions (Webasto)
WEBASTO 18327
These instructions refer to the WEBASTO timer
illustrated above.
Remaining Operating Time
The remaining operating time refers to the
period of time the heater still continues to remain
in operation. It may be changed while the heater
is in operation.
Setting the Digital Timer
After the power has been connected, all symbols
on the digital display are flashing. The time of
the day and the day of the week must be set.
All flashing symbols of the timer can be set by
means of the Forward (9) or Reverse (8)
buttons.
When buttons (8) and (9) are pressed for more
than 2 seconds, the quick digit advance mode is
activated.
Setting the Time and Day of the Week
1. Press button (5) for more than 2 seconds
(time display flashes).
2. Press (8) or (9) button to set the time of day.
3. Wait 5 seconds. The time of day is stored
(time of week flashes).
4. Press (8) or (9) button to set the correct day
of week.
5. Wait 5 seconds. The day of week is stored.
Viewing the Time (Ignition ON)
Continuous display of current time and day of the
week.
4-14