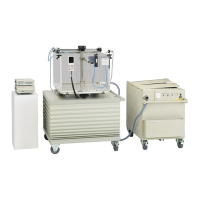
MP3
Therapy Beam Analyzer
Service Manual – Cleaning
46 D175.131.00/11 en
8.2 Connection Cables
Clean the cables as follows:
• Disconnect the cables from the devices, pulling
on the plug, not on the cable.
• For cleaning, rub the cables down with a cloth
moistened with soap water or with disinfectant.
• Never immerse the cable in liquid!
8.3 Connectors
Do not immerse the connectors in liquids! Do not let
liquid enter the connectors.
The connectors must not become dirty. Clean the
connectors only with a soft brush. Do not blow into
the connector.
8.4 Perspex Tank
The MP3 water reservoir is used to pump the water
out of the Perspex tank. The inclination of the tank
that is necessary to complete empty it can be
achieved by adjusting one of the screw feet. Do not
tilt the tank manually.
The supporting profile and the angle are adjusted
by PTW-Freiburg. Do not remove them.
For cleaning, use a mild cleaning agent suitable for
plastic material or soap water.
After cleaning, thoroughly remove all remains of the
cleaning agent.
You should coat the Perspex tank for storage with
the delivered cover.
8.5 Moving Mechanism
The shafts and toothed wheels of the moving
mechanism should be lubricated with the supplied
grease at intervals of 1 to 2 years or when neces-
sary (use small amount of grease only!).
8.6 Cleaning Water Reservoir
Usually the water reservoir does not need to be
cleaned for a long time. There are two inspection
fittings at the top of the water reservoir through
which the inside can be accessed for cleaning.
These apertures are located at the bottom of the
two storage compartments. They are opened by
removing the cap and closed by reinstalling it.
For cleaning, use a mild cleaning agent suitable for
plastic material or soap water.
A drain plug (SW32) is located at the bottom of the
water reservoir. Open this plug to drain the dirty
water.
After cleaning, the tank must be thoroughly rinsed
to remove all remains of the cleaning agent. Even-
tually, reinstall the drain plug. Close the two caps at
the top of the tank and tighten the screws evenly,
but not fully.