RAUMED NeuroSmart Instruction Manual
Manufacturer: RAUMEDIC AG, Hermann-Staudinger-Strasse 2, 95233 Helmbrechts, Germany
zwo-541EN Rev 3 / 2022-05-03
Page 18 of 61
3.4 Starting a measurement
The battery symbol at the top of the display shows the battery’s state of charge. A full bar
means that the battery is fully charged. With a fully charged battery, the NeuroSmart can be operated
without connection to a mains outlet for up to 4 hours (e.g. when transporting a patient) In this case, the
green Power On LED flashes (on the bottom left of the operating foil, see Figure 2 No. [2]).
If the NeuroSmart is operated with the supplied Power Adapter, it must be connected to the mains
voltage. Now connect the red plug of the adapter cable to the NeuroSmart's red socket. Please note
that the adapter may only be connected to an approved electrical installation.
Switch on the NeuroSmart by pressing the button. The device is ready for operation after a brief
self-test. This button also switches the device off. To prevent accidental shutdown, you must confirm
this on the touch display.
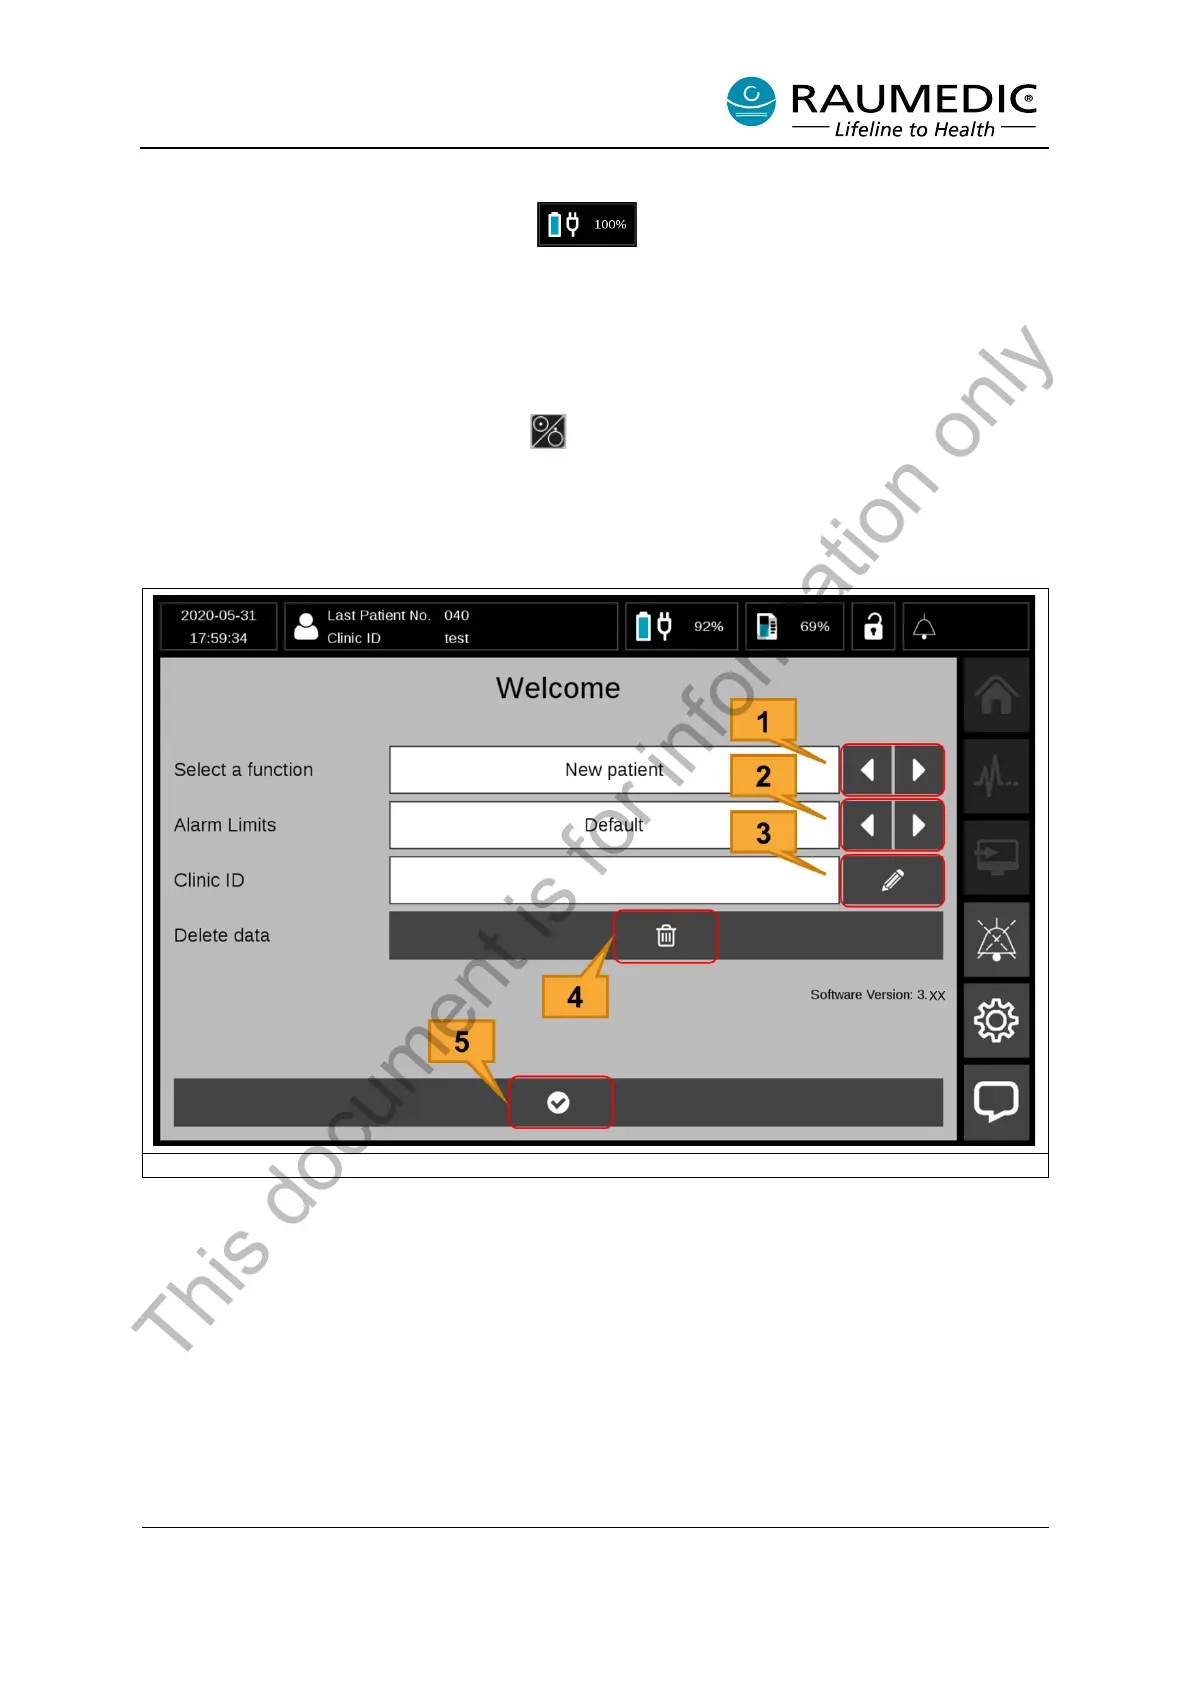
After the NeuroSmart has been switched on, the Start screen appears (see Figure 6).
Figure 6: Start the measurement
[1] Measurement function select keys. Selection: “New Patient”, “Continue Measurement” or “View
Measurement”
[2] Alarm limits select keys. Selection: “Default”, “Clinic” or “Keep”
[3] Entry field for Clinic ID: Clicking on this soft key makes a keyboard appear. You can then enter the
patient’s clinic ID.
[4] Delete data button: This button can be used to delete all the data on the NeuroSmart.
[5] Start Measurement button
This document is for information only