19
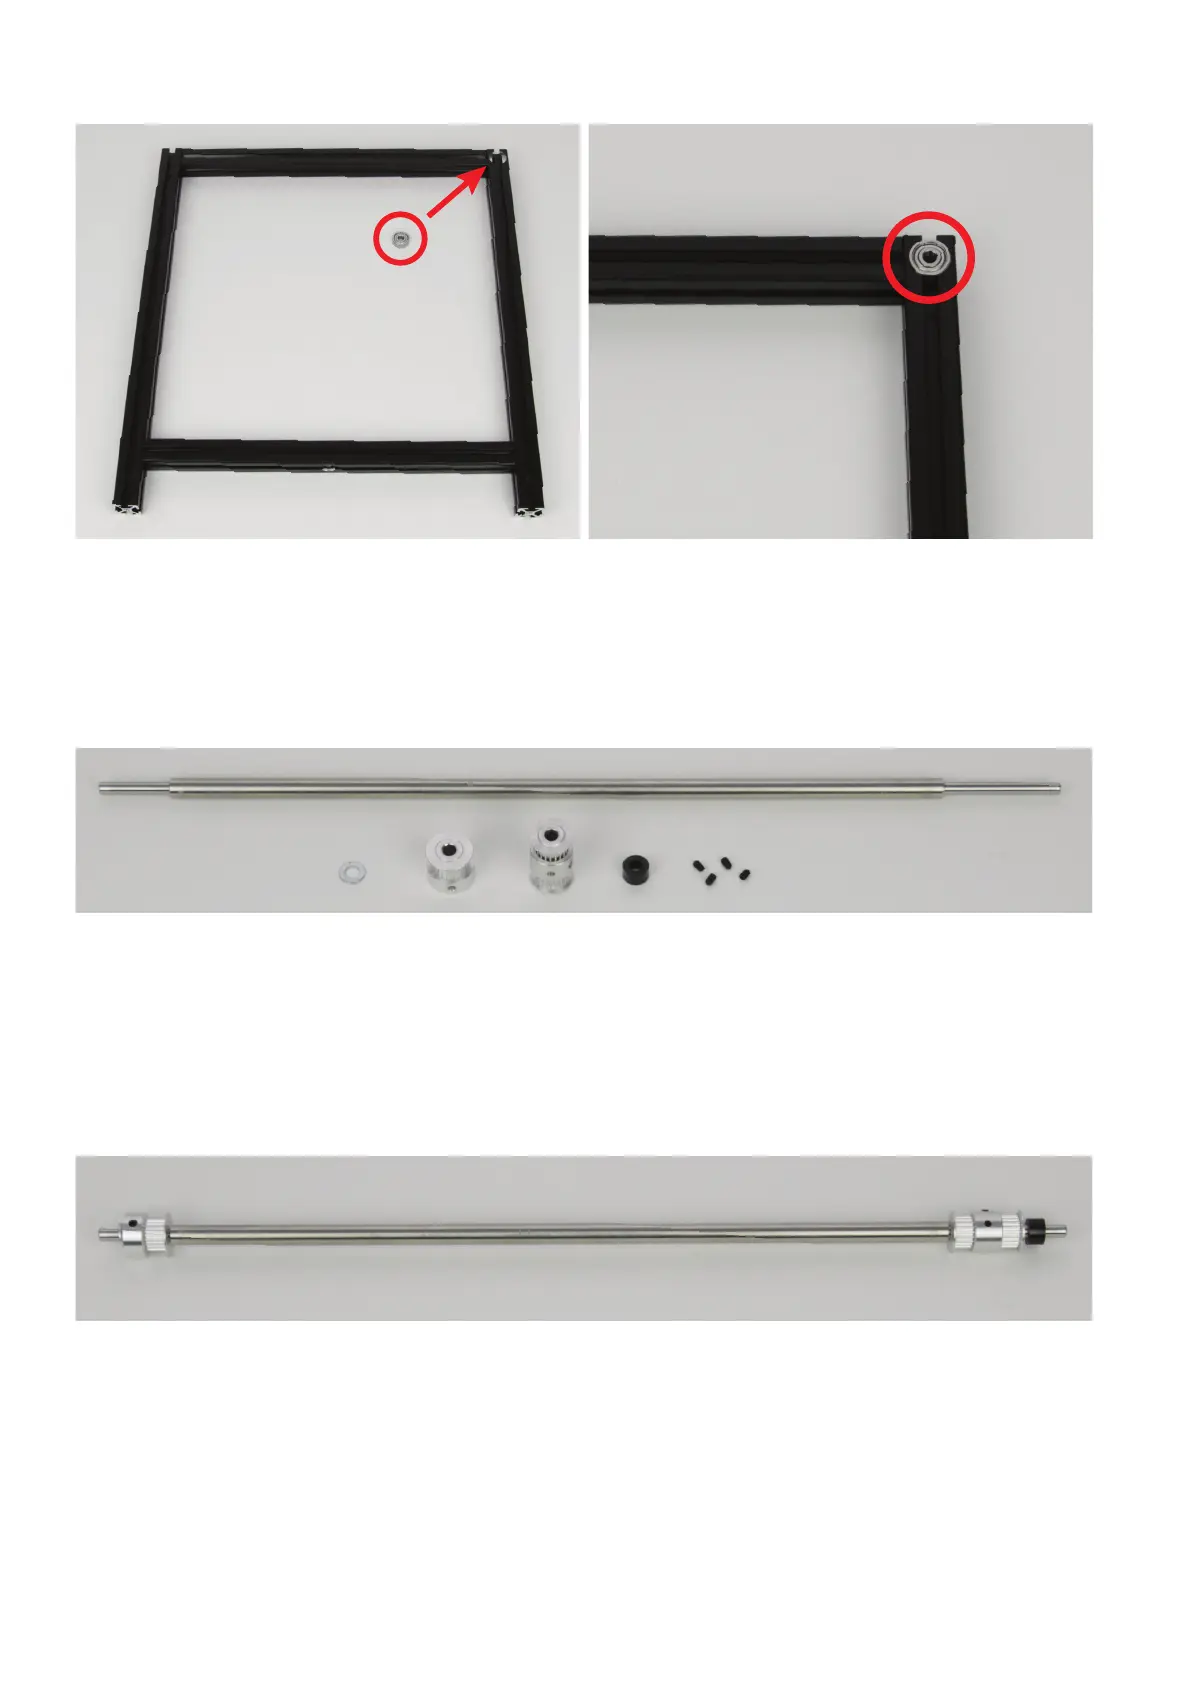
Insertingtheballbearingintothesideparts.
1x side part left
1x side part right
2xgroovedballbearing625Z(diameterinside/outside5/16mm)
Firsttaketheleftsidepart(seeleftgure)andpushoneofthetwoball
bearings into the intended cut-out.
Proceed accordingly for the right side part.
Assemblyofthedeectionshaft
1x shaft 5 mm
1xwasher(diameterinside/outside5.3/10mm)
1x sprocket 5 mm
1x sprocket, double, 5 mm
1xspacer6mm(innerdiameter5mm)
4x threaded pin M3x5
Assemblethedeectionshaftasshowninthegureabove.
Itwillbeinstalledintheprinterlaterlikethegureshows(frontalview).
Ontheleft,pushthesprocketontotheshaftrst,followedbythewasher(mustbeatthefarouterleftintheend).Observeproperalignment
for the sprocket.
Ontheright,pushthedoublesprocketontotheshaftrst,followedbythespacer(mustbeatthefarouterrightintheend).
Screw2threadedrodsintoeachofthetwosprockets.Donottightenthesermlyyet!
Optionally, the threaded rods can be secured with threadlocker varnish.