23
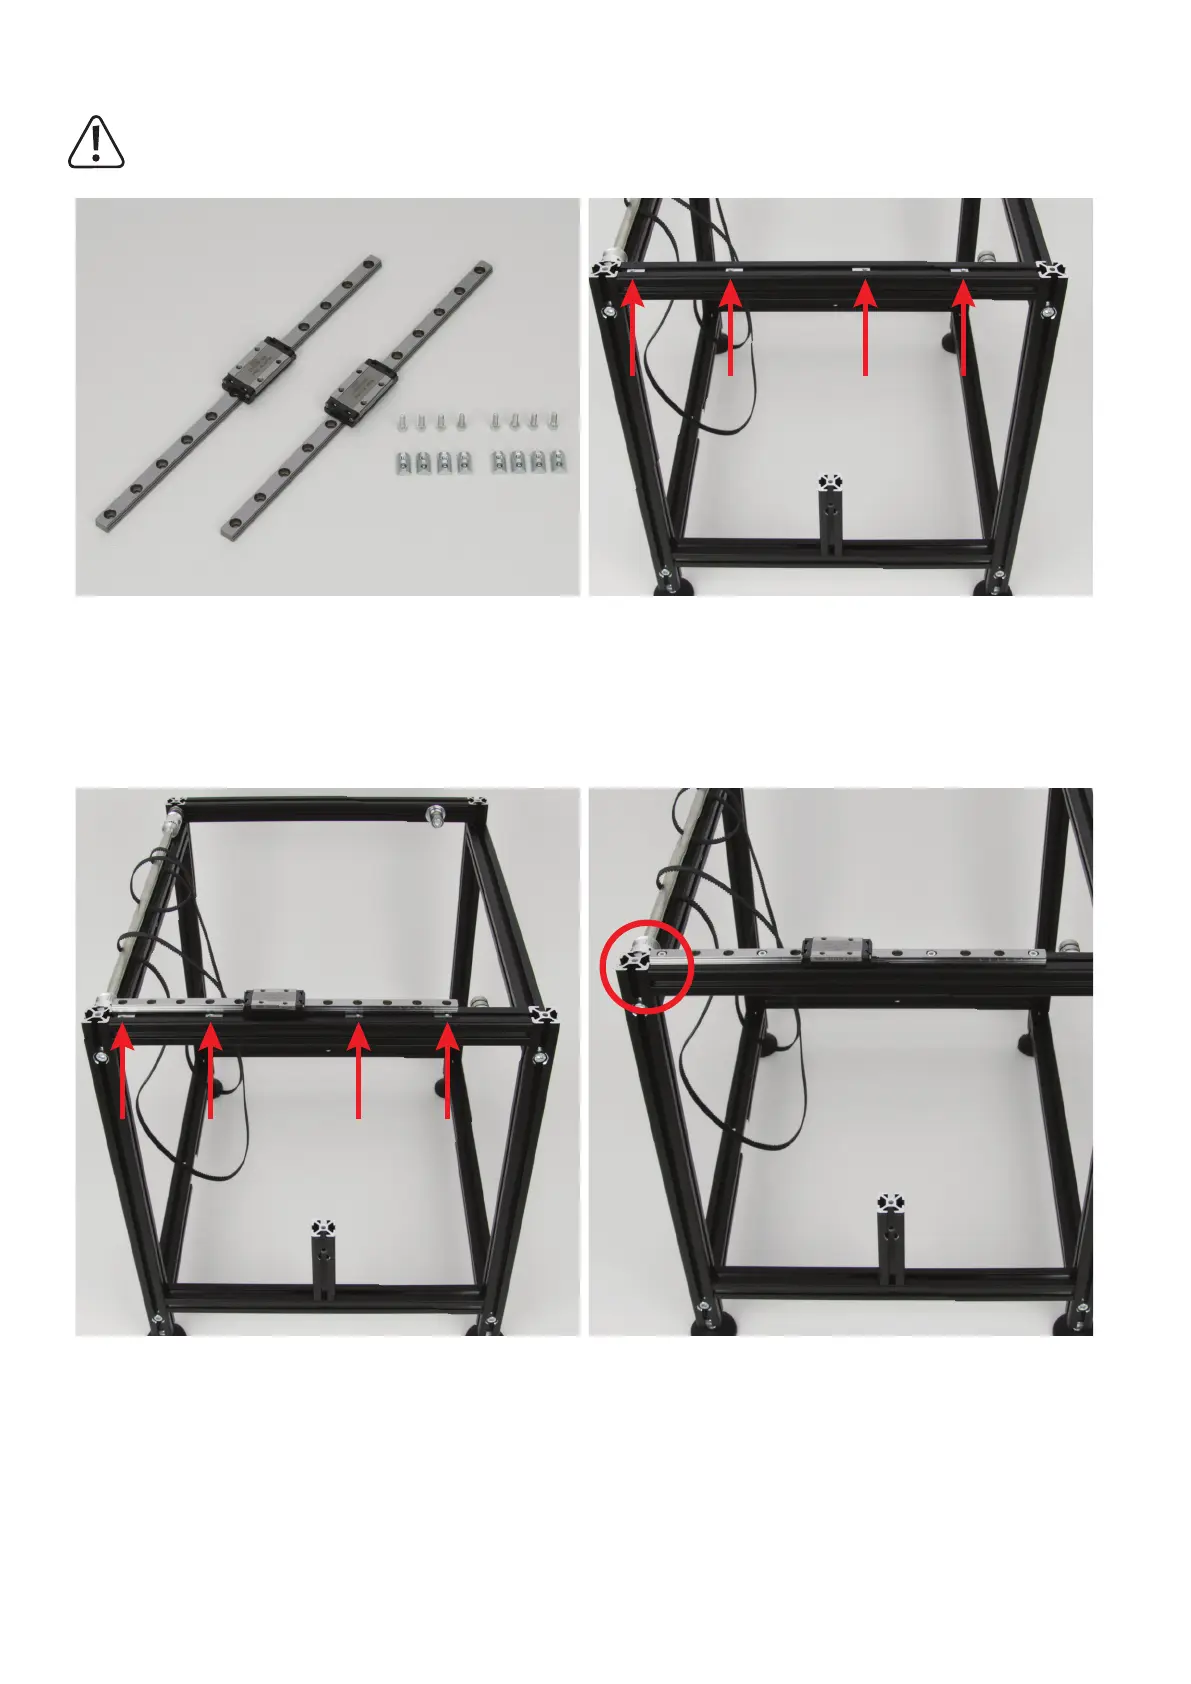
InstallationoftheguiderailsfortheY-direction
Theguidecarriagecangenerallybepushedoffoftherespectiveguiderail,sincethebearingballsarecombinedinachain.
However,werecommendavoidingthisifpossible.
2xguiderailwithguidecarriage(235mm)
8x cylinder head screw M3x8
8x slot nut M3
Push4slotnutsintotheupperaluminiumprolesofthetworespec-
tive side parts 4 slot nuts. For the other ones, the thread must point
outwards in each case.
Remove the two cable ties from the guide rails.
Hold a guide rail with guide carriage against the slot nuts and align
the slot nuts on both sides as illustrated.
Attach one guide rail with guide carriage each loosely to the two pro-
leswiththecylinder-headscrews.
Then align the guide rail. It must end with the
aluminiumproleitisattachedtoattherearoftheprinter.
Finally, slightly tighten all screws so that the guide rail can no longer
be moved.