72
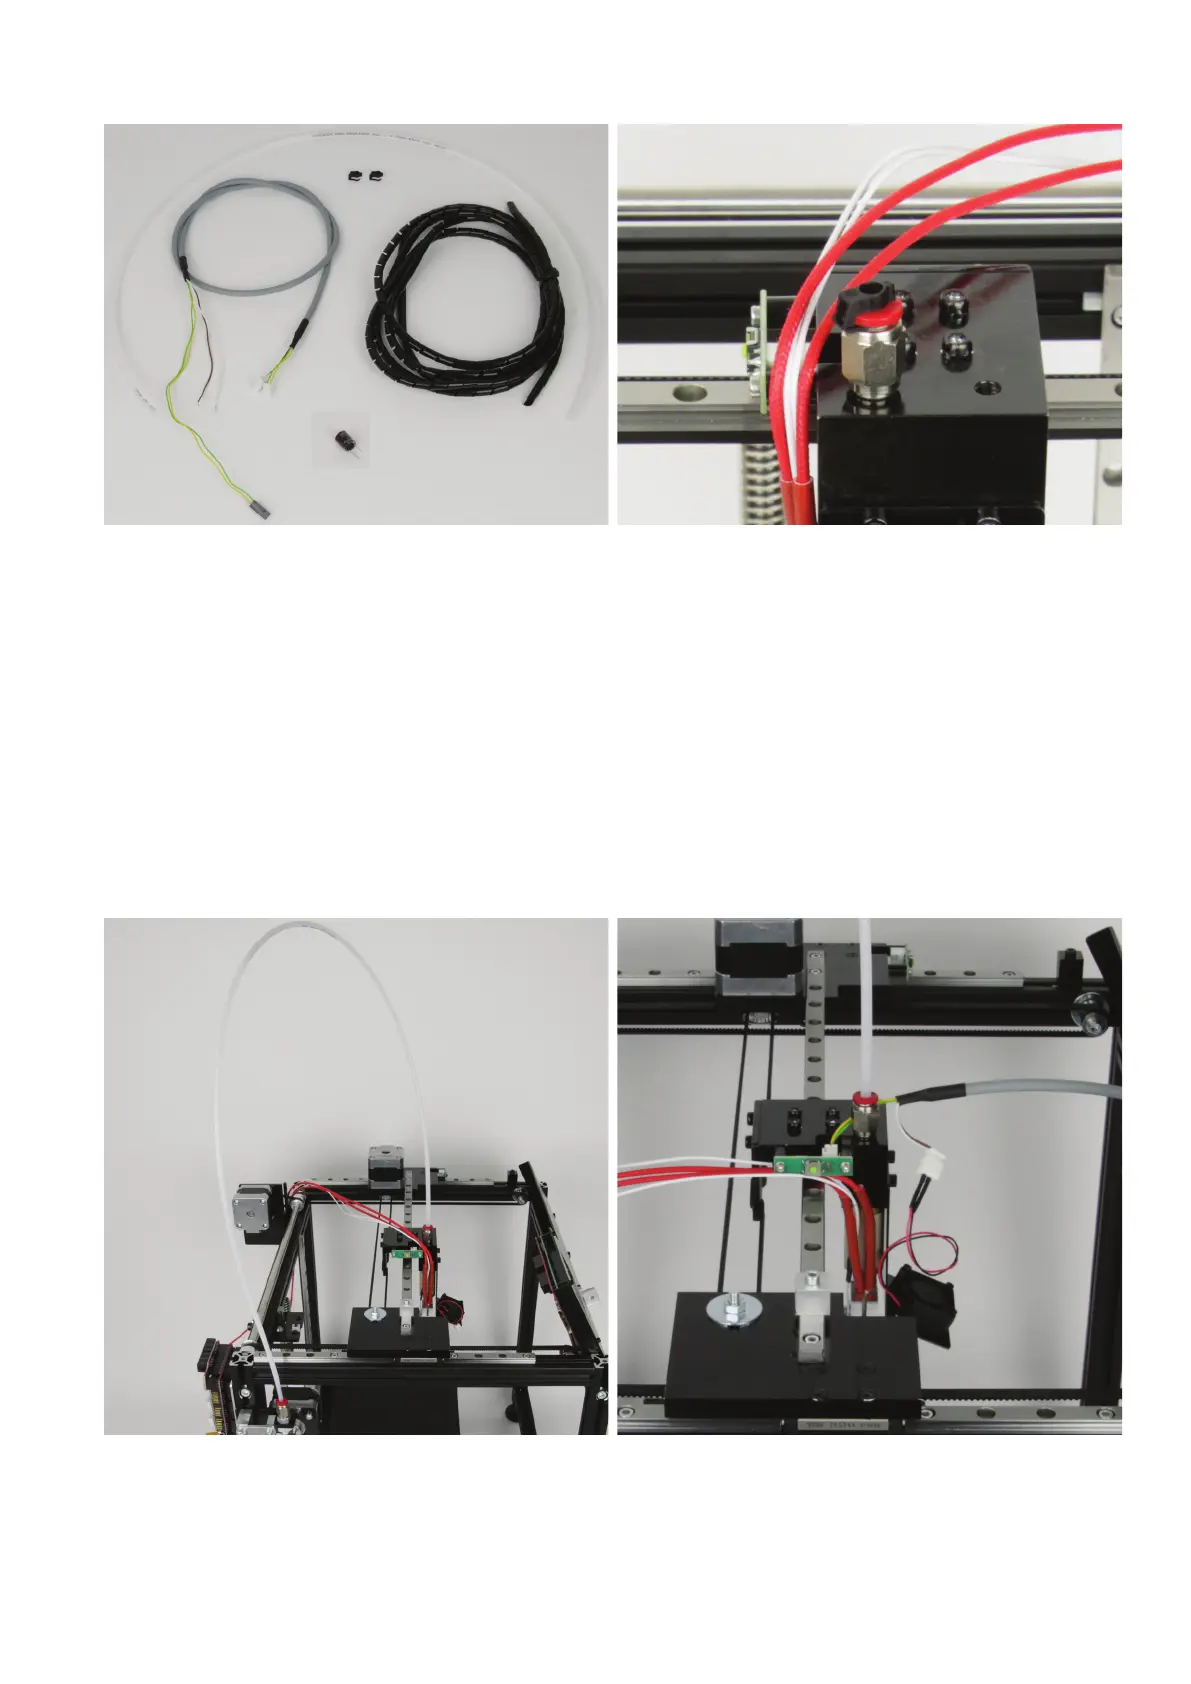
Wiringoftheextrudercarriage
1xlamenttubeapprox.80cm
1x cable 01 approx. 990 cm
2xclipforquickclosure(tubeprotection)
1x Elko 220 µF, 25 V
1x spiral tube black
Optional: Push one clip each onto the quick-closure to additionally
securethelamenttube.
Attention!Youcanonlyremovethetubewhentheclipisdestroyed.
This is of interest, e.g., for schools as well, since it prevents easy
removal of the clip.
Youcanattachthecliptotheextrudercarriageatonceifdesired.Do
thisattheveryendatthelamentinfeedunit,sincethetubeneeds
to be removed again.
Alternatively, you can print out an alternative circlip yourself. For this,
thele"Sicherungsclip.stl"isincludedinthedownloadbundle.This
alsoimprovesthe"Retract"behaviour(retractingthelamentwhile
printing).
Pushthelamenttubeintothequickclosureoftheextrudercarriage
andthelamentinfeedunit.
Connect the cable 01 at the extruder carriage.
Connect the plug with the yellow and green lines to the limit switch
PCB; connect the plug with the brown and white lines to the fan.