• The jumper works as the battery switch.
2. Before installing the Fax unit, push the MBU [B] and confirm that the MBU is properly connected to
the FCU [C].
3. Install the FCU [C] into the slot ( x 3 [including the screw [D] removed in Step 1]).
4. Attach the connector cover [E] to the network cable slot if you do not connect a network cable.
5. For NA model only, attach the connector cover to the "TEL" slot if a handset or an external telephone
is not installed.
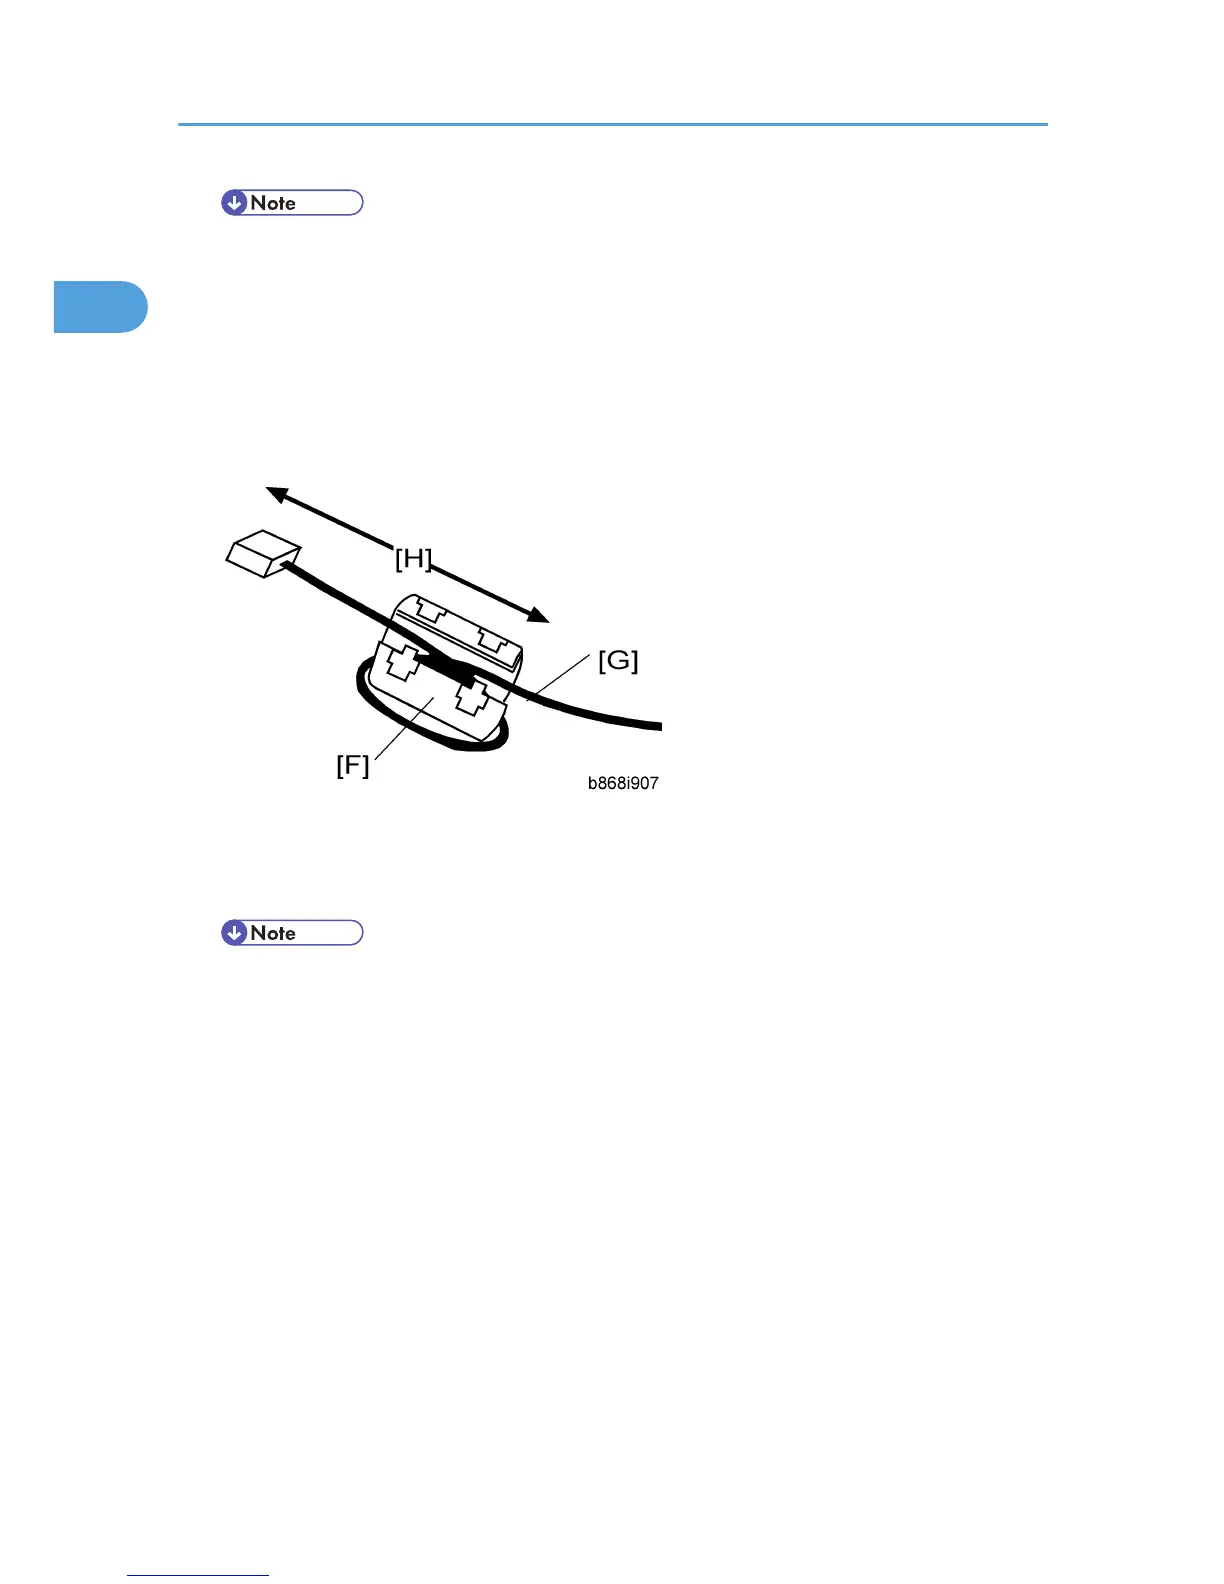
6. Attach the ferrite core [F] to the telephone cable [G]. The end of the ferrite core must be about 7 cm
(2.8") from the end of the cable [H].
7. Connect the telephone cable to the "LINE" jack.
• Connect the handset cable to the "TEL" jack if the handset is installed.
If the printer/scanner option has already been installed, skip steps 8 and 9.
1. Installation
10