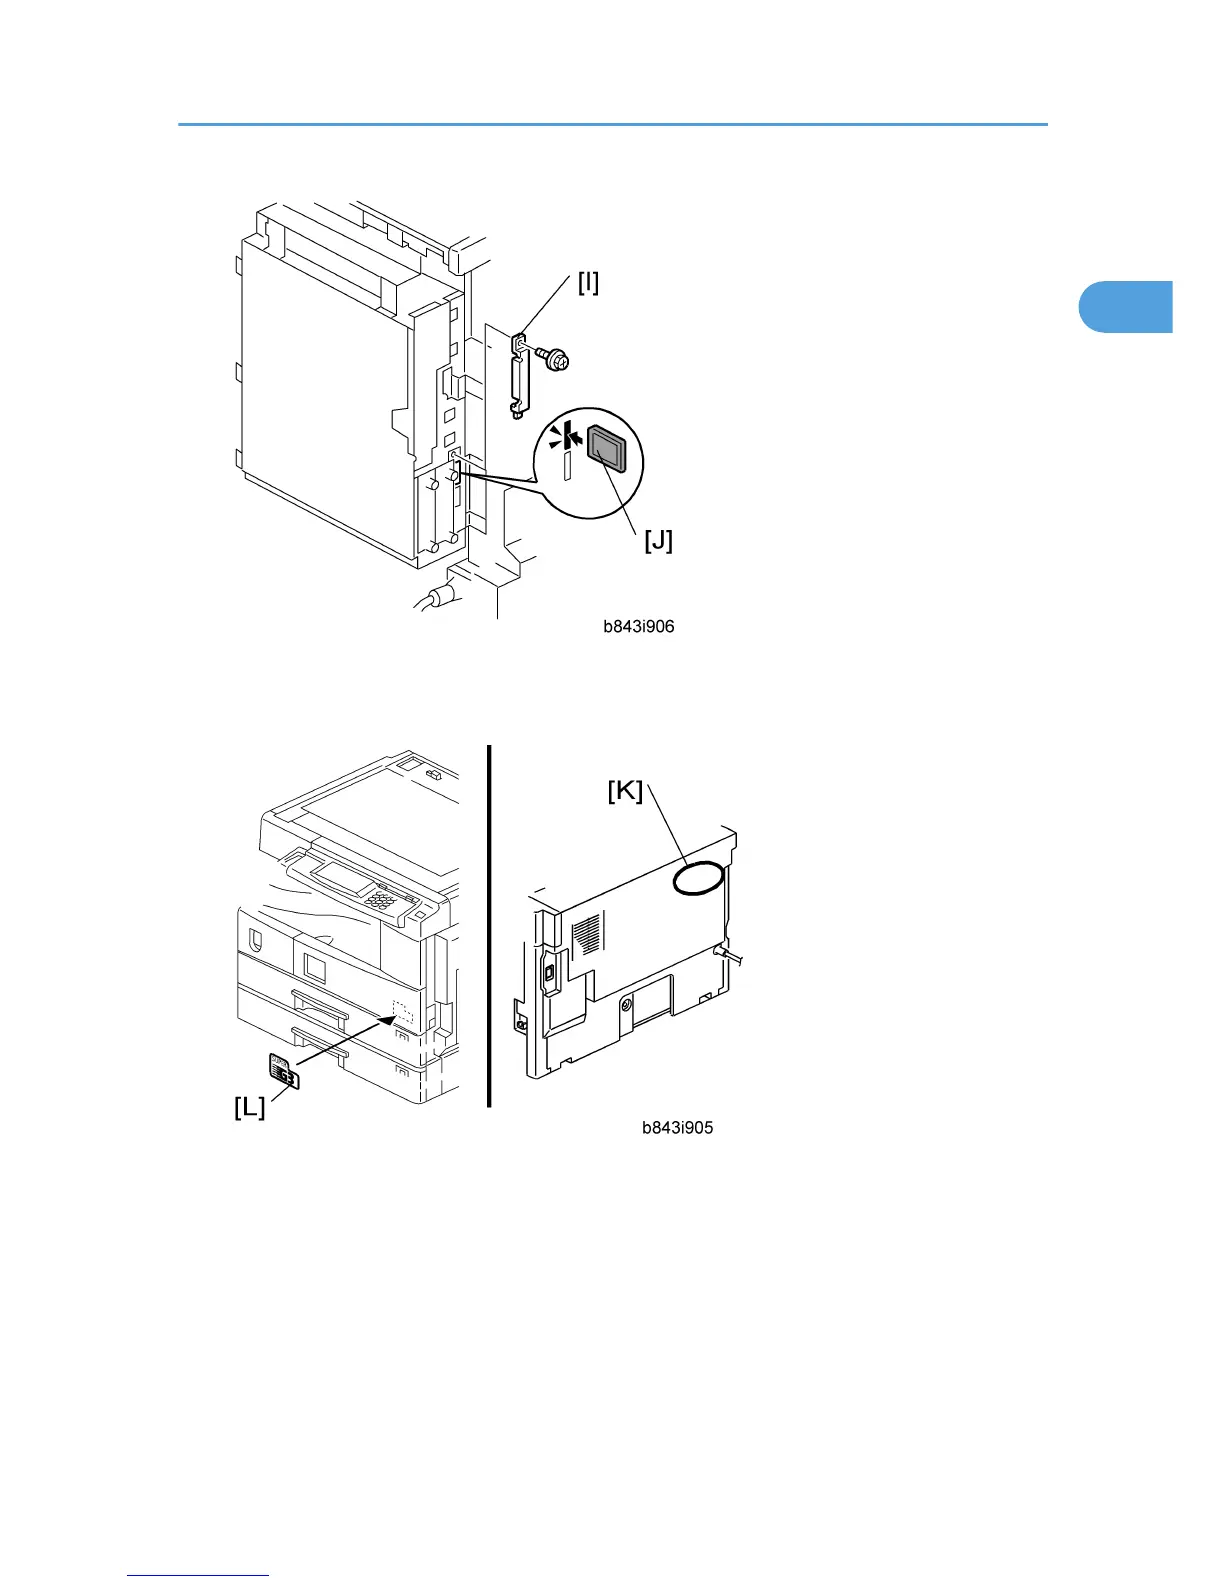
8. Remove the SD-card cover [I] ( x 1).
9. Insert the SD card [J] in the SD card slot 2 (second from the bottom).
10. Attach the serial number decal of the fax unit to the rear left [K] on the rear cover of the mainframe.
11. Attach the SG3 decal [L] to the right side corner of the front cover.
12. For NA model only, attach the FCC decal below the serial number decal of the fax unit.
If you install the printer /scanner option after installing the FCU, do the following procedure.
1. Do "Step 2-Printer/Scanner" in the "MFP EXPANSION INSTALLATION PROCEDURE".
2. Turn on the main power switch, and then enter the SP mode.
3. Confirm that the address book data is in the SD card, which is installed in the SD card slot 2 (second
from the bottom) with SP5-846-043.
Fax Unit (B868)
11