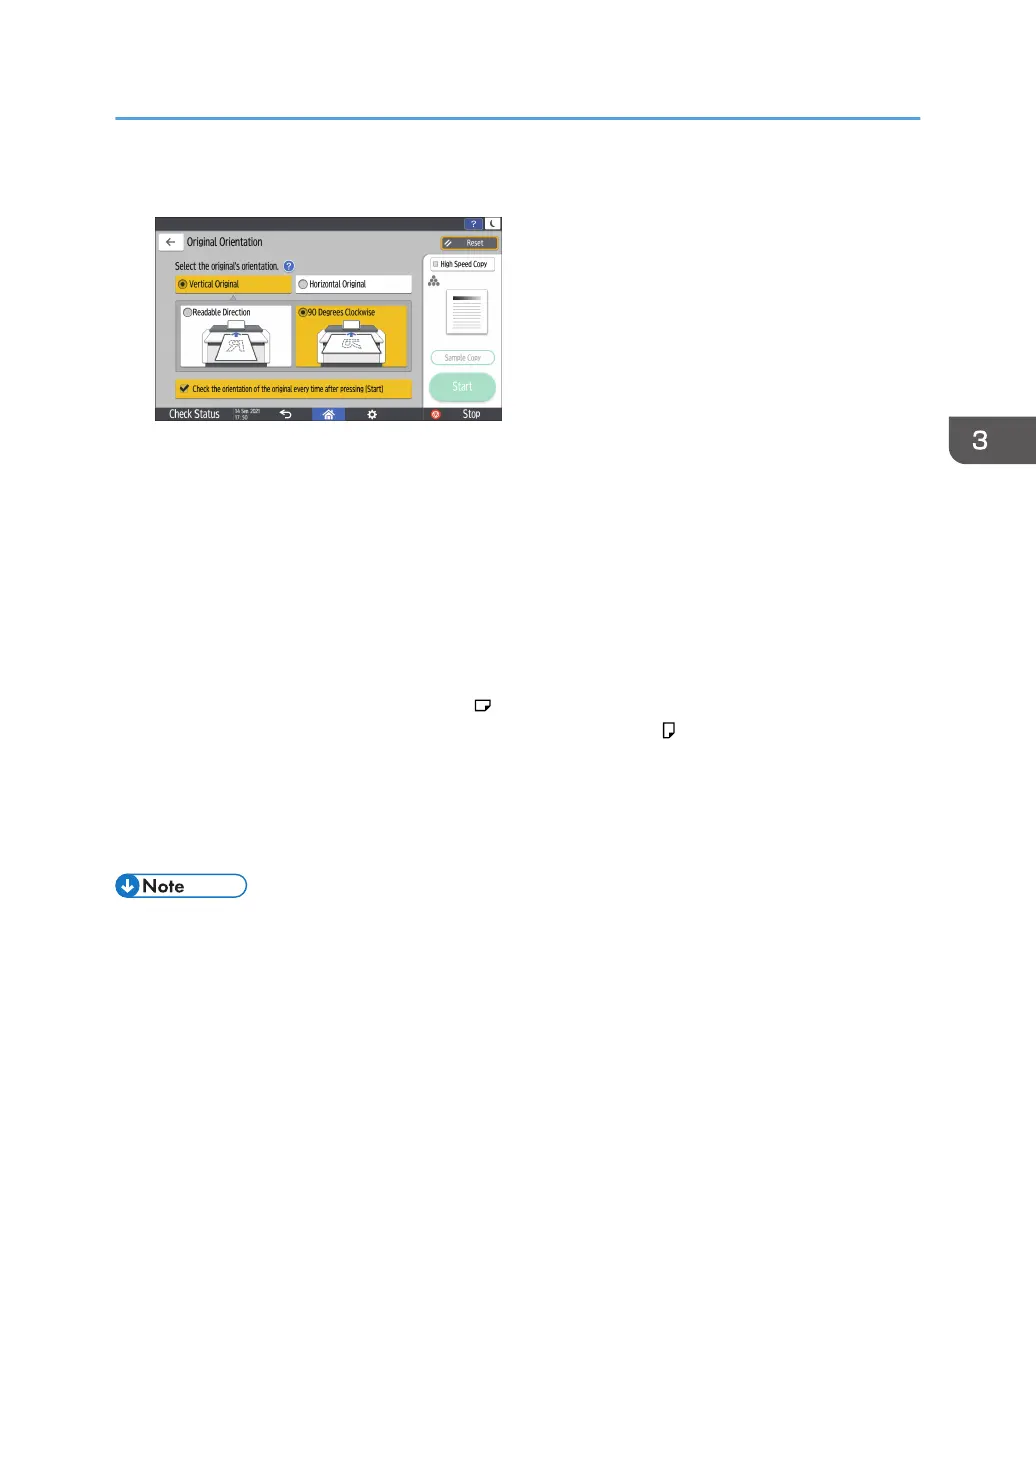
6. Specify the Original Orientation.
Depending on the settings, the screen shown above is displayed when you place an original or
press [Start]. If you do not want this screen to appear when you place originals or press [Start],
clear the [Check the orientation of the original every time after pressing [Start]] check box.
7. Place the original.
page 54 "Placing Originals on the Original Table"
• The original is fed into the machine automatically, and copying starts. If the original is not fed
automatically, press [Start].
• Do not pull or push an original forcibly while scanning it.
• You cannot place the original in the
orientation when copying onto A0 (E), B1 JIS, 30 ×
21, or 30 × 42 size paper. Instead, place the original in the orientation and specify the
original orientation in [Original Orientation].
• When copying multi-page originals or the back sides of the originals, place the original
again. Press [Finish Scn] after scanning all of the originals if necessary according to copy
settings.
• The factory–default configuration is for copying to starts by just placing the original. You can
change the setting so that copying starts after you press [Start].
• See "Machine", User Guide (Full Version).
• Originals scanned when no paper is loaded or when an error has occurred will be copied
automatically when the machine is ready to execute copying.
• To stop the original feeding in, press the [Scanner Stop] key.
• page 55 "Stopping Originals from Feeding in"
• When the machine is printing on paper that requires a long time for the ink to dry, such as
translucent (vellum) paper, wait until each job has finished printing before loading the next original.
If you load the next original while the machine is printing, the original might touch the printout and
be stained with ink.
Basic Procedure for Copying Documents
59

 Loading...


